
Tools
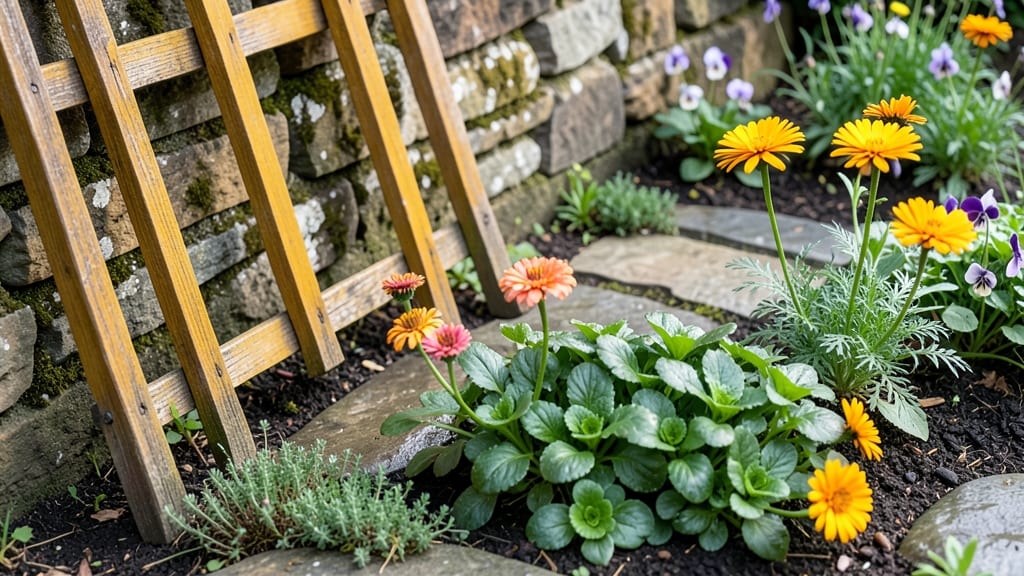
An edible flower garden turns your yard into a feast for both eyes and the table. 🌸 I learned the hard way that not all flowers are safe to eat—until I swapped my ornamental blooms for calendula, nasturtiums, and borage that double as garnishes and teas.
The best part? These pollinator magnets thrive in containers or garden beds, making them perfect for small spaces or kitchen gardens.
Start with a mix of sun-loving annuals like marigolds and shade-tolerant options like violets. Plant them near herbs or vegetables—their bright colors deter pests while attracting bees and butterflies.
Just avoid toxic look-alikes (like foxglove) by sticking to well-researched varieties. Within weeks, you’ll harvest petals for salads, syrups for cocktails, or dried bundles for homemade potpourri.
The payoff isn’t just culinary—your garden becomes a buzzing ecosystem. Imagine bees sipping from edible blooms while you snip petals for garnishes. These flowers stay vibrant all season, offering continuous harvests from spring through frost.
Even beginners can nail this with minimal effort, as most edible flowers are as resilient as they are beautiful.
Works in urban balconies or sprawling landscapes—just adjust spacing for container growing. The key is balancing beauty with function, so every bloom serves a purpose beyond decoration. Let’s design one that feeds both your plate and your pollinators.
📚 In This Guide
- What you need
- Instructions
- Tips and common mistakes
- Wrapping up and next steps
What you need
- ● Garden Space: Sunny spot (6+ hours of sunlight daily) – partial shade works for some varieties like violets
- ● Well-draining soil (amend with compost if needed)
- ● Seeds or Seedlings: 10–20 edible flower plants (e.g., nasturtiums, calendula, borage, pansies, or violets)
- ● Pollinator-friendly varieties (e.g., bee balm, lavender, or marigolds)
- ● Tools: Garden gloves (1 pair)
- ● Hand trowel or small spade
- ● Pruners (for harvesting)
- ● Watering can or hose with adjustable nozzle
- ● Measuring tape (for spacing plants)
- ● Mulch (straw or shredded leaves to retain moisture)
- ● Organic fertilizer (balanced 10-10-10 or compost tea)
- ● Pest deterrents (neem oil or companion plants like basil)
- ● Decorative stones or trellises (for aesthetics and support)
- ● Harvesting basket or scissors (for clean cuts)
Step-by-step guide to designing your edible flower garden
Here’s how to create a thriving, dual-purpose garden that feeds both you and pollinators.
🌱 Step 1: Choose the Right Edible Flowers for Your Climate
Start by selecting flowers that thrive in your USDA hardiness zone and match your sun exposure. I always prioritize pollinator magnets like nasturtiums, borage, and calendula—these attract bees while adding vibrant color and flavor. Check seed packets for days to maturity and plant height to ensure they fit your space.
For shade gardens, opt for viola (pansies), snapdragons, or lobelia, which tolerate partial sun. In full sun, sunflowers, marigolds, and zinnia deliver both beauty and edible petals. Group flowers by height to avoid shading smaller varieties—tall sunflowers should go in the back, while low-growing nasturtiums edge the front.
🪴 Step 2: Prepare the Soil and Planting Layout
Edible flowers need well-draining, nutrient-rich soil with a pH between 6.0 and 7.0. Mix 2-3 inches of compost into the top 6 inches of soil to improve fertility and moisture retention. Avoid heavy garden soil—it compacts easily and can suffocate delicate roots.
Design your layout with pollinator pathways in mind. Plant flowers in clusters of 3-5 (not single rows) to create visual impact and attract more bees. Leave 12-18 inches of space between larger varieties like sunflowers, but only 6 inches for compact nasturtiums. Mark planting spots with stakes to maintain organization.
☀️ Step 3: Plant and Maintain for Continuous Blooms
Sow seeds ¼ inch deep and cover lightly with soil—most edible flowers germinate best in warm soil (60-70°F). Water gently after planting to settle the soil, but avoid oversaturating, which can cause rot. Once seedlings emerge, thin to 6-12 inches apart (check seed packet spacing).
To encourage nonstop blooms, deadhead spent flowers regularly—this redirects energy to new growth. For annuals like zinnias, pinch back the tips of young plants to promote bushier growth. Mulch with 1-2 inches of straw to retain moisture and suppress weeds, but keep mulch 2 inches away from stems to prevent rot.
💧 Step 4: Water and Fertilize for Edible-Quality Blooms
Water deeply once a week (or daily in extreme heat) to establish roots, then taper to every 2-3 days once established. You’ll know it’s time to water when the top inch of soil feels dry. Avoid wetting leaves in the morning to prevent fungal diseases like powdery mildew.
Feed lightly with a balanced organic fertilizer (10-10-10) at planting and again 6 weeks later. Too much nitrogen produces lush foliage but fewer flowers. Instead, side-dress with compost tea every 4-6 weeks for gentle nutrients. Harvest petals in the morning after dew dries for peak flavor and freshness.
✂️ Step 5: Harvest and Preserve Your Edible Blooms
Pick flowers just as they open for the brightest color and sweetest taste. Use clean scissors to snip stems, leaving ½ inch of growth to encourage regrowth. Nasturtium and borage petals add peppery or cucumber-like flavors to salads, while violets and pansies offer mild, floral notes.
Preserve extras by drying petals between layers of paper towels for 2-3 days, then store in an airtight container. Freeze petals in ice cubes for easy garnishes. Avoid pesticides—edible flowers must be organic to ensure safety. With proper care, your garden will reward you with harvests all season long.
Tips & tricks for perfect edible flower gardens
Creating a thriving edible flower garden takes more than just planting seeds—it's about strategic choices that maximize both beauty and harvest. Here's how to elevate your garden game.
Climate and Flower Selection: Always check your USDA hardiness zone before selecting flowers. For example, nasturtiums thrive in zones 2-11, while sunflowers prefer zones 4-10. I've found that planting a mix of annuals (like zinnias) and perennials (like calendula) ensures continuous blooms throughout the season. This diversity also attracts a wider range of pollinators, creating a more resilient ecosystem.
Soil Preparation Strategy: The 2-3 inches of compost mixed into the top 6 inches of soil isn't just about nutrients—it's about creating the perfect air-to-water ratio. I recommend testing your soil's pH before planting. If it's below 6.0, add crushed limestone to raise it gradually. For containers, use a mix of 60% potting soil, 20% compost, and 20% perlite to ensure proper drainage.
Pollinator-Friendly Layout: When creating your clusters of 3-5 plants, consider the "three sisters" principle from Native American agriculture. Plant tall sunflowers with medium-height borage and low-growing nasturtiums. This vertical arrangement maximizes sunlight exposure while creating natural pathways for bees to navigate. The 12-18 inch spacing between larger plants also allows for easy maintenance without disturbing nearby flowers.
Seasonal Maintenance Calendar: Create a simple chart marking key dates: 6 weeks after planting for fertilizer, every 4-6 weeks for compost tea, and morning harvest times. I've had great success using a whiteboard in my garden shed to track these intervals. This system prevents over- or under-fertilizing while ensuring you never miss the optimal harvest window when petals are at their peak flavor and color.
Pro Tips for Edible Flower Garden
- Creating a thriving edible flower garden takes more than just planting seeds—it's about strategic choices that maximize both beauty and harvest.
- Climate and Flower Selection: Always check your USDA hardiness zone before selecting flowers.
- Soil Preparation Strategy: The 2-3 inches of compost mixed into the top 6 inches of soil isn't just about nutrients—it's about creating the perfect air-to-water ratio.
Frequently asked questions
Got questions about growing and enjoying edible flowers?
Here are answers to the most common ones—so you can dive into your pollinator-friendly garden with confidence!
Can I grow edible flowers in containers or small spaces?
Many edible flowers, like nasturtiums and pansies, thrive in containers. Choose shallow pots (6+ inches deep) with drainage holes, well-draining soil, and a sunny spot. Just ensure they get enough sunlight—most need 4–6 hours daily. Pro tip: Dwarf varieties (like calendula) are perfect for balconies or windowsills!
How long does it take for edible flowers to grow and bloom?
Timing varies by flower, but most edible blooms sprout within 2–4 weeks and flower in 6–12 weeks. Fast growers like borage or chives may bloom in as little as 30 days, while slower types (e.g., squash blossoms) take 2–3 months. Check seed packets for specifics—patience pays off with vibrant, tasty blooms!
Are there edible flowers I should avoid if I have allergies?
Yes! Some flowers (like foxglove or oleander) are toxic. Stick to well-researched, food-safe varieties like violets, roses (petals only, no leaves/seeds), or hibiscus. If you have pollen allergies, test a tiny amount first—some may still trigger reactions. When in doubt, consult a healthcare provider!
Will edible flowers still attract pollinators if I harvest them?
Yes! Leave at least 2–3 blooms per plant to ensure pollinators keep visiting. Overharvesting can stress plants, but selective picking (like leaving the center flower intact) keeps bees and butterflies happy. Plus, many edible flowers re-bloom—so you’ll get more harvests over time!
What’s the best way to store edible flowers for cooking?
Store blooms in a paper towel-lined container in the fridge for up to 5 days. For longer storage, dry them in a cool, dark place (like a dehydrator or air-drying rack) for 1–2 weeks. Once dry, keep them in an airtight jar—perfect for teas, garnishes, or winter dishes!
Wrapping up and next steps
Creating an edible flower garden is a rewarding way to nourish both your plate and the planet! 🌸 You’ve learned how to blend beauty, flavor, and sustainability—plus, you’re now equipped to answer common questions and gather the right tools.
Whether you’re a seasoned gardener or a curious beginner, this project is as simple as it is delightful.
Ready to take the next step? Start small—plant a few easy blooms like nasturtiums or marigolds, then expand as you gain confidence. Before you know it, you’ll be harvesting edible petals for salads, teas, or garnishes while supporting local pollinators. Happy gardening! 🌱