
Flowers
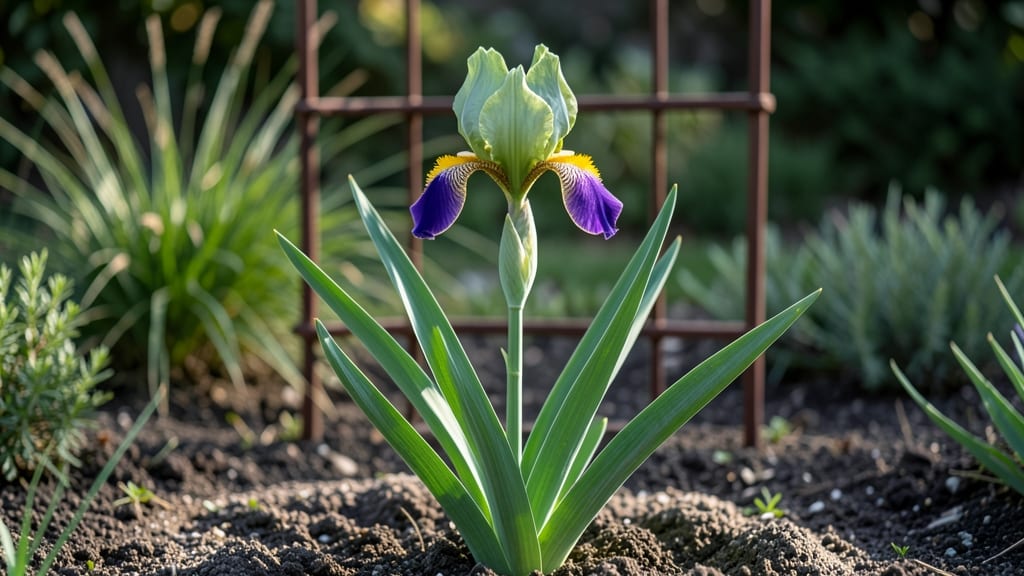
Growing green iris flowers in the Pacific Northwest means waking up to velvety foliage that outshines even the boldest blooms. 🌿 These frost-resistant perennials thrive where many others falter, their chartreuse blades adding year-round texture to shady gardens.
The key starts with soil—rich, well-draining loam that mimics their native wetland edges—and a spot where morning sun kisses their leaves before afternoon shade takes over.
My first batch took root in a partially shaded corner of my garden, where the soil stayed moist but never soggy. You’ll need rhizomes (not bulbs) planted just below soil level in early fall or spring, spaced 12-18 inches apart.
The secret weapon? A 3-inch layer of mulch to protect roots through winter’s chill and summer’s heat. These irises multiply like wildfire, so plan for crowd control—dividing clumps every 3-4 years keeps them vigorous.
By late spring, you’ll see sword-like foliage erupt into 3-foot-tall spikes of delicate lavender or white blooms—yes, even green irises flower! The real magic happens in June and July, when the air hums with pollinators drawn to their nectar.
Prune spent blooms to redirect energy into next year’s growth, and watch as your patch expands effortlessly, year after year.
Common challenges? Slugs adore young shoots, so scatter crushed eggshells around plants. Overwatering leads to rot—these irises prefer their feet damp, not drowning. With proper care, your green iris grove will become the showstopper of your garden, proving that the most striking perennials often hide in plain sight.
📚 In This Guide
- What you need
- Instructions
- Tips and common mistakes
- Wrapping up and next steps
What you need
- ● Green iris rhizomes: 3–5 healthy, firm rhizomes (choose Iris tenax or Iris chrysographes for PNW resilience).
- ● Well-draining soil: 1 cubic yard of a mix: 60% garden soil, 30% coarse sand/perlite, and 10% compost.
- ● Organic fertilizer: 5–10–10 NPK ratio (e.g., bone meal or fish emulsion) for planting.
- ● Mulch: 2–3 inches of pine bark or straw to retain moisture and protect roots.
- ● Garden trowel or spade (for digging).
- ● Pruning shears (for trimming dead foliage).
- ● Garden hose with spray nozzle (for watering).
- ● pH testing kit (ideal soil pH: 6.0–7.0).
- ○ Optional: Raised garden bed kit (if drainage is poor).
- ● Sunlight: Full sun (6+ hours/day) or partial shade (morning sun + afternoon shade).
- ● Climate: USDA Zones 5–9 (PNW is perfect!).
- ● Water access: Drip irrigation or consistent hand-watering.
Step-by-step guide to cultivating Pacific Northwest green iris
Here's how to establish these striking perennials with minimal fuss—ideal for cold climates.
🌱 Step 1: Select and Prepare the Planting Site
Green iris thrives in well-draining soil with partial shade—critical for Pacific Northwest conditions. Choose a location with morning sun and afternoon shade, protecting roots from summer heat while allowing spring growth. Test soil drainage by digging a 6-inch hole—if water pools after 30 minutes, amend with 2-3 inches of coarse sand or gravel.
I always work the soil 6-8 weeks before planting to allow amendments to integrate. For heavy clay soils common in the PNW, mix in 2 inches of organic matter (like compost) to improve structure. The goal is soil that crumbles easily when damp but holds moisture without becoming soggy—iris roots rot quickly in waterlogged conditions.
🪴 Step 2: Plant Rhizomes at Proper Depth and Spacing
Plant rhizomes in early fall or late winter when soil temperatures are below 60°F—this gives roots time to establish before summer heat. Space rhizomes 12-18 inches apart in rows 24 inches apart to allow for mature foliage spread. The key is positioning them halfway exposed—place each rhizome with one-third above soil level and two-thirds below.
Don't bury them completely (a common mistake)—this encourages rot. Instead, mound soil around the sides and leave the top flat. Gently press soil around the rhizome to eliminate air pockets, then water deeply to settle everything. You'll see new shoots emerge within 3-4 weeks—this confirms proper planting depth.
☀️ Step 3: Establish Watering and Light Routines
Water newly planted rhizomes once weekly for the first 4 weeks, providing 1 inch of water each time. After establishment, reduce to every 10-14 days unless experiencing extreme drought. The PNW's mild summers mean supplemental watering is rarely needed, but check soil moisture by pushing your finger 2 inches deep—if dry, water thoroughly.
Monitor light exposure closely. While green iris tolerates shade, too little light reduces flowering. If leaves appear pale or stems stretch excessively, move plants to a slightly sunnier location. The ideal balance is 3-5 hours of morning sun—enough for photosynthesis without afternoon stress. Mulch with 2 inches of wood chips in winter to protect roots from freezing temperatures.
✂️ Step 4: Prune and Divide for Long-Term Health
Cut back dead foliage in late fall after flowering, leaving 2-3 inches of stem above the rhizome. This prevents disease while allowing energy to remain in the roots. Every 3-4 years, divide clumps in early spring when new shoots appear. Dig up the entire plant, separate rhizomes with 2-3 fan-like leaves, and replant immediately.
Discard old, woody rhizomes—they won't produce flowers. Healthy divisions should have plump, firm rhizomes with visible growth buds. Replant divisions at the same depth as before, spacing them 18 inches apart. You'll see new blooms within 2 years of division, proving the plant's vigor.
Tips & tricks for perfect Pacific Northwest green iris cultivation
Took me years of trial and error to master these PNW-specific growing secrets—here's how to skip the mistakes and get stunning results right away.
Soil Preparation Insight: The 6-8 week soil amendment window is your best friend for heavy PNW clay soils. I've found that adding 2 inches of compost and 2-3 inches of coarse sand creates the perfect balance—drainage that prevents rot while retaining enough moisture for those cool, damp summers. For a quick test, squeeze a handful of amended soil: it should hold shape but crumble when you poke it with your finger.
Rhizome Planting Precision: That one-third exposed rule is non-negotiable—burying rhizomes completely is the fastest way to invite rot. I've learned the hard way that even a slight over-burial can cause the top to rot before shoots emerge. After planting, give the soil a gentle press around the rhizome to eliminate air pockets, then water deeply until moisture reaches 4 inches down. This ensures consistent contact with the soil.
Watering Strategy for PNW Conditions: The first 4 weeks are critical for root establishment, but don't overwater—green iris roots actually prefer slightly drier conditions after that initial period. I've found that checking soil moisture at 2 inches deep (using your finger) is more reliable than sticking to a schedule. The PNW's frequent drizzle can make it easy to overwater, so always let the top 1 inch dry between waterings after the first month.
Light Balance Secret: That 3-5 hours of morning sun window is the sweet spot for PNW growing conditions. Too much afternoon sun can stress the plants, while too little reduces flowering. I've noticed that plants near east-facing windows or slightly open areas get the perfect balance. If your site gets intense afternoon sun, consider a 30% shade cloth during the hottest hours—it makes a surprising difference in leaf health.
Pro Tips for Green Iris Flower
- Took me years of trial and error to master these PNW-specific growing secrets—here's how to skip the mistakes and get stunning results right away.
- Soil Preparation Insight: The 6-8 week soil amendment window is your best friend for heavy PNW clay soils.
- Rhizome Planting Precision: That one-third exposed rule is non-negotiable—burying rhizomes completely is the fastest way to invite rot.
Frequently asked questions
Got questions about growing green iris flowers in the Pacific Northwest? Here are answers to the most common ones to help you succeed with this frost-resistant beauty!
How cold can green iris flowers tolerate?
The Iris germanica (green iris) is hardy down to USDA Zone 3, making it perfect for PNW winters! While established plants handle frost well, young seedlings may need winter protection like mulch or burlap wraps until fully rooted.
When is the best time to plant green iris in the PNW?
Plant in early fall (September-October) or late winter (February-March) for best results. Fall planting lets roots establish before winter, while spring planting avoids soggy soil. Avoid planting in summer heat—iris hate stress!
Can I grow green iris in containers?
Yes! Use a well-draining pot with at least 12 inches of depth and fill with a mix of garden soil, perlite, and compost. Place in full sun to partial shade and water when the top 2 inches of soil dry out. Containers dry faster, so monitor moisture closely.
What pests should I watch for with green iris?
Green iris are generally pest-resistant, but watch for iris borers (tiny moth larvae) and aphids. Remove damaged leaves immediately, and apply neem oil or insecticidal soap if needed. Healthy plants with good airflow deter most pests!
Why aren’t my green iris blooming?
Blooms may skip a year if the plant is too young, overcrowded, or not getting enough sun (6+ hours daily). After flowering, cut back seed pods to redirect energy to roots. If soil is too rich, blooms may reduce—amend with sand or gravel for better drainage.
Pro Tip:
Divide iris clumps every 3–4 years in early fall to prevent overcrowding. Simply dig up the rhizomes, separate the fans, and replant—your blooms will thank you!
Wrapping up and next steps
The green iris flower is a stunning, low-maintenance perennial that thrives in the Pacific Northwest’s climate—adding color, texture, and resilience to any garden. With the right soil, sunlight, and care, you’ll enjoy its beauty year after year, even through frosts. 🌿
Now that you’re armed with the knowledge to grow these frost-resistant gems, why not take the next step? Start by selecting your favorite variety, prepping your garden space, and planting with confidence! Your future blooms will thank you.