
Flowers
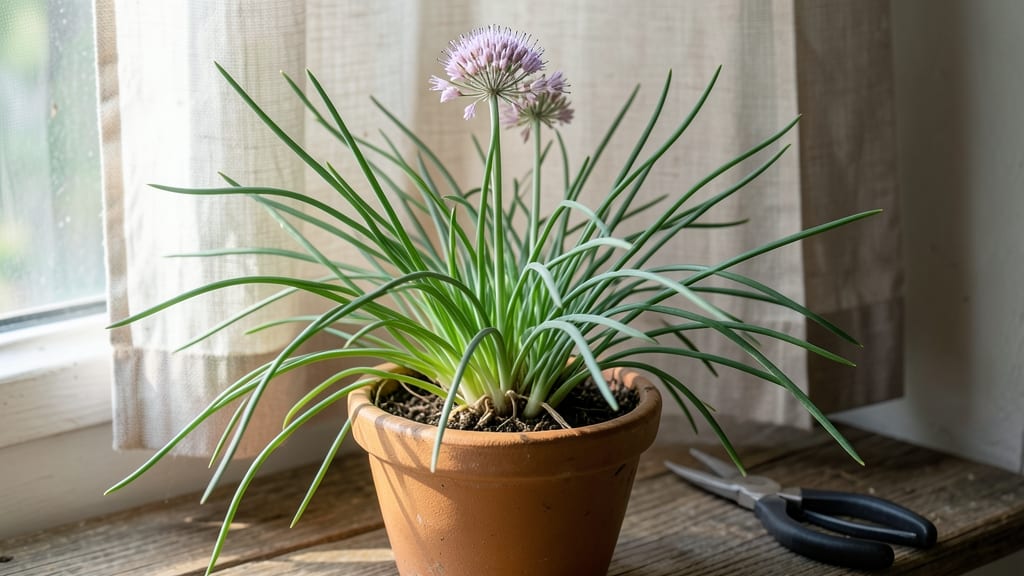
When chives bloom in late spring, those delicate purple flowers are more than just pretty—they’re a zesty flavor powerhouse waiting to be dried for year-round use. 🌿 I learned this the hard way after letting my first batch of chive blossoms go to seed; now, I harvest them at peak bloom for the perfect balance of floral and oniony notes.
The process is straightforward, but timing and drying methods make all the difference in preserving that bright, fresh taste.
You’ll need just a few simple tools: sharp scissors for harvesting, breathable paper bags or a dehydrator for drying, and airtight containers for storage. The key is harvesting flowers when they’re fully open but before they turn brown—this ensures maximum flavor and color retention.
Once dried, these flowers keep their vibrant hue and intense flavor for months, making them a pantry staple for cooks who love subtle, aromatic garnishes.
Dried chive flowers transform dishes with their bright, fresh flavor, adding a delicate onion-caper punch to everything from soups to cocktails. They also make stunning, edible decorations for tables or gifts, blending culinary and decorative uses seamlessly.
With proper storage in a cool, dark place, you’ll have homegrown garnishes ready whenever inspiration—or hunger—strikes.
Troubleshooting is easy: if flowers wilt or mold during drying, adjust humidity or spread them out more thinly. A little patience goes a long way, and the results are worth it—imagine sprinkling home-dried chive blossoms on your next summer dish, knowing every petal was grown and preserved by you.
📚 In This Guide
- What you need
- Instructions
- Tips and common mistakes
- Wrapping up and next steps
What you need
- ● Fresh chive plants (organic, pesticide-free preferred): At least 12–15 mature chive stalks (or 1–2 bunches from a grocery store)
- ● Ensure flowers are fully open and vibrant (avoid wilted or yellowing blooms)
- ● Clean, breathable drying surface: Option 1: Paper towels or parchment paper (for air-drying)
- ● Option 2: Wire mesh screen or drying rack (for better airflow)
- ○ Small, airtight containers (for storage): Glass jars (4–6 oz size) or resealable pouches with silica gel packets (optional)
- ● Sharp kitchen scissors or pruning shears (for harvesting)
- ● Food dehydrator (set to 95°F–115°F for 2–4 hours if short on time)
- ● Fine-mesh strainer (to remove excess moisture before storage)
- ● Labeling tags (to note drying date and flavor profile)
- ● Essential oil diffuser (add a drop of lavender or citrus oil to jars for extra preservation)
- ● A sunny, well-ventilated spot (or a warm, dry indoor area if humidity is high)
- ● 2–5 days of patience (drying time varies by climate and method)
- ● Knowledge of food safety: Avoid drying in direct sunlight if temperatures exceed 100°F (to prevent mold)
How to harvest and dry chive flowers for edible garnishes
Here's how to turn your chive blooms into fragrant, zesty garnishes that elevate any dish.
🌿 Step 1: Identify and Harvest Flowers at Peak Freshness
Wait until chive flowers fully open but remain vibrant—typically when pale lavender buds unfurl into star-shaped blossoms with six delicate petals. Harvest in the early morning when moisture levels are highest and flavors most concentrated. Use clean, sharp scissors or fingers to snip stems just above the first set of leaves—this encourages bushier growth.
Real talk: Don't harvest flowers that have already started wilting or turning brown. You'll know you've picked at the right time when the stems snap cleanly and the petals feel crisp to the touch. A single chive plant yields enough flowers for 4-6 servings of garnish.
☀️ Step 2: Prepare Flowers for Drying
Gently remove any yellowing leaves or damaged petals from the harvested flowers. Arrange them in a single layer on a clean, dry surface—like a baking sheet lined with parchment paper—ensuring stems don't overlap. The goal is even airflow to prevent mold. Place the sheet in a dry, shaded spot with indirect sunlight and good ventilation (a kitchen counter away from direct light works well).
Here's the thing—chive flowers dry best at room temperature (65-75°F). If your home is humid, prop a small fan nearby to circulate air. You'll see the petals lose their vibrant color and become papery and crisp within 3-5 days.
🪴 Step 3: Complete the Drying Process
After 3-5 days, check the flowers for dryness by gently touching a petal. If it crumbles easily and the stem snaps cleanly, they're ready. Transfer the dried flowers to an airtight container—like a glass jar with a tight-sealing lid—and store in a cool, dark place (like a pantry). Properly dried chive flowers keep their flavor for up to 6 months.
Don't rush the drying process—overly hasty drying can result in brittle, flavorless petals. If you notice any dark spots or mold, remove those flowers immediately and discard them to preserve the rest of your batch.
✂️ Step 4: Store and Use Dried Chive Flowers
Once fully dried, use your chive flowers as an edible garnish for soups, salads, or roasted dishes. Sprinkle 1-2 teaspoons over finished dishes just before serving to preserve their delicate flavor. You can also crush the dried flowers lightly between your fingers to release their zesty aroma before adding to recipes.
I like to label my jars with the harvest date so I can track freshness. A little goes a long way—these tiny flowers pack a punch of flavor, so start with small amounts and adjust to taste. Store dried flowers away from moisture and strong odors to keep their flavor intact.
Tips & tricks for perfect dried chive garnishes
Transforming chive flowers into edible garnishes is all about patience and precision—here’s how to elevate your results.
Timing is Everything: Harvesting in the early morning matters more than you might think. The dew on the petals helps concentrate their natural oils, which translates to more intense flavor. I’ve found that flowers picked after 10 AM often lose some of their crispness by the time they dry—so set that alarm if you’re serious about flavor. Also, aim for fully open buds with six distinct petals; partially open flowers won’t dry evenly and may develop uneven textures.
Airflow Secrets: The single-layer arrangement in Step 2 isn’t just about space—it’s about creating a microclimate where each flower gets equal airflow. If you’re short on counter space, try using a wire cooling rack instead of parchment paper. This elevates the flowers slightly, allowing air to circulate underneath too. And if your kitchen is particularly humid (like mine is in summer), place a small dish of silica gel packets nearby to absorb excess moisture without drying out the flowers too quickly.
Testing for Perfect Dryness: The crumble test is your best friend here. When a petal breaks apart easily between your fingers and the stem snaps cleanly, you’ve hit the sweet spot. If they’re still slightly pliable after 5 days, spread them out again and give them another day or two. Overly hasty drying—like tossing them in the oven—will turn them into brittle, flavorless husks. Trust me, I’ve learned this the hard way after ruining three batches!
Storage Wisdom: Once your dried chive flowers are perfectly crisp, store them in small batches if you plan to use them over several months. I divide mine into 1-teaspoon portions in tiny jars—this way, you can open just one jar at a time without exposing the rest to air. Label each jar with the harvest date, and you’ll always know which batch to use first. A little goes a long way, so start with just ½ teaspoon and adjust to taste.
Pro Tips for Dried Chive Flowers
- Transforming chive flowers into edible garnishes is all about patience and precision—here’s how to elevate your results.
- Timing is Everything: Harvesting in the early morning matters more than you might think.
- Airflow Secrets: The single-layer arrangement in Step 2 isn’t just about space—it’s about creating a microclimate where each flower gets equal airflow.
Frequently asked questions
about dried chive flowers—because we’ve got your curiosity covered!Can I use dried chive flowers in place of fresh chives in recipes?
Dried chive flowers pack a concentrated, zesty flavor—just use half the amount of fresh chives (e.g., 1 tsp dried = ~2 tbsp fresh). They’re perfect for garnishes, soups, or dried herb blends. For best results, crush them lightly before adding to dishes.
How long do dried chive flowers last, and how should I store them?
Properly dried and stored, these floral gems last 6–12 months. Keep them in an airtight container (like a jar or resealable bag) in a cool, dark place—like your pantry. Avoid humidity to prevent mold. Freezing is optional but can extend shelf life even further!
What if my dried chive flowers smell musty or lose their flavor?
Musty smells or weak flavors usually mean moisture or improper drying. If this happens, try reviving them by placing the jar in a warm, sunny spot for 1–2 hours (like a windowsill). If they’re still off, compost them and start fresh—next time, ensure they’re fully dehydrated before storing!
Are dried chive flowers safe to eat raw, or do I need to cook them?
Yes, they’re 100% edible raw! Their mild, oniony flavor shines in salads, yogurt, or as a crunchy garnish for cocktails. For a deeper flavor, lightly toast them in a dry pan for 30 seconds before using. No cooking required—just enjoy!
Can I grow chive flowers at home for drying?
You bet! Chives are easy to grow in pots or garden beds. Harvest flowers when fully open (usually mid-summer), then dry them upside-down in a dark, well-ventilated area for 1–2 weeks. Bonus: The same plant yields both leaves and flowers—double the harvest!
Wrapping up and next steps
Dried chive flowers are a simple yet flavor-packed way to elevate your dishes with a subtle, oniony kick! Whether you're preserving your garden harvest or exploring creative garnishes, these delicate blooms add both beauty and taste to salads, cocktails, and more. 🌸
Ready to try? Start small—grow a few chives, dry the flowers, and experiment in your kitchen. Your taste buds (and Instagram feed) will thank you! Happy cooking! 🍽️