
Flowers
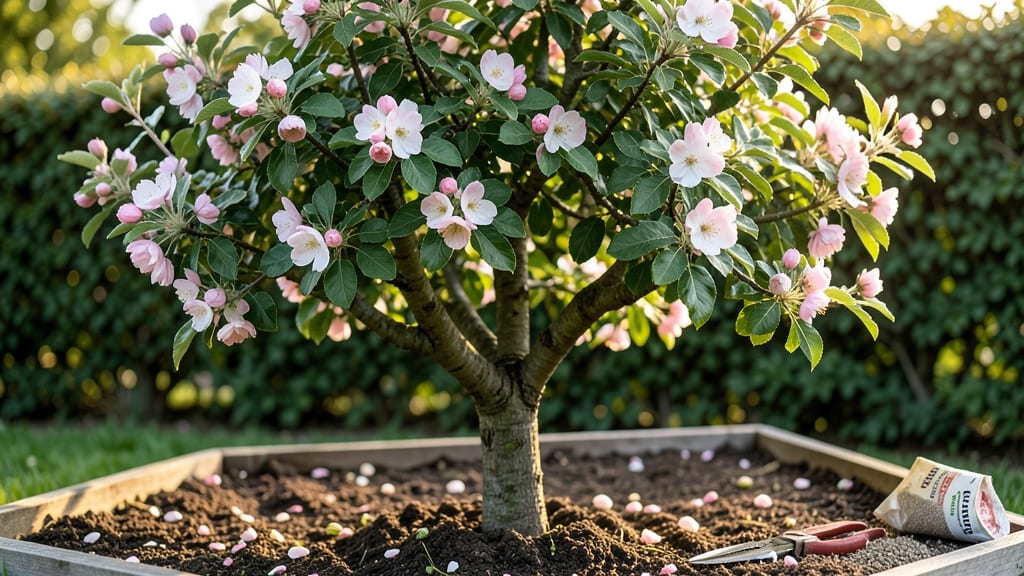
The secret to apple tree flowers that burst into bloom every spring lies in understanding their lifecycle—and pruning is the game-changer. 🌸 I’ve watched my own trees go from sparse blossoms to thick, fragrant canopies by making a few key cuts at the right time, and it’s easier than you’d think.
The difference between a tree that’s all show and one that produces fruit comes down to how you shape it now.
Apple tree flowers appear in late winter or early spring, right before the leaves emerge, and they’re the promise of next year’s harvest. But here’s the thing—these blossoms need sunlight, air circulation, and the right balance of old and new wood to thrive.
That’s where pruning comes in: it’s not about hacking branches but about opening up the center of the tree so light can reach every bud. Even if you’ve never pruned before, these techniques are beginner-friendly.
What you’ll end up with is a tree that flowers more heavily each year, with clusters of delicate white or pink blossoms that attract pollinators and set the stage for juicy fruit.
The scent alone is worth the effort—imagine walking past your tree in full bloom, the air thick with that sweet, tangy fragrance. And the best part? These blooms translate directly into a better harvest, so you’re not just growing flowers, you’re growing food.
Whether you’re dealing with a young sapling or an established tree, the same principles apply. The key is timing—prune in late winter or early spring before the buds swell—and focusing on structure over quantity.
You’ll see the difference in just one season, and your neighbors will be asking for your secrets. Let’s get those branches in shape!
📚 In This Guide
- What you need
- Instructions
- Tips and common mistakes
- Wrapping up and next steps
What you need
- ● Pruning shears: Bypass pruners (sharp, clean, and disinfected—1 pair per tree).
- ● Loppers: For thicker branches (3–5 inches in diameter) – 1–2 pairs.
- ● Pruning saw: For large branches (>5 inches) – 1 (handheld or folding).
- ● Gloves: Heavy-duty, cut-resistant (2 pairs—one for pruning, one for cleanup).
- ● Disinfectant: 70% isopropyl alcohol or bleach solution (1:9 ratio with water).
- ○ Pruning sealant: Optional but helpful for large cuts (1 small bottle).
- ● Tarp or drop cloth: To catch debris (1–2 large sheets).
- ● Marking tape or paint: For tagging branches to prune later (1 roll).
- ● Water & spray bottle: For cleaning tools between cuts (1–2 gallons).
- ● Knowledge: Basic understanding of apple tree anatomy (e.g., water sprouts vs. fruit spurs). 💡 Pro tip: Watch a short tutorial if you’re new!
- ● Weather check: Prune on a dry, cloudy day (avoid frost or extreme heat).
- ○ Optional: Extension pole (6–10 ft) for tall trees.
- ● Tree pruning rope (10–15 ft) to stabilize branches.
- ● Compost or mulch (5–10 gallons) for post-pruning care.
- ● Camera (phone or DSLR) to document progress!
How to prune apple trees for maximum flowering
Pruning isn't just about shaping—it's the secret to lush apple tree flowers every spring.
✂️ Step 1: Time Your Pruning for Flower Health
Prune your apple tree during its dormant season, ideally between late winter and early spring—just as buds begin to swell but before flowers emerge. This timing ensures the tree isn't stressed during its flowering phase, which is critical for fruit production. If you prune too early, the tree may produce fewer blooms, and if you wait too long, you risk damaging emerging flowers.
I like to mark my calendar for February or March in most climates, but adjust based on your last frost date. The goal is to finish pruning at least 4-6 weeks before flowering season so the tree can heal and prepare for blooms. You'll know you've timed it right when you see fresh, green growth starting in early spring—this means the tree is ready to focus its energy on flowering.
✂️ Step 2: Remove Dead, Diseased, or Weak Branches First
Start by identifying and removing any dead, diseased, or crossing branches. Dead branches are easy to spot—they're brown, brittle, and often snap when you bend them slightly. Diseased branches may have black spots, oozing sap, or unusual growths. Crossing branches rub against each other, creating wounds that invite pests and diseases, which can weaken the tree's ability to produce flowers.
Use clean, sharp pruning shears to make cuts just outside the branch collar—the swollen area where the branch meets the trunk. This ensures the tree can seal the wound properly and reduces the risk of infection. If a branch is thicker than ½ inch, use a pruning saw instead. After removing these branches, you'll notice the tree's structure looks cleaner and more open, which is essential for sunlight to reach the remaining branches—sunlight is what triggers flower production.
☀️ Step 3: Open the Canopy for Better Light and Airflow
Next, focus on thinning out the canopy to improve airflow and sunlight penetration. Aim to remove about 20-25% of the tree's total growth in this step. Start at the center of the tree and work your way outward, cutting back branches that are growing inward or rubbing against others. The goal is to create an open, vase-like shape that allows sunlight to reach all parts of the tree, including the inner branches where many flowers develop.
Look for branches that are growing straight up or downward—these are often less productive for flower and fruit development. Instead, encourage horizontal branches, which produce more flowers. You'll see the difference in just a few years: trees with open canopies produce more blooms and healthier fruit. If you're unsure which branches to cut, imagine sunlight streaming through the tree—anything blocking that light can go.
✂️ Step 4: Shape for Future Growth and Flowering
Now it's time to shape the tree for balanced growth and maximum flowering. Focus on maintaining a central leader—the main vertical trunk—while encouraging strong lateral branches. Cut back any branches that are growing too close to the leader, as these can compete for energy and reduce flowering. For lateral branches, aim to keep them spaced about 12-18 inches apart along the trunk to prevent overcrowding.
Here's the thing—apple trees flower best on mature wood, which means branches that are at least 2-3 years old. So, avoid cutting back too aggressively on older branches unless they're diseased or dead. Instead, focus on pruning younger growth to encourage the development of stronger, flowering branches. You'll know you're on the right track when the tree produces a steady number of blooms each spring and the branches look sturdy and well-spaced.
🌱 Step 5: Clean Up and Monitor for Flowering Success
After pruning, clean up all the debris from the ground around the tree to reduce the risk of disease and pests. Dispose of diseased branches separately to prevent the spread of pathogens. Once the tree is pruned and the area is clean, give it a deep watering to help it recover. Over the next few weeks, monitor the tree for new growth and the development of flower buds.
You'll see the first signs of success when you notice tight clusters of buds forming along the branches in early spring. These buds are the promise of future flowers and fruit. If you've done the pruning right, you should see a steady increase in blooms year after year. Keep an eye out for any signs of stress, like yellowing leaves or wilting branches, and adjust your care accordingly. With the right pruning, your apple tree will reward you with a spectacular display of flowers and a bountiful harvest.
Tips & tricks for pruning apple trees for year-round blooms
Here's what nobody tells you about pruning that makes all the difference between a few sad blooms and a tree covered in flowers.
Timing is Everything: Those 4-6 weeks before flowering are critical—this gives the tree time to heal and prepare its energy for blooms. I once pruned too early and my tree barely flowered the next spring. Mark your calendar for late winter to early spring, and double-check your local frost dates. If you're in doubt, err on the side of waiting a little longer rather than cutting too soon.
The Branch Collar Matters: When you make cuts in Step 2, always look for that swollen area where the branch meets the trunk—the branch collar. Cutting just outside this collar helps the tree seal the wound properly, preventing disease. I learned this the hard way after seeing sap ooze from poorly cut branches, which weakened the tree's flowering potential. Use clean, sharp tools to make precise cuts right at the collar.
Sunlight Strategy: In Step 3, think of your tree like a greenhouse—you want sunlight to reach every part. That 20-25% thinning might feel aggressive, but it's what creates those horizontal branches that produce the most flowers. I like to visualize sunlight streaming through the tree; if I can see light reaching the center, I know I'm on the right track. Vertical branches might look impressive, but they're less productive for flowering.
Monitor for Success: After pruning, keep an eye out for those tight clusters of buds in early spring—they're your reward for good pruning. If you see fewer buds than expected, you might need to adjust your pruning approach next year. I've found that trees with proper spacing (12-18 inches between lateral branches) consistently produce more blooms. The key is patience—it might take a couple of years to see the full benefits of your pruning efforts.
Pro Tips for Apple Tree Flowers
- Here's what nobody tells you about pruning that makes all the difference between a few sad blooms and a tree covered in flowers.
- Timing is Everything: Those 4-6 weeks before flowering are critical—this gives the tree time to heal and prepare its energy for blooms.
- The Branch Collar Matters: When you make cuts in Step 2, always look for that swollen area where the branch meets the trunk—the branch collar.
Frequently asked questions
Got questions about nurturing those stunning apple tree flowers? You’re not alone! Here are some of the most common queries—plus straightforward answers to keep your tree thriving and blooming beautifully.
When do apple tree flowers bloom, and how long do they last?
Apple tree flowers typically bloom in early spring (March–May, depending on your climate), just before or as the leaves emerge. Each bloom lasts 7–14 days, but the entire tree’s flowering period spans 2–3 weeks. Timing varies by variety—crabapple trees often bloom earlier than standard apple trees.
Why aren’t my apple tree flowers turning into fruit?
Several factors can prevent flowering from leading to fruit:
- Pollination issues: Most apple trees need cross-pollination from a different variety (or even species). Plant a second tree within 50–100 feet if yours isn’t producing.
- Poor weather: Cold snaps or rain during bloom can deter bees. Hand-pollinate with a soft brush if needed.
- Stress or disease: Check for pests (like aphids) or fungal issues (e.g., apple scab). Healthy trees bloom better!
Can I prune apple trees when they’re in flower?
Pruning during bloom isn’t ideal, but light shaping after flowering (once petals fall) is fine. Avoid heavy pruning—wait until late winter or early spring (before buds swell) for best results. Focus on removing dead, crossing, or overcrowded branches to encourage next year’s blooms.
How do I protect apple tree flowers from frost?
Frost can ruin blooms and fruit. Use these tricks:
- Cover young trees with frost cloth or a lightweight blanket when temps drop below 28°F (-2°C).
- Install a fan to circulate warm air around the tree on calm nights.
- Water the soil deeply the night before—moist ground retains heat better.
- Choose late-blooming varieties (like ‘Honeycrisp’) if frost is common in your area.
What can I plant near apple trees to attract pollinators?
Boost pollination by adding these bee-friendly plants nearby:
- Herbs: Thyme, lavender, or rosemary (drought-tolerant and fragrant).
- Flowers: Dill, marigolds, or clover (provide nectar and shelter for bees).
- Avoid pesticides—they harm pollinators! Opt for organic sprays instead.
Bonus: These plants also deter pests like aphids, which can damage flowers.
Wrapping up and next steps
Apple tree flowers aren’t just a seasonal spectacle—they’re the promise of future harvests and a vibrant garden all year long! By mastering pruning techniques, you’ve unlocked the secret to healthier trees, more abundant blooms, and delicious fruit.
Whether you’re a beginner or a seasoned gardener, every trim brings you closer to that perfectly balanced tree.
🌱 Ready to take the next step? Start by scheduling your first pruning session in late winter or early spring—just as those buds begin to swell. Grab your tools, put on your gardening gloves, and watch your apple tree transform into a blooming, fruiting masterpiece! 🍎✨