
Flowers
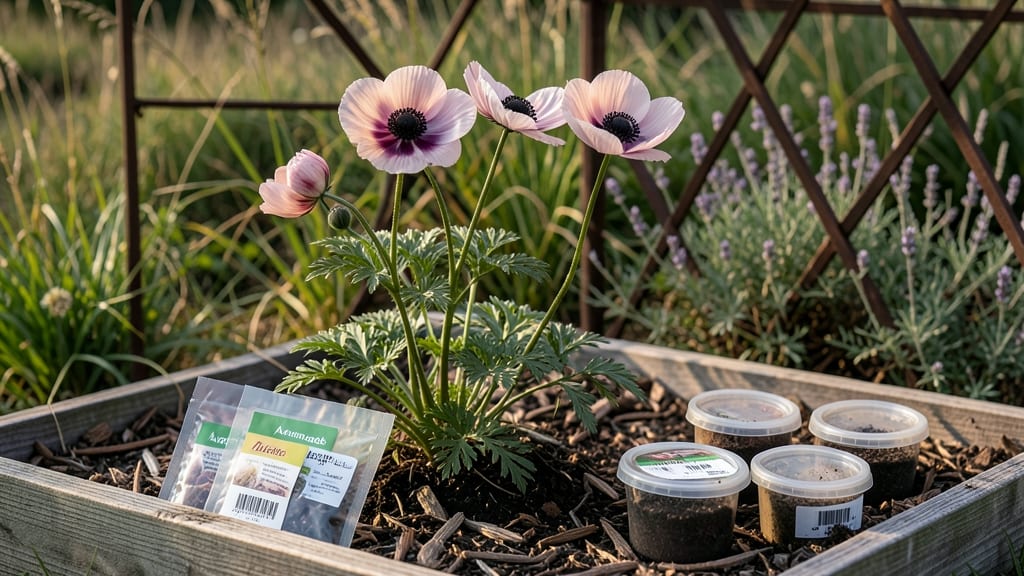
Growing anemone flower seeds in the Pacific Northwest means frost-proof blooms that defy the chill while adding drama to your garden. 🌿 I’ve struggled with finicky flowers before, but anemones—especially the hardy varieties like Japanese anemones—thrive where others falter, pushing through cool soil to reward you with delicate, long-lasting blooms by midsummer.
The secret lies in patience and preparation. Start seeds indoors 8-10 weeks before your last frost, using a light, well-draining mix to prevent rot. Anemones hate soggy roots, so keep the soil barely moist and avoid overcrowding—seedlings need space to stretch toward the light.
Japanese anemones, in particular, benefit from a slight chill period before transplanting, mimicking their natural forest-floor habits.
By late spring, you’ll be pinching back leggy stems and watching for those first cup-shaped blooms in shades of pink, white, or deep purple. The flowers may look fragile, but they hold up beautifully in rain and resist deer—unlike many PNW favorites.
Plus, the seed heads add winter interest, staying intact until the first hard freeze.
Whether you’re growing windflowers (annuals) or perennial Japanese anemones, the key is consistency: even moisture, gradual hardening off, and a little extra phosphorus at planting time. Skip the fancy setups—these flowers reward simplicity with months of effortless beauty. Ready to try?
📚 In This Guide
- What you need
- Instructions
- Tips and common mistakes
- Wrapping up and next steps
What you need
- ● Anemone flower seeds – Choose cold-hardy varieties like Anemone hupehensis or Anemone × hybrida (1–2 packets for a small garden, 5+ for larger areas).
- ○ Seed-starting mix – A well-draining, sterile blend (e.g., 50% peat moss, 30% perlite, 20% vermiculite). Optional: Add a slow-release fertilizer (5–10–10 ratio).
- ● Seed trays or small pots – 2–3 inch pots or a seed tray with drainage holes (10–20 trays/pots for a batch).
- ● Grow lights or sunny windowsill – Anemones need 12–16 hours of light daily (a 2–3 foot LED grow light works well).
- ● Misting bottle – For gentle watering (avoid oversaturating seeds!).
- ● Plastic wrap or humidity dome – To retain moisture while seeds germinate.
- ● Transplanting tools – Small trowel, tweezers, and a bucket for watering.
- ● Outdoor planting spot – Partial to full shade (dappled sunlight is ideal). Soil should be moist but well-draining (amend with compost if needed).
- ○ Mulch (optional but recommended) – 2–3 inches of shredded bark or straw to protect roots from winter frosts.
- ○ Stakes or cages (optional) – For taller varieties (e.g., Anemone tomentosa) to prevent flopping in wind.
How to grow Pacific Northwest anemones from seed
These hardy blooms thrive in cool climates—here’s how to coax them from seed to frost-resistant garden stars.
🌱 Step 1: Stratify Seeds for Reliable Germination
Anemone seeds need cold stratification to break dormancy. Place them in a sealed plastic bag with a damp paper towel, then refrigerate for 4-6 weeks. Check weekly—they should remain moist but not soggy. This mimics winter’s natural process, ensuring stronger seedlings.
I like to label the bag with the variety and date. After 4 weeks, transfer to a cool, dark spot (like a basement) for another 2 weeks. This two-phase approach mimics seasonal changes, giving seeds the best chance to sprout. Without stratification, germination rates drop dramatically.
☀️ Step 2: Sow in Well-Draining Soil After Stratification
Fill 4-inch pots with a mix of 50% potting soil and 50% perlite—anemones hate soggy roots. Plant seeds ¼ inch deep, spacing them 1 inch apart. A light misting keeps the soil damp but not waterlogged. These seeds are tiny, so I use a toothpick to place them precisely.
Keep pots in indirect light at 60-65°F until sprouts appear in 4-8 weeks. The slow germination is normal—don’t rush it. If condensation forms on the soil surface, let it dry slightly before misting again. Overwatering at this stage causes rot before seedlings even emerge.
🌿 Step 3: Acclimate Seedlings to Outdoor Conditions
Once seedlings have 2-3 true leaves, move pots to a shaded outdoor spot for 1-2 hours daily. Gradually increase exposure over 2 weeks, ending with full sun by late spring. Anemones are tough, but sudden temperature swings can stress young plants.
Hardening off is critical—skipping it leads to weak stems that snap in wind. I test readiness by gently tugging a leaf; if it resists, the plant’s strong enough. Transplant after last frost date when soil reaches 50°F, spacing plants 12-18 inches apart in well-draining garden beds. Amend heavy clay with compost to prevent waterlogging.
⏰ Step 4: Mulch and Protect for Winter Blooms
After planting, apply 2-3 inches of mulch to retain moisture and regulate soil temperature. Anemones thrive in partial shade but need morning sun for strong stems. Deadhead spent blooms in early fall to encourage a second flush of flowers.
These perennials are frost-proof, but young plants benefit from a light winter mulch (like straw). By their second year, they’ll naturalize and spread, creating those dreamy, drift-like meadows. Patience pays off—full bloom takes 2-3 years, but the payoff is worth it.
Tips & tricks for growing Pacific Northwest anemones from seed
Here's what I've learned after growing these resilient blooms through multiple seasons in the Pacific Northwest.
Stratification Strategy: The 4-6 week refrigeration period is non-negotiable for anemone seeds—this mimics winter's natural dormancy cycle. I've found that using a second refrigerator (set to 38-40°F) for the first 4 weeks gives more consistent results than a standard fridge. After those 4 weeks, the cool dark spot should be between 50-55°F—basements work perfectly if they stay consistently cool. Don't rush this process; the seeds need this time to break dormancy properly.
Seed Placement Technique: When planting those tiny ¼-inch-deep seeds in Step 2, I've discovered a simple trick: mix the seeds with a small amount of dry sand first. This makes them easier to distribute evenly in the soil. The 1-inch spacing between seeds might seem generous, but it prevents overcrowding later when seedlings develop. Remember, these plants will naturalize over time, so give them room to establish strong roots.
Germination Environment: Maintaining that 60-65°F temperature range during germination is crucial—too warm and seeds may rot before sprouting. I've had success using a seedling heat mat set to low under the pots to maintain consistent warmth. The indirect light requirement is often misunderstood; while these aren't shade plants, direct sunlight at this stage can scorch the delicate seedlings. A north-facing window or grow light on low setting works best.
Hardening Off Insight: When you're ready to transition seedlings outdoors in Step 3, start with just 1 hour of shade exposure on day one rather than the full 1-2 hours. This gradual approach prevents shock. I've noticed that anemones harden off faster than many perennials—by day 5 of the 2-week process, I often increase exposure by 30 minutes rather than the full hour. Watch for leaves that stay firm when touched rather than relying solely on time.
Pro Tips for Anemone Flower Seeds
- Here's what I've learned after growing these resilient blooms through multiple seasons in the Pacific Northwest.
- Stratification Strategy: The 4-6 week refrigeration period is non-negotiable for anemone seeds—this mimics winter's natural dormancy cycle.
- Seed Placement Technique: When planting those tiny ¼-inch-deep seeds in Step 2, I've discovered a simple trick: mix the seeds with a small amount of dry sand first.
Frequently asked questions
When is the best time to plant anemone flower seeds?
Anemone seeds thrive when planted in early fall (Sept–Oct) for spring blooms or late winter (Jan–Feb) in mild climates like the PNW. Direct sowing after the first frost ensures germination in cooler soil. Avoid planting in summer heat—seeds need consistent moisture and cooler temps (50–60°F) to sprout.
Can anemone seeds survive winter in the Pacific Northwest?
Anemones are frost-proof and often self-seed naturally in the PNW’s cold winters. Once established, they’ll regrow from the root crown even after snowfall. For extra protection, mulch lightly with straw or leaves in harsh winters, but avoid burying seeds—they need light to germinate.
How long do anemone seeds take to germinate?
Germination can take 2–4 weeks (sometimes longer in cold soil). Keep seeds moist but not soggy and in indirect light until sprouts appear. If soil stays dry or too hot, germination may stall. Pro tip: Use a seedling heat mat if planting in late winter for faster results!
What if my anemone seeds don’t sprout?
Don’t panic! Try these fixes:
- Check moisture: Seeds need consistent dampness (not waterlogged). Mist lightly daily.
- Verify depth: Plant seeds just below soil level—burying too deep can prevent sprouting.
- Test viability: Soak seeds in water for 24 hours; if they sink, they’re likely viable. If not, order fresh seeds.
- Patience: Some varieties (like Anemone nemorosa) germinate slowly—wait up to 6 weeks before replacing.
Are there easy alternatives to growing anemones from seed?
Yes! If seeds feel tricky, try:
- Dividing mature plants: Dig up established anemones in early spring or fall and split their rhizomes.
- Buying transplants: Local PNW nurseries often sell young anemone plants (e.g., Japanese anemone or windflower) ready to bloom.
- Hybrid seeds: Some varieties (like ‘Honorine Jobert’) are bred for easier germination—check seed packets for tips!
Pro Tip:
For faster blooms, pre-soak seeds in lukewarm water for 12 hours before planting. This mimics natural spring rains and can cut germination time in half!
Wrapping up and next steps
Growing anemone flower seeds in the Pacific Northwest is a rewarding journey—especially when you bring home those frost-proof, dreamy blooms with minimal fuss! Whether you’re a seasoned gardener or a curious beginner, these hardy perennials prove that beauty thrives even in cooler climates. 🌿✨
Now that you’re armed with the right materials and answers to common questions, it’s time to roll up your sleeves and plant those seeds.
Start small, stay patient, and soon you’ll be enjoying a garden that feels like a breath of fresh air—literally! Ready to dig in? Grab your gloves, pick a sunny spot, and let your anemone adventure begin.