Flowers
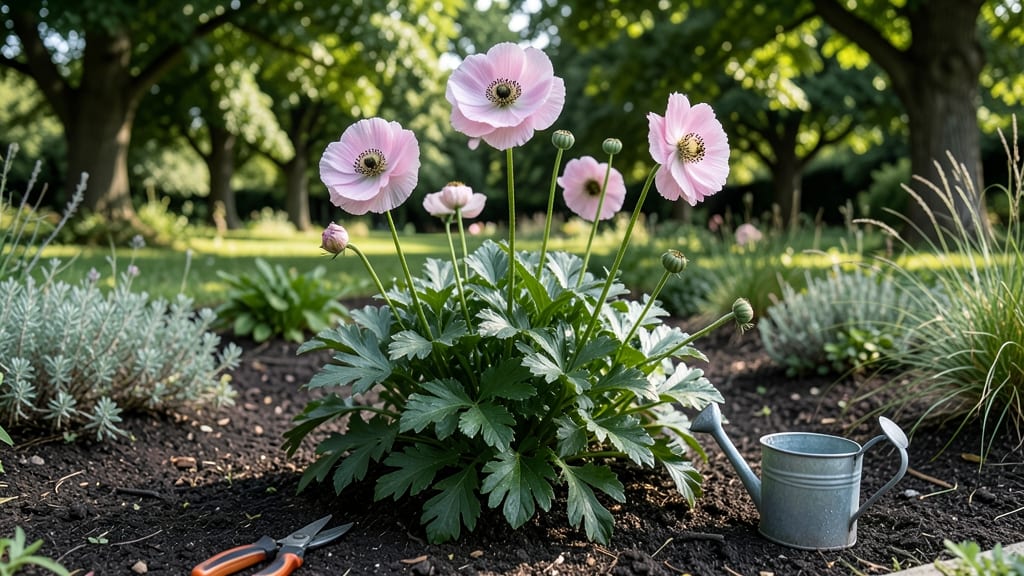
The flower Japanese anemone brings late-summer drama to Pacific Northwest gardens with its bold blooms and frost-proof resilience—first catching my eye when I spotted a single 'Honorine Jobert' standing tall in a neighbor’s garden. deep pink flowers defying the early October chill.
These perennials thrive where many give up, making them the secret weapon for gardeners who want color when other plants fade.
The key to their success lies in patience and the right conditions: partial shade, rich soil, and consistent moisture. Unlike finicky annuals, Japanese anemones reward you with years of blooms once established—no fuss, just stunning foliage and flowers from midsummer through frost.
They even handle our region's damp winters better than many natives, proving they're built for the PNW climate.
You'll start with sturdy stems and glossy leaves by late spring, then watch as 5-inch blooms appear in July, lasting well into fall. The secret to their longevity? Planting in well-draining soil with organic matter and spacing them 18-24 inches apart so they don't flop.
With minimal pruning and proper watering, these beauties will multiply and spread, creating natural drifts that look effortlessly elegant.
Whether you're a beginner or seasoned gardener, Japanese anemones deliver drama with minimal effort. Let's get you growing these frost-resistant stars that outshine everything else in late-season gardens.
📚 In This Guide
- What you need
- Instructions
- Tips and common mistakes
- Wrapping up and next steps
What you need
- ● Japanese Anemone Plants: 1–3 Anemone hupehensis or Anemone × hybrida tubers or bare-root plants (choose varieties like ‘Honorine Jobert’ or ‘September Charm’ for PNW resilience).
- ● OR 5–10 seeds (germination can be slow; start indoors 8–12 weeks before last frost).
- ● Soil: 5–10 gallons of well-draining, humus-rich soil (amend with 2–3 inches of compost or aged manure).
- ○ Optional: 1 part perlite or coarse sand (for sandy PNW soils to improve drainage).
- ● Fertilizer: 1 cup balanced 10-10-10 fertilizer (or organic options like fish emulsion or worm castings).
- ● 1 tbsp bone meal (for phosphorus, encouraging root growth).
- ● Garden Tools: Trowel or hand shovel (for transplanting tubers).
- ● Garden fork (to loosen soil).
- ● Pruners (for post-planting cleanup).
- ○ Optional (But Helpful): Mulch (2–3 inches of wood chips or straw to retain moisture and protect roots in PNW winters).
- ● Drip irrigation system or watering can (anemones prefer consistent moisture).
- ● Stakes or cages (if your variety grows tall—e.g., ‘Kwang Myong’—to support stems).
- ● Location Know-How: Partial shade (3–6 hours of sun daily; ideal for PNW’s mild summers).
- ● Protection from strong winds (use a temporary windbreak if needed).
Step-by-Step instructions for planting Japanese anemones in the Pacific Northwest
Here's how I've learned to grow these frost-hardy beauties with minimal fuss.
🌱 Step 1: Choose the Perfect Planting Location
Japanese anemones thrive in partial shade with 4-6 hours of morning sun and afternoon shade—critical for the PNW's humid summers. I always plant mine where they'll get dappled light through trees or on the east side of the house. The roots appreciate consistent moisture but hate soggy soil, so avoid low spots where water pools.
Dig a hole twice as wide as the root ball but only as deep as the container's base. This prevents burying the crown too deep, which can cause rot. Gently loosen the roots if they're circling tightly in the pot—anemones resent being root-bound.
🌿 Step 2: Prepare the Soil for Optimal Growth
Amend your native soil with 2-3 inches of compost mixed into the top 12 inches of planting hole. Japanese anemones prefer well-draining, humus-rich soil with a slightly acidic to neutral pH. I add a handful of perlite to improve drainage if my soil is heavy clay—these plants hate wet feet.
Spread the roots out gently in the hole, making sure they're not folded or cramped. The crown should sit just below soil level, never buried deeper than ½ inch. Backfill with native soil mixed with compost, tamping lightly as you go to eliminate air pockets around the roots.
💧 Step 3: Water Thoroughly and Mulch Properly
Water deeply right after planting to settle the soil and eliminate air pockets. You'll know it's enough when water drains out the bottom of the hole. Give the plant 1 inch of water weekly during the first growing season, more during dry spells. The key is keeping soil consistently moist but never soggy.
Apply 3 inches of organic mulch around the base, keeping it 2 inches away from the stem to prevent rot. I use shredded bark or straw—both help retain moisture while allowing air circulation. This mulch layer also protects roots from winter freezes, which is especially important in the PNW's unpredictable climate.
⏰ Step 4: Provide Seasonal Care for Long-Term Beauty
In spring, remove any dead foliage but leave last year's stems—they provide winter protection. Fertilize lightly with ½ cup of 10-10-10 fertilizer spread around the base in early spring when new growth appears. Avoid heavy feeding, as anemones bloom best on moderately fertile soil.
Deadhead spent blooms by cutting stems back to the nearest leaf set. This encourages more flowers and prevents seed formation, which can weaken the plant. In fall, cut back foliage to 6 inches tall and add an extra 2 inches of mulch to protect roots through winter's wet spells.
Tips & tricks for perfect Japanese Anemone planting in the Pacific Northwest
These simple strategies will help your frost-resistant beauties thrive with minimal effort in the PNW's challenging climate.
The Light Factor: In Step 1, when choosing your planting location, remember that "partial shade" means different things in different spots. The east side of a house gets morning sun and afternoon shade—ideal for anemones. If planting under trees, look for areas where sunlight filters through rather than gets blocked completely. The 4-6 hours of morning sun is crucial for blooming, but too much afternoon sun can stress the plants in our humid summers.
Soil Science: For Step 2, if your soil is heavy clay, don't just add compost—mix in that handful of perlite I mentioned. This creates tiny air pockets that prevent waterlogging, which is especially important after our frequent PNW rains. I've found that amending just the top 12 inches of soil gives roots enough room to establish without overwhelming the plant. The slightly acidic to neutral pH is key—test your soil if you're unsure, as our native soils can vary dramatically across the region.
Watering Wisdom: In Step 3, the "1 inch weekly" guideline is perfect for our climate, but there's a trick: water in the morning so excess moisture evaporates during the day rather than sitting on the leaves overnight. This prevents fungal issues common in our damp summers. And when you apply that 3 inches of mulch, create a slight depression around the base to help water pool there during dry spells—just make sure it's not touching the stem.
Seasonal Care: For Step 4, that extra 2 inches of mulch in fall is your best defense against our wet winters. I've seen plants survive our coldest spells with just this simple protection. When deadheading in summer, use clean pruners and make cuts at a 45-degree angle just above a leaf node—this encourages bushier growth. And in spring, that ½ cup of 10-10-10 fertilizer is just enough to give them a boost without overstimulating new growth too early in our cool season.
Pro Tips for Flower Japanese Anemone
- These simple strategies will help your frost-resistant beauties thrive with minimal effort in the PNW's challenging c...
- The Light Factor: In Step 1, when choosing your planting location, remember that "partial shade" means different thin...
- Soil Science: For Step 2, if your soil is heavy clay, don't just add compost—mix in that handful of perlite I mention...
Frequently asked questions
Got questions about growing Japanese anemones in the Pacific Northwest?
You’re not alone! Here are answers to the most common queries—from timing to troubleshooting—to help your garden thrive with these stunning blooms.
Can Japanese anemones survive harsh PNW winters?
These hardy beauties thrive in USDA Zones 4-9, making them perfect for the PNW’s chilly climate. Mulch heavily in late fall (3-4 inches of straw or shredded leaves) to protect roots. Their deep dormancy ensures they bounce back each spring—just like a frost-resistant champ!
When is the best time to plant Japanese anemones?
Fall planting (September-October) is ideal for the PNW—roots establish before winter, giving them a head start. Spring planting works too, but water deeply for the first 2 weeks. Avoid transplanting during extreme heat or drought; these divas prefer consistent moisture over drama.
How long does it take for Japanese anemones to bloom?
Patience is key! Established plants (2-3 years old) typically bloom in late summer to early fall (August-September). Younger plants may take 1-2 seasons to flower, but their lush foliage adds year-round interest. Pro tip: Deadhead spent blooms to encourage a second flush in mild climates!
What’s the deal with Japanese anemones flopping over?
Floppy stems? It’s usually a sign of overcrowding or poor support. Space plants 18-24 inches apart and stake tall varieties (like ‘Honorine Jobert’) with hidden bamboo stakes or pebbles. Avoid heavy heads—cut back faded blooms to redirect energy to next year’s growth.
Are there dwarf or compact Japanese anemone varieties for small gardens?
Yes! If space is tight, try ‘Whirlwind’ (18” tall) or ‘September Charm’ (24” tall), both with vibrant pink blooms. For white options, ‘Hadspen Abundance’ stays under 3 feet. These compact picks deliver big impact without the sprawl.
Do Japanese anemones attract pests or diseases?
Generally low-maintenance, but keep an eye out for slugs (they love young leaves!) and powdery mildew in humid PNW summers. Improve airflow, water at the base, and remove debris. Aphids? Blast them off with water—no harsh chemicals needed!
Wrapping up and next steps
Ready to welcome the elegant charm of Japanese anemones to your Pacific Northwest garden? 🌸 These frost-resistant beauties thrive with just the right care—whether you’re a seasoned gardener or a beginner eager to try. Start small: plant a few in well-drained soil, protect them from harsh winter winds, and enjoy their late-summer blooms as a stunning centerpiece.
Your next step? Grab some seeds or tubers, mark your calendar for the ideal planting window, and get ready to transform your garden into a serene, flower-filled retreat. Happy gardening! 🌿