
Flowers
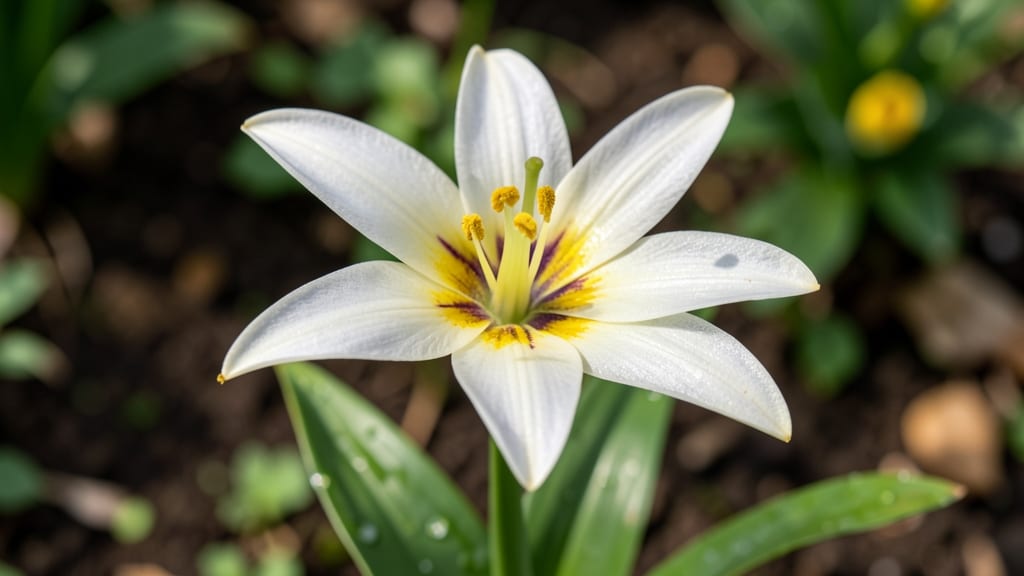
The spider lily flower transforms your garden with its bold, spider-like blooms, bursting forth effortlessly in late summer—just plant and admire. ✨ These exotic beauties thrive in zones 5-9 with minimal care, and I’ve grown them for years without a single problem.
The key is letting them mimic their natural habitat: dry soil, full sun, and a long dormancy period.
Spider lilies demand well-draining soil—think sandy loam or amended clay—because soggy roots will kill them faster than you can say "false spider lily." Plant bulbs 6 inches deep in early fall, spacing them 12 inches apart for dramatic clusters.
They’ll naturalize over time, popping up like magic in late summer when most gardens are winding down.
Watering is where most gardeners trip up: drench them once after planting, then let nature take over. No need to water again until spring—these bulbs store moisture like pros.
By late August, you’ll spot those 6-inch-tall stems with 6-petaled, crimson blooms that look like alien spacecraft. The foliage dies back by fall, signaling their dormancy phase.
Here’s the secret: don’t dig them up unless you’re dividing a crowded patch. True spider lilies (Lycoris radiata) bloom after their leaves die back—unlike rain lilies (Lycoris squamigera), which bloom in spring.
Avoid overwatering in dormancy, and you’ll have decades of zero-fuss blooms that neighbors will envy.
📚 In This Guide
- What you need
- Instructions
- Tips and common mistakes
- Wrapping up and next steps
What you need
- ● Spider Lily Bulbs: 3–5 healthy bulbs per plant (choose size 2+ for quicker blooms). Pro tip: 💡 Opt for organic, disease-free bulbs from reputable nurseries.
- ● Well-Draining Soil: 3–5 gallons of a mix of 50% garden soil, 30% perlite/pumice, and 20% compost (or a cactus/succulent blend).
- ● Planting Container or Garden Bed: Containers: 12–15" diameter pots with drainage holes (terracotta or fabric pots work best).
- ● Garden Beds: Full sun to partial shade (4+ hours of sunlight daily).
- ● Organic Fertilizer: 1 cup of balanced 10-10-10 or bulb-specific fertilizer (apply at planting and mid-season).
- ● Mulch: 1–2 inches of pine bark fines or gravel to retain moisture and deter weeds.
- ● Garden Trowel or Bulb Planter (for easy digging).
- ● Watering Can or Hose with Nozzle (gentle watering avoids bulb rot).
- ● Pruning Shears (to trim dead foliage post-bloom).
- ○ Stakes or Trellis (Optional) – Only needed if growing Hymenocallis varieties with arching stems.
- ○ Slow-Release Fertilizer Tablets (Optional) – For container growers (place 1–2 tablets per pot at planting).
- ● Bug Spray (Neem Oil or Pyrethrin) – For aphids or spider mites (rare but possible).
Step-by-step instructions for growing stunning spider lilies
Here's how to coax those striking, spider-like blooms from your garden with minimal effort.
🌱 Step 1: Choose the Perfect Planting Spot
Spider lilies thrive in partial to full shade, making them ideal for woodland gardens or areas with dappled sunlight. I always plant mine where they’ll receive morning sun and afternoon shade—this prevents the foliage from scorching while still encouraging robust blooms. Avoid spots that bake in direct afternoon sun, especially in hotter climates.
Test your spot by observing how sunlight moves through the area. If the ground stays cool to the touch even at midday, it’s a good sign. Spider lilies also appreciate well-draining soil, so if your garden holds water, amend the area with 2-3 inches of compost or plant in a raised bed. The goal is soil that feels slightly damp but never soggy when you squeeze a handful.
🪴 Step 2: Plant Bulbs at the Right Depth and Spacing
Plant spider lily bulbs 6 inches deep and 6 inches apart—this mimics their natural habitat and prevents overcrowding. I dig a hole twice as wide as the bulb to encourage root spread. Place the bulb with the pointed end facing upward, then cover it with soil, leaving no air pockets. A light patting with the back of a trowel ensures good soil-to-bulb contact.
Real talk: If you plant too shallow, the bulb may rot. Too deep, and it’ll struggle to push through the soil. The 6-inch rule is your sweet spot for consistent blooms. Water thoroughly after planting to settle the soil and eliminate air gaps. Over the next few weeks, the bulb will establish roots, and you’ll see shoots emerge in late spring or early summer, depending on your climate.
☀️ Step 3: Water and Fertilize for Maximum Blooms
Spider lilies are drought-tolerant once established, but they’ll reward you with larger, more vibrant blooms if you keep the soil evenly moist during the growing season. Water deeply once a week, or more often in extreme heat, until the top 2 inches of soil feel dry. Avoid wetting the foliage to prevent fungal issues—always water at the base.
In early spring, before new growth appears, add a balanced, slow-release fertilizer (like 10-10-10) to encourage strong root development. I scatter a handful around the base and lightly scratch it into the top inch of soil. Skip fertilizing in fall or winter—this gives the bulb time to store energy for next year’s blooms. You’ll know you’re doing it right when the leaves stay lush and upright, not flopping or yellowing.
✂️ Step 4: Deadhead and Mulch for Next Year’s Blooms
After the spider-like flowers fade, snip the spent blooms at the base with clean pruners—this redirects the plant’s energy into bulb storage rather than seed production. Don’t cut the leaves yet! They’ll continue photosynthesizing until they turn yellow naturally, usually in late fall. This process ensures the bulb stores enough nutrients for a strong comeback next season.
Apply a 2-inch layer of mulch (like shredded bark or leaves) around the base to insulate the soil and retain moisture. This also suppresses weeds and keeps the bulb cozy through winter. In colder climates, a thick mulch layer prevents freeze-thaw cycles that can damage bulbs. Come spring, remove the old mulch and add fresh compost to give your spider lilies a nutrient boost for another stunning display.
⏰ Step 5: Divide and Propagate Every 3-4 Years
Spider lilies multiply over time, and their clusters can become overcrowded after 3-4 years, which reduces bloom quality. In early spring, before new growth appears, dig up the entire clump and gently separate the bulbs with your hands or a fork. Discard any soft, mushy bulbs—they won’t survive. Healthy bulbs should feel firm and plump, with no signs of rot or damage.
Replant the divisions immediately at the same 6-inch depth, spacing them 6 inches apart. Water thoroughly to help them establish roots quickly. This step keeps your spider lilies vigorous and ensures you’ll have plenty of blooms for years to come. If you’re generous, you can share divisions with fellow gardeners—everyone loves free, easy-to-grow plants!
Tips & tricks for perfect spider lily flower care
These subtle adjustments will transform your spider lilies from merely surviving to thriving with showstopping blooms.
Lighting Strategy: The morning sun and afternoon shade rule is your secret weapon for vibrant blooms. If your garden only offers full sun, create shade with a sheer fabric canopy during peak afternoon heat—this prevents the foliage from scorching while still allowing enough light for photosynthesis. I’ve seen spider lilies in full sun locations struggle after just a few weeks, so don’t skip this adjustment if your climate is hot.
Soil Science: That "slightly damp but never soggy" test is more important than you might think. For heavy clay soils, mix in 3-4 inches of perlite or coarse sand with your compost to improve drainage. I’ve had spider lilies rot in clay soil despite proper planting depth—this simple amendment makes all the difference. The goal is soil that drains water within 1-2 hours of watering, mimicking their natural woodland habitat.
Timing Secret: The late spring/early summer emergence window is your cue for action. If you notice shoots appearing earlier than expected (say, in late winter), protect them with a light frost cloth until nighttime temperatures reliably stay above 40°F. Early blooms can get damaged by late frosts, and the plant will redirect energy to recovery rather than producing showy flowers. Patience here pays off with bigger, healthier blooms later in the season.
Mulching Mastery: That 2-inch layer of mulch isn’t just for looks—it’s a winter survival tactic. In colder climates, add an extra 1-2 inches of straw mulch on top of your shredded bark. The straw acts as insulation while allowing moisture to penetrate. I’ve seen spider lilies in Zone 5 gardens thrive with this double-layer approach, while single-layer mulched plants sometimes suffered bulb damage during freeze-thaw cycles.
Pro Tips for Spider Lily Flower
- These subtle adjustments will transform your spider lilies from merely surviving to thriving with showstopping blooms.
- Lighting Strategy: The morning sun and afternoon shade rule is your secret weapon for vibrant blooms.
- Soil Science: That "slightly damp but never soggy" test is more important than you might think.
Frequently asked questions
Got questions about growing spider lily flowers? You’re not alone! These striking blooms are easy to care for, but a few details can make all the difference. Here are answers to the most common queries—so you can enjoy their exotic beauty without the guesswork.
When is the best time to plant spider lilies?
Plant spider lilies in early spring (after the last frost) or late summer for the best results. They thrive in warm soil, so avoid planting when temperatures are still chilly. If you’re in a mild climate, fall planting can also work—just ensure the ground isn’t frozen.
How long does it take for spider lilies to bloom?
With patience, spider lilies typically bloom 1–2 years after planting from seed, though tubers may flower sooner (sometimes in the first year). Once established, they reward you with dramatic, spider-like blooms in late summer to fall—worth the wait!
Do spider lilies need a lot of water?
Not at all! These drought-tolerant beauties prefer well-draining soil and moderate watering. Water deeply once a week (or when the top inch of soil is dry), but avoid soggy conditions—they hate wet feet. Mulch helps retain moisture and keeps roots cool.
Can I grow spider lilies in containers?
Spider lilies adapt well to large containers (at least 12 inches deep) with drainage holes. Use a mix of potting soil and sand/perlite for airflow. Just move them indoors or to a sheltered spot if frost threatens—these tropical-looking plants aren’t cold-hardy.
Why aren’t my spider lilies blooming?
No flowers? Check these fixes:
- Not enough sun: They need full sun (6+ hours daily).
- Overcrowded tubers: Divide clumps every 3–4 years for better growth.
- Too much fertilizer: Cut back on nitrogen—it encourages leaves, not blooms.
- Young plants: Give them time! First blooms may take 1–2 years.
What’s a good alternative if spider lilies don’t thrive in my area?
If your climate is too cool or dry, try these low-maintenance, exotic-looking alternatives:
- Black mondo grass (for dark foliage contrast)
- Crinum lilies (hardy, fragrant, and drought-tolerant)
- Dahlias (dramatic blooms with similar care needs)
- Agapanthus (arching stems and starry flowers)
Wrapping up and next steps
The spider lily flower is a stunning, low-maintenance gem that brings exotic elegance to any garden—even for beginners! With its striking blooms and adaptable nature, it thrives in partial shade, tolerates neglect, and rewards you with vibrant colors year after year.
Whether you’re drawn to its unique shape or its resilience, this plant proves that beauty doesn’t require a green thumb.
Ready to level up your garden? Grab your supplies, pick a shady spot, and give these exotic blooms a try—your future self (and your garden) will thank you! 🌿✨ Start planting today!