Flowers
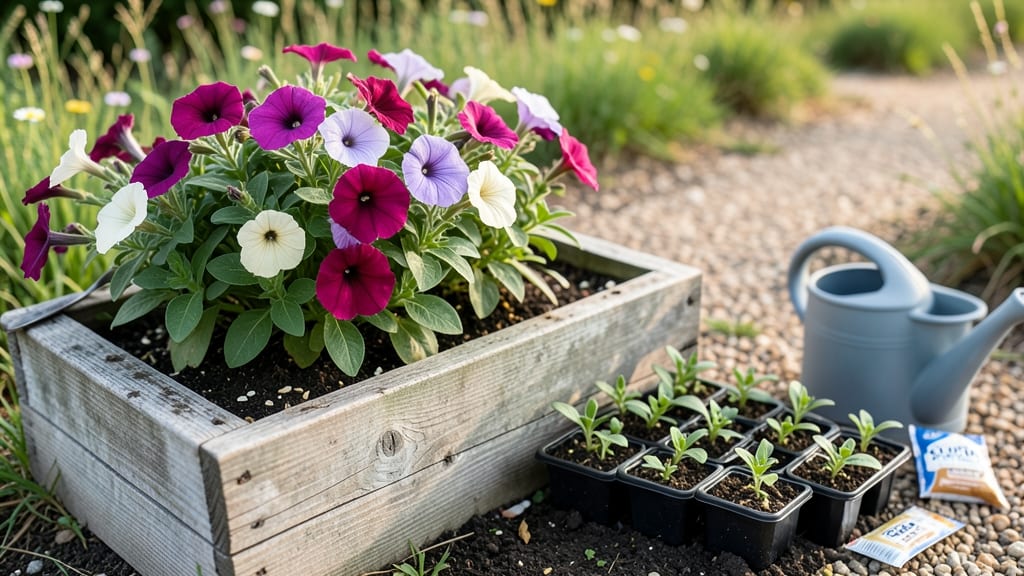
Building raised flower box plans that bloom all year transforms even the smallest porch into a fragrant, ever-changing garden. 🌸 I designed mine last spring after realizing my ground soil was too heavy for delicate annuals—and now I never run out of cut flowers for the house.
The key is matching plant heights, textures, and bloom times so something’s always in color, even in winter.
Start with a sturdy box (cedar resists rot and looks elegant) that’s at least 12 inches deep—shallow roots need room to spread. Add drainage holes if using containers, and line the bottom with landscape fabric to keep weeds out.
For year-round color, layer perennials like heuchera at the back with seasonal annuals in front, and tuck in evergreens like dusty miller for winter structure.
By summer, you’ll have a vertical garden that spills over with blooms—think purple salvia, golden black-eyed Susans, and white alyssum creating a cascading effect. The best part? No bending, no weeding, and you can move the whole box if you need to brighten up a different spot.
Even my neighbor’s tiny balcony now has a flower box that gets compliments all season.
Pro tip: Use a drip irrigation kit to keep watering consistent, and swap out annuals every 6-8 weeks to maintain that fresh, lush look. The first time you snip a bouquet from your own porch, you’ll understand why this project is worth every minute.
📚 In This Guide
- What you need
- Instructions
- Tips and common mistakes
- Wrapping up and next steps
What you need
- ● Wood or composite lumber: 2x6" or 2x8" boards (4–6 ft long, depending on box size). Tip: Cedar or redwood resist rot—great for longevity!
- ● Galvanized screws or decking nails: 2–2.5" (100–150 pieces). Pro tip: Stainless steel screws prevent rusting over time.
- ● Exterior wood glue: (1 tube) for extra reinforcement.
- ● Landscape fabric: (1 roll) to block weeds and retain moisture.
- ○ Potting soil: High-quality, well-draining mix (2–3 cubic feet per box). Optional: Add compost for nutrient boost!
- ● Drainage material: Small gravel or perlite (1–2 bags) to prevent waterlogging.
- ● Measuring tape & pencil for precise cuts.
- ● Circular saw or handsaw to cut lumber to size.
- ● Drill/driver for assembling screws.
- ● Level to ensure your box sits straight.
- ● Sandpaper (80–120 grit) for smoothing rough edges.
- ● Paintbrush or roller (if staining/sealing wood).
- ● Wood stain or paint: For a polished look (choose non-toxic options).
- ● Corner braces: Reinforce box stability.
- ● Drip irrigation kit: Automate watering for low-maintenance blooms.
- ● Decorative trim: Add charm with metal edging or lattice.
Step-by-step guide for building a stunning vertical flower box
Here's how to create a vibrant, low-maintenance vertical garden that thrives year-round.
🪴 Step 1: Select and Prepare Your Flower Box Structure
Choose a box with at least 12-inch depth—shallower boxes dry out too quickly and limit root growth. I prefer cedar or redwood for natural rot resistance, but painted metal or plastic works too. Ensure the box has pre-drilled drainage holes (¼-inch diameter) spaced every 6 inches along the bottom edge—this prevents root rot and keeps water flowing freely.
Line the bottom with landscape fabric to block soil from falling through the holes while still allowing water drainage. Secure it with small staples or bend the fabric edges inward. If your box has a back panel, attach it now with galvanized screws—this creates a clean, finished look and prevents soil from spilling onto your deck or patio.
🌱 Step 2: Layer Soil and Add Slow-Release Fertilizer
Fill the box ¾ full with a high-quality potting mix blended with perlite or vermiculite (¼ part by volume) for extra aeration. I like to add ½ cup of slow-release fertilizer per cubic foot of soil mix—this feeds plants steadily for 3-4 months without the risk of over-fertilizing. Mix everything thoroughly so the soil is loose and crumbly, not compacted.
Here's the thing—don't pack the soil too tightly. Press down just enough to remove air pockets, but leave it light enough for roots to penetrate easily. You'll see the ideal texture when a handful of soil holds its shape but still crumbles when squeezed gently. This ensures proper drainage while retaining enough moisture for your plants.
☀️ Step 3: Plant a Thriving Vertical Color Scheme
For a year-round display, plant in three layers: trailing plants at the back, mid-height fillers, and spillers at the front. Start with 3-4 trailing plants (like sweet potato vine or lobelia) spaced 6-8 inches apart along the back edge. These will cascade over the sides, creating instant drama. Next, add 3-4 mid-height plants (like coleus or snapdragons) positioned 4-6 inches apart in front of the trailers.
Finish with 3-4 spiller plants (like petunias or bacopa) at the front edge, where they'll spill over the sides. Water thoroughly after planting to settle the soil around roots, then let the box drain completely before watering again. This prevents soggy soil, which can suffocate new roots and invite fungal diseases.
💧 Step 4: Water and Maintain for Long-Lasting Blooms
Water deeply every 2-3 days during the first 2 weeks after planting—this encourages roots to grow deeper into the soil. Once established, most flower boxes need watering every 3-4 days in warm weather, but check the soil first. Stick your finger 1 inch into the soil; if it feels dry, it's time to water. If it's still damp, wait another day.
Fertilize every 4-6 weeks with a balanced liquid fertilizer (10-10-10 or 20-20-20) to keep blooms vibrant. Deadhead spent flowers regularly—this encourages new growth and prevents the box from looking tired. I also rotate the box a quarter turn every 2 weeks so all plants get even light exposure, which keeps the display looking full and symmetrical.
✂️ Step 5: Extend the Season with Cold-Hardy Plants
For year-round color, swap out summer annuals with cold-hardy varieties in fall. Replace heat-loving petunias with pansies or violas, which thrive in 30-50°F temperatures. In winter, add evergreen foliage plants like heuchera or dusty miller for texture, and winter jasmine or hellebore for delicate blooms. These plants handle frost and still provide interest when most gardens are dormant.
Mulch the soil surface with ½ inch of shredded bark in late fall to insulate roots and retain moisture. This small step makes a big difference in winter survival. In early spring, refresh the soil with a top dressing of compost (¼ inch thick) and add a slow-release fertilizer to jumpstart new growth. Your vertical garden will reward you with continuous color from spring through frost.
Tips & tricks for perfect raised vertical gardens
Creating a thriving vertical garden requires attention to detail—here's how to avoid common pitfalls and maximize your flower box's potential.
Material Selection: If you're using untreated wood for your flower box, seal it with an outdoor-rated wood preservative before planting. This prevents moisture absorption that can lead to rot and warping over time. For boxes without pre-drilled holes, use a step bit to create ¼-inch drainage holes every 6 inches along the bottom—this critical step prevents waterlogging that can drown roots.
Soil Mix Optimization: The ¾ full soil fill ratio is perfect, but here's the secret: blend your potting mix with ¼ part perlite or vermiculite by volume to create air pockets. This prevents compaction while maintaining moisture retention. I recommend adding ½ cup of slow-release fertilizer per cubic foot—this feeds plants steadily for 3-4 months without risking over-fertilization that can burn delicate roots.
Plant Layering Strategy: When arranging your three-layer planting scheme, place your 3-4 trailing plants closest to the back edge where they'll have maximum space to cascade. The 4-6 inch spacing between mid-height and spiller plants creates visual balance while preventing overcrowding. After planting, give everything a thorough watering, then let it drain completely—this crucial step prevents soggy soil that suffocates new roots.
Seasonal Transition Tips: For year-round color, swap out summer annuals with cold-hardy varieties when temperatures drop below 50°F. Pansies and violas thrive in 30-50°F ranges, while evergreens like heuchera provide winter texture. In late fall, apply ½ inch of shredded bark mulch—this simple step insulates roots and retains moisture during winter dormancy.
Pro Tips for Raised Flower Box Plans
- Creating a thriving vertical garden requires attention to detail—here's how to avoid common pitfalls and maximize you...
- Material Selection: If you're using untreated wood for your flower box, seal it with an outdoor-rated wood preservati...
- Soil Mix Optimization: The ¾ full soil fill ratio is perfect, but here's the secret: blend your potting mix with ¼ pa...
Frequently asked questions
Got questions about creating your own raised flower box plans? You’re not alone! Here are some of the most common queries—and their simple solutions—to help you get started with confidence.
What’s the best height for a raised flower box?
A standard height of 6–12 inches works well for most flowers, balancing drainage and accessibility. Deeper boxes (12–18 inches) are ideal for root-heavy plants like tomatoes or roses, while shallower ones (4–6 inches) suit annuals like petunias or impatiens. Just ensure it’s tall enough to prevent soil spillage!
When is the best time to plant a raised flower box?
For perennials, plant in early spring (after the last frost) or fall (6–8 weeks before frost). Annuals can go in once soil temps hit 60°F+, usually April–May in most climates. Pro tip: Mulch in late fall to protect roots over winter!
Can I use wood scraps or repurposed materials?
Untreated wood
(like cedar or redwood) is best for longevity, but you can also use plastic bins, cinder blocks, or even old wine crates lined with landscape fabric. Just avoid pressure-treated wood if planting edibles—opt for food-safe sealants instead.
How do I keep pests out of my raised flower box?
Prevent pests with healthy soil (compost + perlite) and companion planting (e.g., marigolds repel aphids). For stubborn bugs, try neem oil or soapy water sprays. Elevate boxes off the ground to deter slugs and snails—gravel barriers help too!
Will a raised flower box work in hot/dry climates?
Yes! Use well-draining soil with organic matter (like coconut coir) to retain moisture. Drip irrigation or self-watering boxes are lifesavers. Drought-tolerant plants like lavender, succulents, or sedum thrive in heat—just mulch to lock in humidity.
Wrapping up and next steps
Creating a raised flower box is a rewarding way to bring vibrant color and life to any space—whether it’s a cozy balcony, a sunny patio, or even a small corner of your yard! 🌸 With the right plans, materials, and a little creativity, you can craft a vertical garden oasis that thrives year-round.
The key is choosing the perfect location, selecting complementary plants, and maintaining your box with love and care.
Now that you’re armed with all the tips and tricks, it’s time to roll up your sleeves and get growing! Start by sketching your design, gathering supplies, and planting those first seeds or seedlings.
Before you know it, your raised flower box will be a blooming masterpiece that brings joy—and maybe even a few buzzing pollinators—to your outdoor space. Happy gardening! 🌱✨