
Blooming
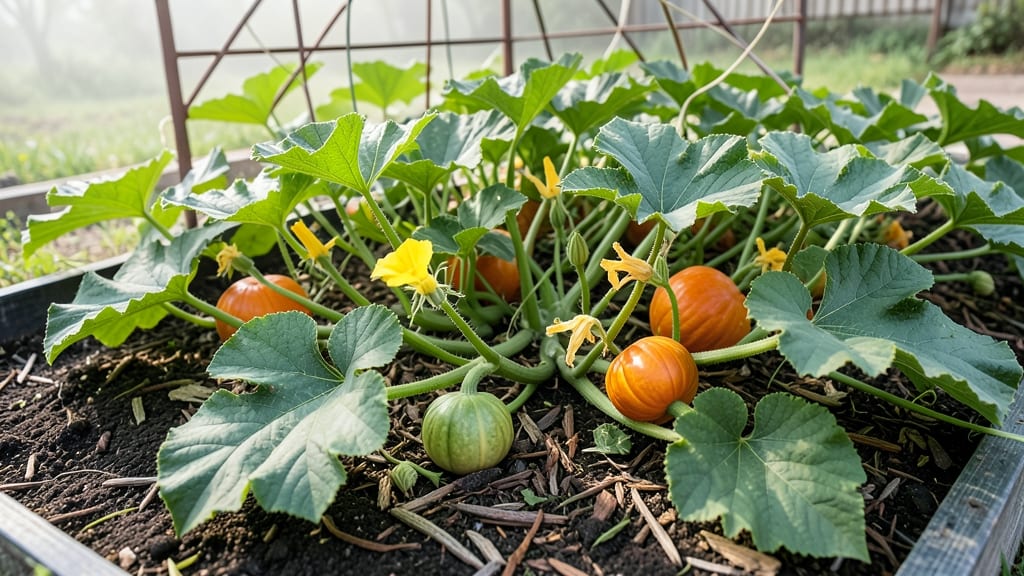
The pumpkin flower stages reveal nature’s secret to those plump, vine-ripened fruits we love. 🌸 From tiny buds to pollinated blooms, each phase tells a story of what’s coming next—and what you can do to help.
I’ve watched my pumpkin vines go from hopeful green shoots to heavy-fruited giants, and the flowers are where the real magic happens.
First come the male flowers, appearing in clusters before the females show up. They’re easy to spot: long stems, no swelling at the base, and they open early in the morning.
Then the female flowers arrive, with their tiny pumpkin bumps at the base—this is where fruit will form if pollination succeeds. Timing matters: male flowers open first, giving bees their chance to do their work.
Once pollinated, those female blooms turn into mini pumpkins within days. The real test is watching them grow—from golf-ball size to football-sized—while you keep the vines fed and watered.
A single missed pollination can mean a skipped fruit, but with healthy plants, you’ll see clusters of blooms leading to a harvest that puts store-bought to shame.
Here’s the thing: even experienced gardeners sometimes miss the signs. Male flowers fade fast, and female blooms can drop if pollination fails. But once you recognize the stages, you’ll know exactly when to hand-pollinate or give your bees a helping hand.
Let’s break it down step by step—your future pumpkin patch starts with these flowers.
📚 In This Guide
- What you need
- Instructions
- Tips and common mistakes
- Wrapping up and next steps
What you need
- ● Pumpkin plants – Healthy, mature vines with visible buds (choose varieties like Cucurbita pepo or Cucurbita moschata for best results).
- ● Magnifying glass or loupe – 10x magnification to inspect delicate flower structures.
- ● Digital camera or smartphone – With a macro lens or high-resolution camera (12MP or higher) for close-up shots.
- ● Notebook or digital journal – To log observations (dates, weather, and flower development notes).
- ● Ruler or measuring tape – For tracking flower/bud sizes (inches or centimeters).
- ● Pruning shears – Small, sharp pair for gently trimming excess foliage or dead blooms.
- ● Garden gloves – 1 pair (nitrile or cotton) to protect hands from prickly vines.
- ● Sunlight or grow lights – Ensure plants receive 6–8 hours of direct sunlight daily (or supplement with LED grow lights if indoors).
- ● Pollen transfer tools – Soft paintbrush or cotton swab for hand-pollination experiments.
- ● Labeling tags – To mark specific flowers/buds for tracking progress.
- ● Tripod or stabilizer – For steady macro photography in windy conditions.
- ● Potting soil & fertilizer – Balanced 10-10-10 or compost tea to boost plant health.
- ● UV flashlight – Reveals pollen patterns under blacklight (fun for science lovers!).
- ● Field guide or app – Like iNaturalist or PlantNet to cross-reference observations.
How to identify and support each stage of pumpkin flower development
Recognizing these stages helps you boost pollination and fruit set—here's what to watch for.
🌱 Step 1: Locate the Early Bud Stage
Pumpkin vines produce tiny, fuzzy green buds about 1 inch long along the main stem and tendrils. These appear 3-4 weeks after transplanting, when vines have 4-6 leaves. The buds feel slightly soft when gently squeezed—harder buds won't open properly.
Here's the thing—these buds are fragile. A strong breeze or rough handling can damage them before they bloom. I always check vines daily at this stage, especially if your garden gets afternoon gusts. Look for three distinct sections on each bud: the base, middle swelling, and pointed tip—this is your confirmation it's ready to develop.
☀️ Step 2: Observe the Male and Female Bloom Differentiation
Male flowers appear first with long, thin stems and no swelling at the base. Their buds open into bright yellow blooms with no visible fruit structure. Female flowers show up 2-3 days later—they have a small, marble-sized swelling at the base where the fruit will form. This swelling is your key identifier.
Real talk: I used to get confused and prune male flowers thinking they were deformed. But male flowers actually help pollinate females! Let them bloom and die naturally—they're essential for fruit development. Watch for 3-5 female flowers appearing before the first fruit sets, as each female bloom only produces one pumpkin.
💧 Step 3: Support Pollination During Full Bloom
Female flowers open in the morning and last only 24 hours. Their petals are slightly larger than males, with that distinctive swollen ovary at the base. The instant you see a female bloom, gently shake the vine or use a small paintbrush to transfer pollen from male flowers to the female stigma. Do this by 10 AM for best results.
If you're growing in a greenhouse or have poor bee activity, hand-pollination is critical. I keep a small paintbrush nearby and pollinate every female bloom I see. You'll know it worked when the ovary begins swelling within 48 hours—this means fertilization has occurred. The petals will wilt and fall off naturally as the fruit develops.
⏰ Step 4: Monitor Post-Bloom Fruit Development
After successful pollination, the ovary grows rapidly into a tiny pumpkin. The stem where it attaches will thicken and harden—this is your confirmation it's developing properly. Watch for new leaf growth near the fruit, as this indicates the vine is supporting the developing pumpkin.
Here's where it gets tricky: if you see female blooms that don't set fruit after 3-4 days, hand-pollinate them again. Sometimes pollen isn't transferred properly the first time. You'll also notice some blooms drop naturally—this is normal, as vines produce more flowers than they can support. Focus your energy on the 3-5 healthiest developing fruits per plant.
Tips & tricks for perfect pumpkin flower development
Took me years of trial and error to figure out these simple tricks that'll help your pumpkins thrive from bud to fruit.
Bud Protection: Those tiny 1-inch buds in Step 1 are more delicate than you'd think. I've lost entire crops because I didn't realize how easily they're damaged. Use soft garden gloves when inspecting vines and avoid working near them during windy afternoons. A light spray of water in the morning can also help strengthen buds by increasing humidity around them. The three-section structure (base, middle, tip) is your quality control—if any section feels uneven, it won't develop properly.
Male Flower Strategy: Here's what nobody tells you—male flowers aren't just decorative. In Step 2, let those first blooms die naturally on the vine. They produce pollen that's essential for fertilizing female flowers. I used to prune them thinking they were deformed, but they're actually working behind the scenes. Keep 3-5 male flowers per plant to ensure proper pollination for your female blooms, which only produce one pumpkin each.
Pollination Timing: The 24-hour window for female blooms in Step 3 is non-negotiable. I set a reminder on my phone for 10 AM sharp to check for new female flowers. Use a soft paintbrush (not your finger!) to transfer pollen—your hands can transfer oils that inhibit fertilization. Watch for that ovary swelling within 48 hours as confirmation it worked. The petals wilting naturally is your second sign of successful pollination.
Fruit Development Focus: After pollination, don't get distracted by new blooms. In Step 4, prioritize the 3-5 healthiest developing fruits per plant. I've seen gardeners try to support too many pumpkins, which weakens the vine. Look for that stem thickening at the fruit attachment point—this is your sign the plant is properly supporting the fruit. If you see new leaf growth near developing pumpkins, that's a good indicator everything's on track.
Pro Tips for Pumpkin Flower Stages
- Took me years of trial and error to figure out these simple tricks that'll help your pumpkins thrive from bud to fruit.
- Bud Protection: Those tiny 1-inch buds in Step 1 are more delicate than you'd think.
- Male Flower Strategy: Here's what nobody tells you—male flowers aren't just decorative.
Frequently asked questions
Got questions about pumpkin flower stages? You’re not alone! Here are some of the most common queries gardeners and enthusiasts ask—plus quick, practical answers to help you navigate each phase like a pro.
How long does it take for pumpkin flowers to go from bud to bloom?
Most pumpkin flowers take 3 to 5 days to transition from a tight bud to a fully open bloom, depending on warmth and sunlight. Morning sun accelerates the process—buds may even unfurl overnight if conditions are ideal. Watch for yellow or orange petals peeking out as the first sign!
Why aren’t my pumpkin flowers opening at all?
If buds stay closed, check for these culprits: cool temps (below 70°F), low light, or overwatering (which can cause rot). Ensure your pumpkins get 6+ hours of direct sun daily and water at the base—not the leaves—to avoid fungal issues. A little patience helps too—some varieties bloom slower!
Do pumpkin flowers only bloom once?
Yes! Each pumpkin flower has a 24-hour lifespan—they open in the morning, wither by evening, and drop by the next day. This is why you’ll see male and female flowers appearing in waves. Pro tip: Hand-pollinate female flowers (with tiny pumpkins at their base) by transferring pollen from males with a paintbrush for better fruit set.
What’s the difference between male and female pumpkin flowers?
Here’s a quick cheat sheet:
Male Flowers
Female Flowers
No swelling at the base
Small pumpkin (1–2 inches) at the base
Stems are long and slender
Stems are shorter, thicker
Female flowers are rarer—once you spot one, it’s prime time to pollinate!
Can I save pumpkin flowers for crafts or cooking?
Harvest blooms in the morning (when they’re freshest) and use them for:
- Floral arrangements: Pair with greenery for a rustic look.
- Edible garnishes: Petals add a mild, earthy flavor to salads or cocktails.
- DIY remedies: Dried petals can be steeped in tea for relaxation.
Just avoid pesticides if eating them!
Wrapping up and next steps
Understanding the pumpkin flower stages—from budding to seed development—isn’t just fascinating; it’s your secret weapon for a thriving harvest! 🌱 Whether you’re a seasoned gardener or a curious beginner, recognizing each phase ensures you maximize pollination, boost yields, and even troubleshoot issues early.
Now that you’re armed with this visual guide, why not take the next step? Try tracking your own pumpkin’s journey with a simple sketch or journal—you’ll be amazed at how rewarding it feels to witness nature’s cycle firsthand!