
Blooming
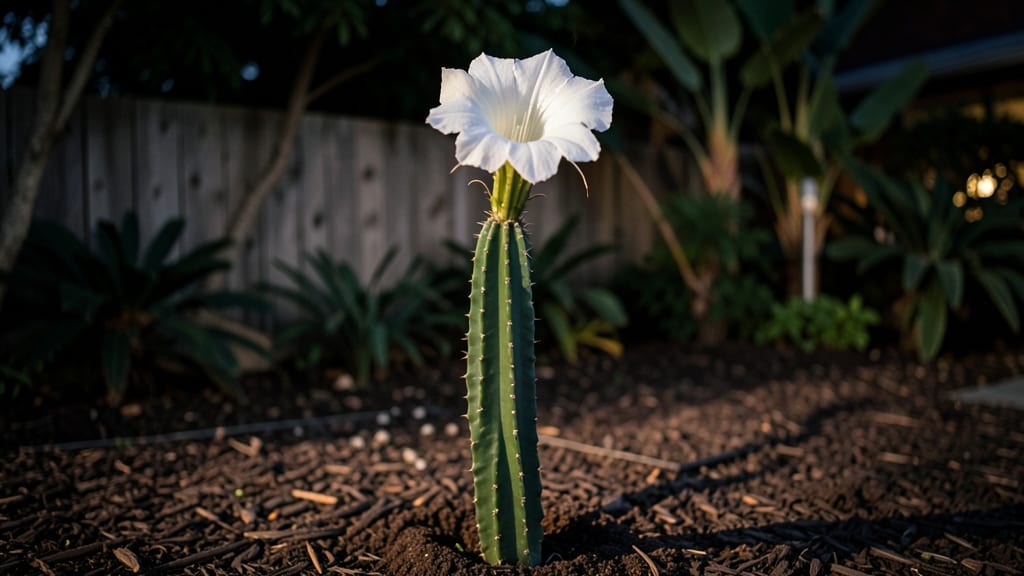
There's nothing quite like the thrill of watching night-blooming cereus flowers unfurl under the moonlight—that ethereal spectacle transforms any garden into a magical stage. 🌙 I still remember the first time I saw my Selenicereus burst into fragrant white blooms at midnight, as if the plant itself had been waiting for darkness to perform.
These tropical beauties aren’t just stunning; they’re surprisingly resilient once you know their secrets.
The key to success starts with mimicking their natural habitat: bright, indirect light (think east-facing windows or dappled shade), warm nights above 60°F, and well-draining soil that mimics desert conditions.
Most gardeners overwater these cacti, but the trick is letting the soil dry completely between waterings—root rot is their Achilles’ heel. With the right balance, you’ll coax those dramatic, moonlit displays year after year.
What you’ll end up with are showstopping blooms that last just one night but leave an unforgettable impression—think creamy petals, intoxicating fragrance, and a garden that feels like a secret tropical escape.
The best part? These plants reward patience with low-maintenance growth and dramatic rewards that even city balconies can handle.
Whether you’re growing in pots or in-ground, the same principles apply: protect from frost, feed lightly during active growth, and avoid drafts. The payoff isn’t just beauty—it’s the joy of growing something that feels like a natural wonder. Let’s get those blooms going!
📚 In This Guide
- What you need
- Instructions
- Tips and common mistakes
- Wrapping up and next steps
What you need
- ● Night-blooming cereus plants: Choose healthy, mature plants (e.g., Hylocereus or Selenicereus varieties) from a reputable nursery. (1-3 plants per container or garden spot)
- ● Well-draining cactus/succulent potting mix: Avoid heavy garden soil—opt for a blend with perlite, pumice, or coarse sand. (10-12 lbs per 5-gallon container)
- ● Containers (if not planting in-ground): Use terracotta, fabric, or plastic pots with drainage holes. (5-10 gallon size for mature plants)
- ● Slow-release fertilizer: Look for a balanced, low-nitrogen formula (e.g., 5-10-10 or 3-4-6). (1-2 tbsp per plant, applied every 2-3 months)
- ● Support stakes or trellis: For climbing varieties (e.g., Selenicereus grandiflorus), use 4-6 ft tall stakes or a lightweight trellis.
- ● Garden trowel or small shovel
- ● Pruning shears (sterilized with rubbing alcohol)
- ● Watering can with a narrow spout (or hose with a gentle spray nozzle)
- ○ pH testing kit (optional but helpful for soil health)
- ● Grow lights (for indoor cultivation, 12-14 hours/day)
- ● Mulch (gravel or bark chips to retain moisture and deter pests)
- ● Humidity tray or pebble tray (for indoor plants in dry climates)
- ● Bloom-enhancing supplements (e.g., potassium-rich additives)
Step-by-step guide to cultivating night blooming cereus flowers
Here's how to coax these ethereal blooms into your garden with precision timing and care.
🌱 Step 1: Select and Prepare Your Plant Variety
Night blooming cereus (Hylocereus spp.) thrives in USDA Zones 10-11, but most gardeners grow them as potted plants that can be brought indoors before frost. Choose a healthy, mature plant with multiple stems—these produce the most dramatic flowers. I always look for plants with 5+ ribs and no signs of rot or pest damage.
If starting from seed, expect 3-5 years before flowering. For quicker results, purchase a grafted plant from a reputable cactus nursery. Grafted plants bloom faster because they combine the hardiness of the rootstock with the flowering vigor of the scion. Avoid wild-collected cuttings—they often carry hidden diseases that spread rapidly.
☀️ Step 2: Provide the Right Light and Temperature Conditions
Night blooming cereus needs bright, indirect light for most of the year to build energy reserves. Place your plant near an east or west-facing window where it gets morning sun and afternoon shade. Too much direct afternoon sun causes sunburn—you'll see white, papery patches on the stems.
During the 6-8 weeks before flowering season (late spring), shift the plant to 12-14 hours of direct sunlight daily. This light exposure triggers the flowering process. Keep daytime temperatures between 70-85°F and nighttime temperatures above 60°F. If your climate drops below 50°F, move the plant indoors immediately—cold stress prevents bud formation.
💧 Step 3: Master the Watering and Feeding Schedule
Watering is where most growers go wrong. From March through September, water deeply when the top 2 inches of soil feel dry. I use my finger to check moisture—if it's dry at that depth, it's time to water. Overwatering causes root rot, which you'll notice as mushy stems and a foul odor. During winter dormancy (October through February), reduce watering to once every 4-6 weeks—just enough to keep the soil slightly moist.
Feed your plant with a balanced 10-10-10 fertilizer diluted to half strength every 4-6 weeks during the growing season. Stop fertilizing in late summer to allow the plant to focus on bud development. I've found that a monthly dose of magnesium sulfate (Epsom salt) in spring boosts flower production—just dissolve 1 teaspoon per gallon of water and apply during watering.
⏰ Step 4: Trigger and Maintain the Flowering Process
Here's the moment that matters: to induce blooming, your plant needs a 12-hour dark period followed by 12 hours of light. Start this cycle 6-8 weeks before your desired bloom time. Place the plant in a dark closet or cover it with a black plastic bag secured with rubber bands for the dark period. Remove the cover or move it to light for the day cycle.
Once buds form (they'll look like tiny green bumps along the ribs), maintain this light cycle religiously. Buds typically open 2-3 nights after they appear. The flowers only last 24 hours, so plan to enjoy them under moonlight or with nighttime lighting. After flowering, reduce watering slightly to encourage new growth for next season.
🌿 Step 5: Prune and Overwinter for Next Season's Blooms
After flowering, trim any dead stems with clean, sharp scissors ½ inch above the base. Remove any yellowed or damaged leaves to redirect the plant's energy. I always prune in early spring (February-March) before new growth begins. Never prune during the flowering cycle—this stresses the plant and can prevent next year's blooms.
For winter care, move potted plants indoors to a cool (50-60°F), bright location. Reduce watering dramatically and avoid fertilizing. Check for pests like mealybugs or scale—these thrive in dry indoor conditions. If you notice webbing or sticky residue, treat immediately with insecticidal soap. With proper winter care, your cereus will reward you with even more spectacular blooms next season.
Tips & tricks for perfect night blooming cereus flowers
Here's what nobody tells you about getting those dreamy blooms—trust me, these details make all the difference.
Light Cycle Precision: The 12-hour dark/light cycle is non-negotiable for blooming. I use a simple timer to automate the process—set it for 12 hours of darkness starting at dusk, then switch to bright light. For indoor growers, a grow light on a timer works perfectly. If your buds aren't forming after 6-8 weeks of this cycle, check your light source: fluorescent bulbs won't cut it—you need full-spectrum LED or sunlight for proper photosynthesis.
Temperature Monitoring: Those 70-85°F daytime temps are crucial for bud development. I keep a small thermometer near my plants—any dip below 60°F at night halts progress. If your home runs cooler, place the plant near a sunny window during the day, then move it to a warmer spot at night. Cold stress is the #1 reason buds fail to open, so don't skip this check, especially in spring when nights can still be chilly.
Bud Formation Inspection: When those tiny green bumps appear along the ribs (Step 4), here's what to watch for: healthy buds should be firm and slightly rounded. If they look shriveled or stay closed after 2-3 nights, your plant might need more light during the day cycle. I've found that gently misting buds with water (just once) helps them open fully—like giving them a little "push" to bloom.
Winter Care Strategy: The 50-60°F winter range is perfect for dormancy, but don't let your plant sit in drafty spots. I place mine near a south-facing window where it gets indirect light all day. The key is consistency—keep watering minimal (every 4-6 weeks) and avoid fertilizing entirely. This resting period actually strengthens the plant for next year's even more dramatic blooms.
Pro Tips for Night Blooming Cereus Flowers
- Here's what nobody tells you about getting those dreamy blooms—trust me, these details make all the difference.
- Light Cycle Precision: The 12-hour dark/light cycle is non-negotiable for blooming.
- Temperature Monitoring: Those 70-85°F daytime temps are crucial for bud development.
Frequently asked questions
Got questions about these enchanting nighttime bloomers? Here’s what you need to know—from timing to troubleshooting!
When do night blooming cereus flowers actually open?
Night blooming cereus typically unfurl their fragrant, star-shaped blooms after sunset, often between 8 PM and midnight, and may last until dawn. Some varieties, like Selenicereus grandiflorus, are especially dramatic, with flowers that can reach 12 inches wide! If yours isn’t blooming at night, check for low light exposure or inconsistent watering.
How long do the flowers last, and can I make them bloom longer?
Each individual flower lasts 1–2 nights, but the plant may rebloom seasonally (spring/summer) if given proper care. To encourage longevity:
- Keep it cool (60–70°F at night) to slow wilting.
- Avoid overwatering—let soil dry slightly between waterings.
- Fertilize lightly with a low-phosphorus mix during growing season.
Why isn’t my night blooming cereus flowering at all?
Common culprits include:
- Too much light: These plants need 12+ hours of darkness to trigger blooming. Keep them away from streetlights or grow lights after dusk.
- Temperature stress: They thrive in 70–85°F days and 55–65°F nights. Drafts or AC vents can shock them.
- Poor nutrition: Lack of potassium or nitrogen can delay blooms. Use a cactus-specific fertilizer in spring/summer.
Are night blooming cereus flowers fragrant? How can I enjoy the scent?
Yes! Their intoxicating, sweet, tropical fragrance (often compared to jasmine or vanilla) peaks at night. To maximize the experience:
- Plant near a patio or bedroom for a natural nighttime perfume.
- Use a small fan to gently circulate the scent indoors.
- Capture the moment: The combination of moonlight and fragrance is magical—try a long-exposure photo!
What are some low-maintenance alternatives to night blooming cereus?
If cereus seems high-maintenance, try these night-blooming (or moon-loving) alternatives:
Plant
Bloom Time
Care Level
Queen of the Night (Epiphyllum oxypetalum)
Midnight–dawn (1 night only!)
Moderate (needs humidity)
Moonflower (Ipomoea alba)
Dusk–dawn (repeats weekly)
Easy (fast-growing vine)
Evening Primrose (Oenothera biennis)
Late afternoon–evening
Very low (self-seeding)
For fragrance, moonflower and queen of the night are top picks—just be ready for their one-night wonder displays!
Wrapping up and next steps
The night-blooming cereus brings magic to your garden with its stunning, moonlit spectacle—just a little patience and care! 🌙✨ Whether you're drawn to their fragrant blooms or their unique growing habits, these plants reward dedication with breathtaking results. Ready to transform your space into a nighttime paradise?
Your next step? Pick a variety that suits your climate and start planning your planting spot—then get ready to witness nature’s own fireworks show! 🌸💡