
Shrubs
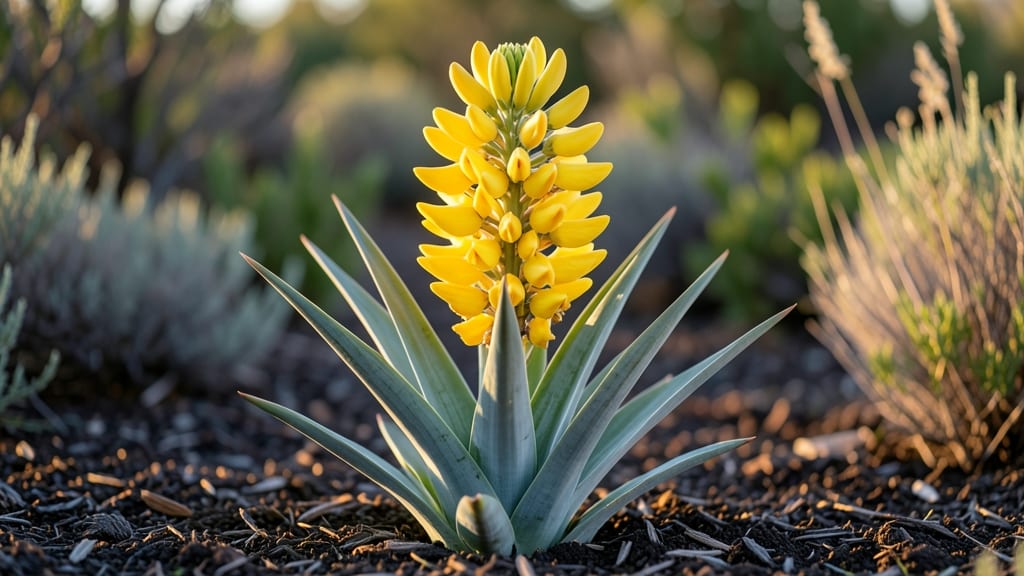
Kangaroo paw flowering starts with the right soil mix—sandy, well-draining, and slightly acidic, just like the native Australian soil these plants crave. 🌱 I’ve watched my own plants transform from stubborn clumps to dramatic, velvety-spiked blooms by mimicking their natural conditions, and the secret lies in that first shovel of soil.
Most gardeners in the Pacific Northwest struggle because they overwater or plant in heavy clay. These plants despise soggy roots—think of them as desert survivors in disguise.
Give them 6 hours of sun daily, protect them from winter winds, and you’ll see those signature paw-shaped flowers emerge by early summer, often lasting until frost.
The payoff? Clusters of bi-color blooms that hummingbirds adore and cut flowers that last weeks in vases. My ‘Green & Gold’ variety even blooms in partial shade, proving these plants are far more adaptable than their reputation suggests.
Here’s where it gets interesting—pruning after flowering boosts next year’s display, and dividing mature clumps every 3-4 years keeps them vigorous. The first step? Soil. Get that right, and the rest falls into place.
📚 In This Guide
- What you need
- Instructions
- Tips and common mistakes
- Wrapping up and next steps
What you need
- ● Kangaroo paw plants (Anigozanthos spp.): 1–3 nursery-grown plants (choose Anigozanthos manglesii or A. flavidus for PNW resilience)
- ● OR seeds (if starting from scratch—germination can take 1–3 months)
- ● Well-draining soil mix: 50% native PNW soil
- ● 30% coarse sand or perlite (critical for preventing root rot!)
- ● 20% compost or aged manure (for nutrients)
- ● Garden tools: Trowel (for transplanting)
- ● Pruners (sterilized with rubbing alcohol)
- ● Garden gloves (to protect from thorns)
- ● Mulch: 2–3 inches of pine bark or gravel (to insulate roots in winter)
- ● Slow-release fertilizer (10-10-10 or organic option like fish emulsion)
- ● Drip irrigation system (kangaroo paws hate soggy feet!)
- ● Frost cloth (for young plants in early spring/fall)
- ● Stakes or cages (if your variety grows tall—up to 4 feet!)
Step-by-step guide to encouraging kangaroo paw flowering in cold climates
Here’s how to coax vibrant blooms from these hardy perennials—even when winter lingers.
🌱 Step 1: Select the Right Variety for Your Zone
Kangaroo paw thrives in USDA Zones 6-10, but Pacific Northwest growers should prioritize frost-tolerant cultivars like Anigozanthos manglesii or A. flavidus. These varieties handle 20-25°F dips without browning, while tropical types (like A. hybridus) struggle below 30°F. Check your microclimate—sheltered spots near south-facing walls stay 5-10°F warmer in winter, extending bloom windows.
I always plant 4-6 plants in clusters to create visual impact and improve pollinator attraction. Space them 18-24 inches apart—crowding leads to leggy stems and fewer flowers. If your soil drains poorly, amend with 20% perlite to prevent root rot, which stunts flowering.
☀️ Step 2: Optimize Sunlight and Soil for Peak Blooms
Kangaroo paw demands full sun (6+ hours daily) for robust flowering, but in cloudy PNW winters, supplement with a reflective mulch (white gravel or aluminum foil) to bounce light onto foliage. Without enough light, plants produce leggy, sparse stems with fewer blooms.
Soil pH should be 6.0-7.0—test yours with a kit. These plants prefer well-draining, sandy loam rich in organic matter. Mix 2-3 inches of compost into the top 6 inches of soil before planting. Avoid heavy clay—it causes waterlogging, which triggers fungal diseases that weaken flowering.
💧 Step 3: Water Deeply but Strategically
Water deeply once a week in summer, aiming for 1-1.5 inches per session. In winter, cut back to every 10-14 days unless soil feels bone-dry. Overwatering in cold months leads to soggy crowns, which rot and prevent spring blooms. You’ll know moisture is right when the top 2 inches of soil feel dry to touch—like a slightly damp sponge.
Mulch with 3 inches of bark or straw after planting to insulate roots. This keeps soil temps 5-10°F warmer in winter, encouraging early spring growth. Remove mulch in late winter to prevent fungal buildup as temps rise above 40°F.
✂️ Step 4: Prune for Next Year’s Blooms
Deadhead spent flower spikes in late summer to redirect energy into root storage for next year. Cut back one-third of the oldest stems in early spring (March) to stimulate new growth. Never prune in fall—this exposes tender new shoots to winter dieback.
Watch for yellowing leaves—this often signals nutrient deficiency (common in sandy soils). Apply a balanced 10-10-10 fertilizer in early spring at half-strength to avoid burning roots. Over-fertilizing in summer leads to leafy growth at the expense of flowers, so skip it after July.
⏰ Step 5: Protect from Late Frosts
Kangaroo paw blooms appear in late spring (May-June), just as late frosts hit the PNW. Cover plants with frost cloth when temps drop below 28°F—even a light freeze can blacken emerging buds. Remove covers by 10 AM to prevent overheating.
Here’s the thing—bloom time varies by elevation. Plants at 1,000+ feet may flower 2-3 weeks later than coastal gardens. Adjust your frost protection timeline accordingly. If buds swell but don’t open, it’s often due to chill stress—water deeply to help recovery.
Tips & tricks for perfect kangaroo paw flowering
Here's what I've learned after years of growing these striking perennials in PNW's unpredictable climate.
Variety Selection: The 20-25°F cold tolerance of Anigozanthos manglesii makes it my top choice for Pacific Northwest gardens. I've found that planting these near south-facing walls adds that extra 5-10°F buffer during cold snaps. For coastal areas, consider A. flavidus—it handles the milder winters better while still delivering vibrant blooms.
Soil Preparation: The 20% perlite amendment mentioned for poor-draining soils is non-negotiable in my experience. I've seen plants in heavy clay completely fail to flower because of fungal issues. For sandy soils, add 2-3 inches of compost to the top 6 inches—this creates the perfect balance of drainage and nutrients that these plants crave for robust flowering.
Winter Care: That 3 inches of mulch recommendation works wonders, but I've learned to remove it precisely when soil temps rise above 40°F in late winter. Too early removal risks fungal growth, while keeping it too late can smother emerging shoots. The key is checking soil temperature with a simple thermometer before removing mulch.
Frost Protection: When covering with frost cloth at 28°F, I always remember to remove it by 10 AM—this prevents overheating that can stress the plants. For high-elevation gardens, I've found that adding a second layer of frost cloth works better, especially when temps dip below 25°F for extended periods.
Pro Tips for Kangaroo Paw Flowering
- Here's what I've learned after years of growing these striking perennials in PNW's unpredictable climate.
- Variety Selection: The 20-25°F cold tolerance of Anigozanthos manglesii makes it my top choice for Pacific Northwest gardens.
- Soil Preparation: The 20% perlite amendment mentioned for poor-draining soils is non-negotiable in my experience.
Frequently asked questions
Got questions about bringing out the best in your kangaroo paw flowering? You’re not alone! Here are answers to the most common queries from PNW gardeners—whether you're troubleshooting, planning, or just curious about these stunning natives.
When is the best time to plant kangaroo paws for optimal flowering?
Plant them in early spring or fall (March–April or September–October) to give roots time to establish before winter. Avoid summer heat stress! If transplanting mature plants, water deeply for 2–3 weeks post-planting to encourage root growth and next-year blooms. Pro tip: Mulch with wood chips to retain moisture and protect roots in winter.
How do I protect kangaroo paws from frost without stunting flowering?
These tough plants handle frost well, but young plants or late blooms may need help. Use lightweight frost cloth (not plastic) on chilly nights (<32°F). Avoid heavy mulch around stems—stick to 2–3 inches of organic mulch. Key: Let them harden off gradually in fall to boost cold resilience.
Why aren’t my kangaroo paws flowering this year?
Common culprits:
- Too much shade—they need full sun (6+ hours/day).
- Over-fertilizing—these natives thrive in poor soil; skip high-nitrogen feeds.
- Young plants—they may take 2–3 years to bloom.
Can I grow kangaroo paws in containers, and will they still flower?
Use a large pot (18"+ diameter) with fast-draining mix (60% cactus/succulent soil + 40% perlite). Dwarf varieties like Anigozanthos humilis thrive in containers and flower just as vigorously as in-ground plants. Tip: Move pots to a sheltered spot in winter to prevent root freeze.
What are some low-maintenance alternatives if kangaroo paws seem high-effort?
If you want frost-resistant, low-fuss blooms, try:
- Sword ferns (Polystichum) – Thrives in shade, evergreen.
- Ocean spray (Holodiscus discolor) – White spring blooms, drought-tolerant.
- Salal (Gaultheria shallon) – Dark leaves, pink spring flowers, deer-resistant.
Wrapping up and next steps
Watching your kangaroo paw flowering thrive in the Pacific Northwest’s chilly climate is a rewarding experience—proof that beauty and resilience go hand in hand! 🌸 With the right soil, sunlight, and care, these unique blooms will not only survive but flourish, adding a touch of exotic charm to your garden.
Now that you’re armed with the know-how, why not take the next step?
- 🌱 Plant your first kangaroo paw this season and track its progress.
- 📸 Share your blooms with fellow gardeners—inspiration spreads!
- 🔍 Explore companion plants to create a stunning PNW-friendly garden.
Your garden’s next masterpiece is just a seed (or cutting) away! 🌿