
Propagation
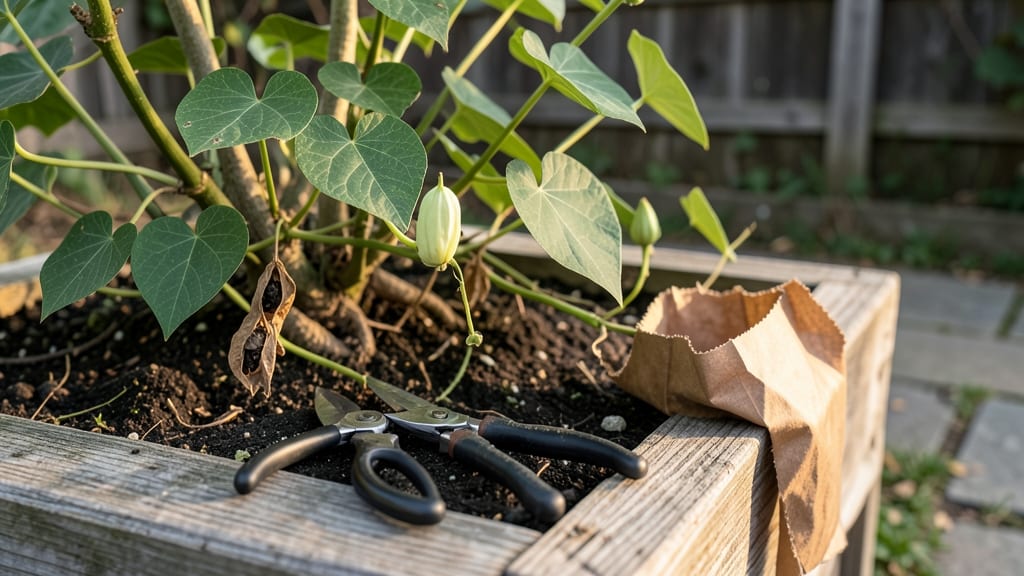
Saving moonflower seeds turns last year’s vines into next season’s dreamy white blooms—if you time it right. 🌙 The trick is waiting for those papery pods to split open naturally, then drying them just enough to preserve viability without risking mold.
I’ve learned the hard way that rushing the process means seeds that won’t sprout, but patience here pays off with free, fragrant vines for years.
You’ll need only three things: sharp scissors, a brown paper bag, and a dry, dark spot to store your seeds. Harvest pods when they’re fully brown and starting to crack open—usually late fall after the first frost—but before they release seeds to the ground.
A single vine can yield 50-100 seeds, so even a small patch gives you plenty for next year’s garden.
Once you’ve collected them, spread the seeds on a screen or paper towel in a warm, dry place for 1-2 weeks to finish drying. Store them in an airtight container with a silica gel packet to prevent moisture buildup.
Properly stored, these seeds stay viable for 3-4 years, though they’ll germinate best if planted fresh.
Troubleshooting is simple: if seeds mold, they were too damp during drying. If they sprout prematurely, your storage space was too warm. Keep them cool (below 60°F) and dry, and you’ll have moonflowers climbing your trellis by midsummer—without spending a dime on new plants.
📚 In This Guide
- What you need
- Instructions
- Tips and common mistakes
- Wrapping up and next steps
What you need
- ● Mature moonflower pods (Ipomoea alba) – Harvest only fully dried, brown pods (they should rattle when shaken). Aim for 5–10 pods for a good seed yield.
- ● Sharp pruning shears or scissors – For cleanly cutting stems without damaging the pods.
- ● Paper bags or brown lunch bags – 2–3 bags (one per pod or a few pods per bag to prevent mold). Avoid plastic—it traps moisture!
- ● Drying tray or mesh screen – A flat, elevated surface (like a cookie sheet or wire rack) to air-dry pods for 1–2 weeks.
- ● Small envelope or seed packet – For storing dried seeds (label it with the date!).
- ● Pencil or permanent marker – To label your pods/seeds with the harvest date and variety.
- ● A dehumidifier or silica gel packets – To speed up drying in humid climates.
- ● Desiccant packet – For long-term seed storage (keeps moisture out).
- ● Magnifying glass – To inspect pods for pests or mold before drying.
- ● Notebook – To track germination rates or notes on growing conditions.
Step-by-Step guide to harvesting and saving moonflower seeds
Moonflowers reward patience with prolific seeds—here's how to collect them properly.
🌿 Step 1: Identify and Select Mature Seed Pods
Wait until the moonflower vines have fully died back in late fall or early winter. The pods will turn from green to a dry, papery brown—this is your cue they're ready. Gently squeeze a pod; if it crumbles easily, it's ripe. Avoid pods that still feel firm or green, as they won't contain viable seeds.
I like to work on a dry day when the pods are completely dry. Wear gloves if you're sensitive to plant fibers, as the pods can be slightly prickly. Harvest pods directly from the vine or from the ground where they've fallen. You'll need about 4-6 pods per plant to ensure good seed yield for next season.
🌱 Step 2: Extract Seeds from the Pods
Lay each pod on a clean, flat surface like a baking sheet or large tray. Use a small knife or your thumbnail to carefully slit open the pod lengthwise—don't cut too deeply, or you'll damage the seeds inside. The pods contain multiple flat, dark brown seeds that resemble tiny beans.
Here's the thing—moonflower seeds are sensitive to moisture, so work quickly. Remove any debris or empty seed casings, then spread the seeds in a single layer on a paper towel. Let them air-dry for 24-48 hours in a warm, dry place away from direct sunlight. You'll know they're properly dried when they feel light and brittle to the touch.
⏰ Step 3: Store Seeds Properly for Next Season
Once the seeds are completely dry, transfer them to an airtight container like a small glass jar or resealable plastic bag. I label mine with the variety and harvest date—moonflower seeds stay viable for 2-3 years if stored correctly. Place the container in a cool, dark spot like a pantry or seed drawer.
Don't refrigerate unless your home gets very humid, as excess moisture will cause mold. Check the seeds occasionally for signs of dampness or pests. If you notice any mustiness or tiny insects, transfer them to a new container immediately. Properly stored seeds should remain dry and ready for planting when spring arrives.
🌱 Step 4: Prepare Seeds for Spring Planting
When you're ready to plant in spring, soak the seeds overnight in lukewarm water to soften their tough outer coating. This step improves germination rates significantly. After soaking, plant them ½ inch deep in well-draining soil, spacing them 6-8 inches apart if growing as annuals or along a trellis.
Moonflower seeds germinate best in 70-80°F soil temperatures. Keep the soil consistently moist but not soggy until germination occurs, which typically takes 10-14 days. Thin seedlings to the strongest one per spot if you planted multiple seeds together. Here's where it gets fun—watch for those first delicate leaves, signaling your moonflowers are on their way to another magical summer.
Tips & tricks for perfect moonflower seed preservation
Saving moonflower seeds successfully comes down to timing and careful handling—here's how to avoid common pitfalls.
Pod Selection: In Step 1, focus on pods that have completely dried and turned papery brown. I learned this the hard way after trying to harvest green pods that yielded no viable seeds. The crumble test is foolproof—if it falls apart easily, it's ready. Harvest on a dry day to prevent moisture from seeping into the pods during handling.
Drying Strategy: The 24-48 hour drying period in Step 2 is crucial for seed viability. Spread seeds in a single layer on paper towels and place them in a warm, dry spot—like on top of your fridge or near a sunny window (but not in direct sunlight). I use a small fan on low to circulate air and speed up the process. Check daily; seeds should feel light and brittle when fully dried.
Storage Wisdom: When storing seeds in Step 3, consider adding a small packet of silica gel to your airtight container. This extra moisture absorber extends viability beyond the 2-3 year mark. I also recommend writing the harvest year on the container—this helps track seed age and germination potential. Store containers in a pantry drawer or seed vault rather than the fridge unless you live in a particularly humid climate.
Spring Planting Prep: For Step 4, I've found that soaking seeds in lukewarm water with a few drops of hydrogen peroxide (1 tsp per cup of water) helps prevent mold while softening the seed coats. This optional step works especially well for older seeds. After planting at ½ inch depth, consider covering the area with a light layer of straw mulch to maintain consistent moisture during the 10-14 day germination period.
Pro Tips for Save Moonflower Seeds
- Saving moonflower seeds successfully comes down to timing and careful handling—here's how to avoid common pitfalls.
- Pod Selection: In Step 1, focus on pods that have completely dried and turned papery brown.
- Drying Strategy: The 24-48 hour drying period in Step 2 is crucial for seed viability.
Frequently asked questions
When is the best time to harvest moonflower seeds?
The ideal time to harvest moonflower seeds is in late fall or early winter after the pods have fully dried and turned brown on the vine. Wait until the pods split open naturally—this usually happens on its own when the seeds are fully mature. Harvesting too early can result in seeds that won’t germinate properly.
How long can I store saved moonflower seeds before planting?
Moonflower seeds remain viable for 1–2 years if stored correctly in a cool, dry place (like a sealed container in the fridge). For best results, plant them within 6 months of harvest. Test a few seeds annually to check germination rates—if they’re slow to sprout, it may be time to collect fresh seeds!
What if my moonflower pods don’t open on their hand?
If the pods stay closed, they’re likely not fully ripe. Try these tricks:
- Wait longer: Leave them on the vine a few more weeks.
- Gently squeeze: Press the pod between your fingers—if seeds rattle inside, they’re ready.
- Dry them indoors: Hang pods upside down in a paper bag for 1–2 weeks to speed up drying.
Can I save moonflower seeds from a store-bought plant?
Yes, but check the plant’s origin first! If it’s a hybrid (like ‘Starlight’ or ‘Moonlight’), seeds may not grow true to the parent plant. For consistent results, save seeds from open-pollinated varieties grown in your local climate. Store-bought plants are often hybrids, so expect surprises in the next generation!
Do moonflower seeds need cold stratification before planting?
Moonflower seeds do not require cold stratification—they germinate best when sown directly in warm soil (60–70°F). Simply plant them ½ inch deep after the last frost. For faster sprouting, soak seeds in warm water for 24 hours before planting. Cold weather can actually slow or prevent germination, so avoid planting until the soil is thoroughly warmed.
Wrapping up and next steps
Saving moonflower seeds is a rewarding way to bring next year’s blooms to life with minimal effort!
By carefully harvesting, drying, and storing the pods, you’ll ensure a steady supply of these enchanting vines—ready to climb and flourish again. Don’t let this simple process intimidate you: with patience and a little know-how, you’re just steps away from a garden full of magical, moonlit blooms.
Now that you’re equipped with the know-how, give it a try this season! Grab those dried pods, follow the steps, and watch your moonflower seeds transform into next year’s garden highlights. Happy growing! 🌙✨