
Picking
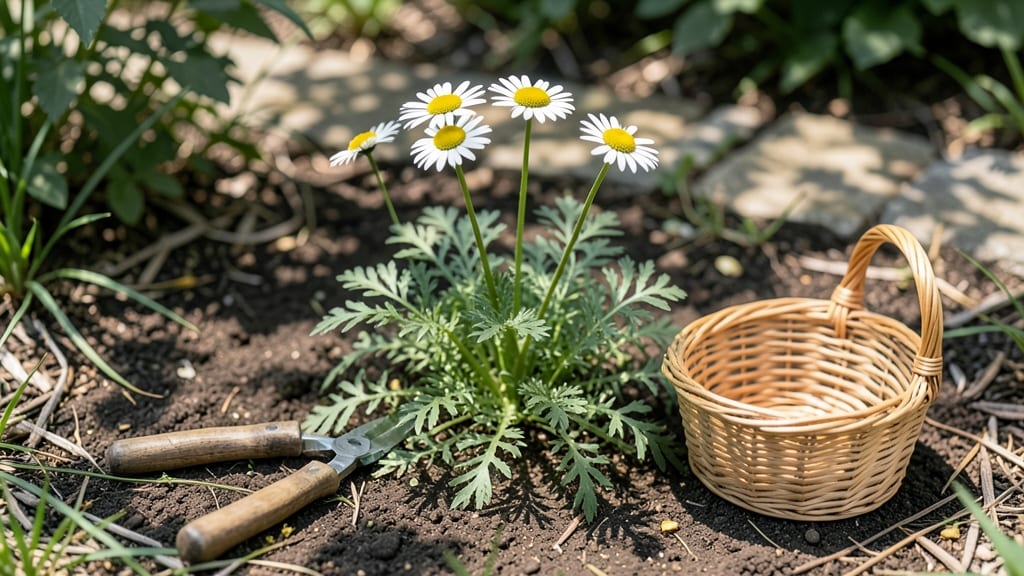
Harvesting chamomile flowers at their peak means waking up early or staying out late—when dew clings to petals and the sun casts golden light. ✨ The secret to flavorful chamomile lies in timing: harvest just as flowers open fully in the morning or late afternoon, before heat dulls their delicate sweetness.
I learned this after my first batch tasted bitter—turns out, waiting until noon ruins everything.
You’ll need only three things: sharp scissors or pruning shears, a clean basket or paper bag, and a sunny day with no rain in the forecast. Cut stems just above the next set of leaves to encourage bushier growth, and avoid harvesting when flowers are wet—moisture speeds up spoilage.
My first harvest lasted only a week before turning brown; now I dry them within hours.
The payoff is worth it: chamomile tea with a honeyed depth you’ll never find in stores, or dried flowers for soothing compresses. Properly dried, your harvest keeps its potency for up to a year.
The key is patience—let flowers air-dry in a dark, well-ventilated space for 1-2 weeks, stirring occasionally to prevent mold.
This method works for both German and Roman chamomile, though German types yield more flowers per stem. For larger harvests, space plants 12-18 inches apart and harvest every 2-3 weeks during peak bloom. Your garden—and your tea cup—will thank you.
📚 In This Guide
- What you need
- Instructions
- Tips and common mistakes
- Wrapping up and next steps
What you need
- ● Chamomile plants: Healthy, mature German (Matricaria chamomilla) or Roman (Chamaemelum nobile) chamomile plants in full bloom. Aim for at least 10–20 plants (or more, depending on your yield goals).
- ● Harvesting tools: A pair of sharp, clean pruning shears or harvesting scissors (sterilized with rubbing alcohol to prevent disease).
- ○ Gloves (optional but recommended)—gardening gloves protect your hands from sap and thorns (especially if harvesting wild chamomile).
- ● Containers for storage: A breathable basket or paper bags (to prevent moisture buildup and wilting). Avoid plastic if drying immediately.
- ● Small mesh bags or envelopes (for long-term storage of dried flowers).
- ● Timing: Harvest only on dry mornings, between 7–9 AM or 4–6 PM (when dew has evaporated but heat hasn’t yet faded the oils).
- ● Labeling supplies: Tiny tags or a marker to label varieties (e.g., "German Chamomile – June 2024").
- ● Drying rack or screen: A clean, shaded area with good airflow (or a dehydrator set to 95°F (35°C) for faster drying).
- ● Fine mesh sieve: For sifting out stems and debris after drying.
- ● Food-safe storage jars: Dark glass or airtight containers to preserve flavor and potency (store in a cool, dark place for up to 1 year).
Step-by-Step instructions for harvesting chamomile at its best
Timing and technique make all the difference when picking these delicate blooms.
🌿 Step 1: Choose the Right Time of Day
The best time to harvest chamomile is early morning after the dew has dried or late afternoon when the sun begins to set. This is when the essential oils are most concentrated, giving you the strongest flavor and aroma. Avoid harvesting during the heat of the day—the flowers will wilt faster and lose potency.
Here's the thing—chamomile blooms open fully in the morning and close slightly by evening. You'll know you've picked the right time when the petals are wide open and the center disc is fully formed but still bright and vibrant. If the flowers feel damp, wait a bit longer for the dew to evaporate.
✂️ Step 2: Select Healthy Flowers for Cutting
Look for fully open, bright white to pale yellow blossoms with no signs of browning or wilting. The center disc should be compact and golden-yellow, not turning dark or fuzzy. I always cut stems that are 3-4 inches long—this gives enough stem for handling while leaving plenty of foliage to regrow.
Skip any flowers that have brown edges or signs of pests. A few damaged blooms won't ruin your harvest, but they'll affect the quality. Real talk: chamomile grows quickly, so if you find a plant with mostly healthy flowers, it's better to harvest a few perfect ones and let the rest mature for the next round.
💧 Step 3: Harvest with Clean Tools
Use sharp, clean scissors or pruning shears to cut the stems just above a set of leaves. This encourages new growth from that node. I always sterilize my tools with rubbing alcohol before harvesting—it prevents spreading disease between plants.
Gently grasp the stem near the base with your thumb and forefinger, then make a clean cut at a 45-degree angle. This increases the surface area for water uptake when drying. Avoid pulling flowers by hand—you'll damage the plant and risk tearing the delicate stems.
☀️ Step 4: Dry the Flowers Properly
Lay the harvested flowers in a single layer on a clean, dry surface in a well-ventilated, shady spot. I use a mesh screen or a piece of breathable fabric to prevent moisture buildup. Keep them out of direct sunlight—too much heat will bleach the petals and degrade the essential oils.
Turn the flowers every 2-3 hours for even drying, which should take about 5-7 days depending on humidity. They're ready when the petals crumble easily between your fingers and the stems snap cleanly. Store the dried flowers in an airtight container away from light to preserve their potency.
Tips & tricks for perfect chamomile harvesting
These little details make the biggest difference in your chamomile harvest's potency and quality.
Timing Secret: In Step 1, if you're harvesting in humid conditions, wait until the flowers are completely dry to the touch—even a slight dampness can accelerate wilting during drying. I've learned this the hard way after losing entire batches to mold! Check the undersides of petals first, as that's where moisture lingers.
Selection Tip: When examining flowers in Step 2, run your finger gently over the petals. Healthy chamomile should feel silky smooth, while damaged flowers will have rough or sticky textures. This quick test helps you spot hidden issues before cutting—especially important if you're harvesting for tea blends where quality matters most.
Tool Technique: For Step 3, if you don't have rubbing alcohol, a simple bleach solution (1 part bleach to 10 parts water) works in a pinch to sterilize tools. Just make sure to rinse thoroughly before harvesting. The key is preventing cross-contamination between plants, which can spread fungal infections that ruin entire harvests.
Drying Strategy: In Step 4, if you're drying indoors with limited ventilation, consider placing a small fan nearby on low setting. This creates gentle airflow without disturbing the delicate flowers—just avoid direct airflow that could scatter them. The 2-3 hour turning schedule becomes even more critical when humidity is high, as moisture can trap inside the petals.
Pro Tips for Harvest Chamomile Flowers
- These little details make the biggest difference in your chamomile harvest's potency and quality.
- Timing Secret: In Step 1, if you're harvesting in humid conditions, wait until the flowers are completely dry to the touch—even a slight dampness can accelerate wilting during drying.
- Selection Tip: When examining flowers in Step 2, run your finger gently over the petals.
Frequently asked questions
Got questions about harvesting chamomile? Here are some answers to common concerns—whether you're a first-timer or a seasoned forager!
When is the best time to harvest chamomile flowers?
The absolute best time is early morning after the dew dries but before the sun gets too hot—around 8–10 AM. Late afternoon (4–6 PM) also works, as the flowers are fully open and fragrant. Avoid harvesting after rain, as moisture can spoil the petals.
How long does it take for chamomile flowers to regrow after harvesting?
Chamomile is resilient! If you harvest lightly (leaving at least 2–3 inches of stem), new flowers should bloom in 2–3 weeks. For heavy harvests, give the plant 4–6 weeks to recover. Avoid over-picking—your chamomile patch will thank you!
Can I harvest chamomile from my local grocery store or garden center?
Not ideal! Store-bought chamomile is often dried, treated with preservatives, or grown in less-than-ideal conditions. For the best flavor and potency, grow your own or forage from pesticide-free wild patches. If foraging, confirm it’s German chamomile (Matricaria chamomilla), not its lookalike, mayweed.
What should I do if my chamomile flowers are wet or damp after harvesting?
Damp petals mold quickly! Spread them on a clean, dry surface (like a mesh screen or paper towels) in a well-ventilated spot, out of direct sunlight. If humidity is high, use a fan on low to speed up drying. Never store wet chamomile—it’ll ruin your harvest!
How do I know if my chamomile is ready to harvest?
Look for fully open, bright white-to-pale-yellow daisy-like flowers with no green at the base of the petals. The best blooms are 1–1.5 inches wide and smell sweetly herbal. Avoid harvesting buds—they won’t dry well and lack flavor.
Wrapping up and next steps
Harvesting chamomile flowers at their peak—when the sun kisses the petals at dawn or dusk—isn’t just a skill; it’s an art that unlocks their sweetest, most potent flavors and therapeutic benefits. 🌿 With the right tools, timing, and a little patience, you’ve got everything you need to transform your garden (or a wild patch) into a treasure trove of soothing blooms.
Whether you’re brewing tea, crafting remedies, or drying flowers for later, your effort will pay off in cups of calm and jars of golden goodness.
Now that you’re armed with knowledge, why not take the next step? Try harvesting a small batch today, experiment with drying methods, or even gift your chamomile creations to friends. Every bloom you pick is a step toward a more mindful, flavorful, and self-sufficient lifestyle—and that’s something to be proud of!