
Flowers
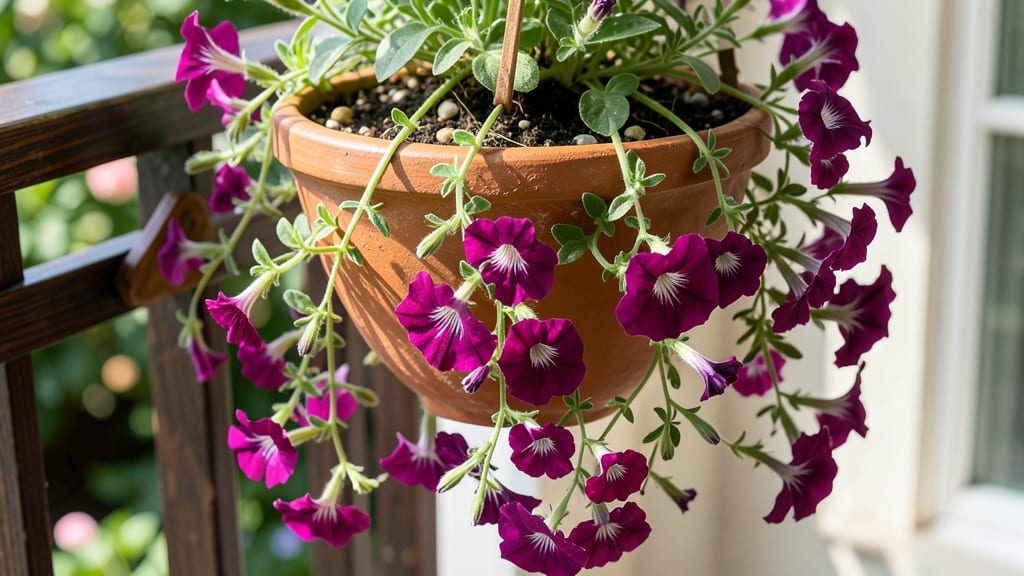
Growing flowers upside down isn't just clever—it's the secret to turning tiny balconies or kitchen corners into bursting displays of color. 🌸 I first tried it after snapping a photo of trailing petunias spilling from a neighbor's hanging basket and thinking, "Why not my windowsill?"
The results were shockingly lush—more blooms than I'd ever seen in the same space, and zero fuss.
You'll need just three things: a sturdy container with drainage, lightweight potting mix, and plants that naturally trail or vine. Petunias, geraniums, and nasturtiums are foolproof starters, while ferns and ivy add texture.
The real magic happens when you hang them upside down—roots dangle freely, absorbing moisture and nutrients without crowding, while stems stretch toward the light. Even my black thumb couldn't kill these.
What you end up with is a vertical garden that thrives where traditional pots fail. Imagine snapdragons cascading from your porch ceiling or pansies brightening a shady patio—all while saving floor space.
The care routine is simpler too: water from below to keep roots hydrated, and pinch back leggy stems to encourage bushier growth. No garden? No problem.
This method works year-round in containers, from spring petunias to winter jasmine, and adapts to any climate. The only rule? Start with plants that love to climb or sprawl naturally. Ready to flip your flower game upside down?
📚 In This Guide
- What you need
- Instructions
- Tips and common mistakes
- Wrapping up and next steps
What you need
- ● Grow bags or fabric pots: 1-2 per plant (10-12" diameter for small flowers, 14-16" for larger varieties like petunias or geraniums).
- ● Tip: Look for breathable, moisture-wicking fabric to prevent root rot. 💡
- ● Upside-down planter kit: 1 kit (includes a container, reservoir, and drainage system).
- ● Alternative: DIY with a 5-gallon bucket, drill, and hardware cloth for drainage. 🔧
- ● High-quality potting mix: 1 bag (lightweight, well-draining mix like cactus/succulent blend or add perlite/vermiculite for aeration).
- ● Slow-release fertilizer: 1 packet (osmocote or similar, mixed into the soil at planting).
- ● Watering can or spray bottle: 1 (with a fine rose nozzle for gentle watering).
- ● Floral wire or twist ties: Small pack (to secure stems to the planter’s holes).
- ● Petunias 🌸
- ● Geraniums 🌺
- ● Ivy 🍃
- ● Begonias 🌼
- ● Lobelia 💙
- ● Nasturtiums 🌻
- ● Self-watering reservoir add-on (for busy gardeners).
- ● LED grow lights (if indoors with limited sunlight).
- ● Decorative paint or markers (to label your upside-down creations!).
- ● Hanging hooks/brackets (for wall/mounting setups).
Step-by-Step instructions for cultivating inverted hanging flowers
Here's how to transform limited space into a lush vertical garden with thriving blooms.
🪴 Step 1: Select and Prepare Your Hanging Containers
Choose 10-12 inch diameter hanging baskets with sturdy handles—plastic or coconut fiber work equally well. I prefer containers with built-in drainage holes since inverted systems rely on gravity for moisture control. If your baskets lack holes, drill ¼-inch holes along the bottom edge to prevent root rot.
Line the basket's interior with 1-2 inches of sphagnum moss (not peat moss—it holds too much moisture). This layer creates a natural barrier that regulates water flow while allowing roots to breathe. Wet the moss thoroughly before adding soil mix, as it will wick up moisture to the roots above.
🌱 Step 2: Layer Soil and Plants for Optimal Growth
Fill the basket halfway with lightweight potting mix, leaving space for your chosen plants. For inverted systems, I recommend compact growers like petunias, geraniums, or trailing verbena—their shallow root systems adapt well. Gently loosen the roots of nursery plants before placing them in the basket.
Create a second soil layer on top, covering the plants completely. The key here is to leave 1-2 inches of space between the soil surface and basket rim. This gap prevents soil from spilling when you hang the basket upside down. Water the soil until it's evenly moist but not saturated.
💧 Step 3: Invert and Establish the Watering System
Hang the basket from a sturdy hook or ceiling mount, ensuring the drainage holes face downward. Immediately after inversion, you'll notice water begins to pool at the bottom—this is normal and essential. The roots will grow downward into this reservoir, accessing moisture as needed.
Fill a shallow tray or saucer beneath the basket with 1-2 inches of water. The potting mix should absorb moisture through capillary action, keeping the root zone consistently damp. Check water levels daily during the first week, topping off as needed. Over time, the system will self-regulate, requiring water only every 2-3 days.
☀️ Step 4: Position for Light and Monitor Growth
Place your inverted blooms in a location receiving 4-6 hours of direct sunlight daily. South or west-facing windows are ideal, but avoid harsh afternoon sun that can scorch delicate petals. Rotate the basket quarter-turn weekly to prevent uneven growth toward the light source.
Watch for new growth emerging from the soil surface—this confirms your plants are adapting to the inverted position. Within 2-3 weeks, you should see vibrant foliage and the first signs of blooming. If leaves appear yellow or wilted, reduce water in the reservoir slightly; over-saturation leads to root suffocation.
Tips & tricks for perfect inverted hanging flowers
Mastering this upside-down gardening technique takes just a few clever adjustments—here's how to make it foolproof.
Container Stability: Don't underestimate the weight of a water-filled basket! Use a hook rated for at least 10 pounds and position it over a sturdy tray. I've seen plastic baskets tip when overwatered—always check your hanging hardware can support the wet weight. For extra security, add a second hook or use a decorative ceiling mount with built-in support.
Soil Layering Secret: The 1-2 inch gap between soil and basket rim in Step 2 is non-negotiable—it prevents soil spillage when inverted. For extra insurance, create a small ledge by folding a strip of landscape fabric around the basket's inner edge before adding soil. This hidden barrier catches any loose soil that might escape during watering.
Watering Wisdom: That 1-2 inches of water in the reservoir should never touch the moss layer—it should only wick upward through capillary action. If you notice water pooling at the moss-soil interface, reduce the water level slightly. Over time, your plants will regulate perfectly, but during the first week, check daily to prevent root suffocation from excess moisture.
Light Rotation Hack: The quarter-turn weekly rotation in Step 4 isn't just about even growth—it's also a way to monitor your plants' health. If you notice leaves turning toward one side, it's a sign they're reaching for light. This simple rotation prevents leggy growth and ensures your blooms develop symmetrically while maximizing their exposure to those critical 4-6 hours of sunlight.
Pro Tips for Growing Flowers Upside Down
- Mastering this upside-down gardening technique takes just a few clever adjustments—here's how to make it foolproof.
- Container Stability: Don't underestimate the weight of a water-filled basket!
- Soil Layering Secret: The 1-2 inch gap between soil and basket rim in Step 2 is non-negotiable—it prevents soil spillage when inverted.
Frequently asked questions
Got questions about growing flowers upside down?
You’re not alone—this method is fascinating but can feel a little tricky at first! Below, we’ve rounded up the most common queries to help you bloom like a pro.
Can I grow any flowers upside down?
Not all flowers thrive upside down! Stick to self-supporting varieties like petunias, geraniums, or strawflowers. Heavy blooms (like roses or sunflowers) may struggle—opt for lightweight, trailing types instead. Always check seed packets for "hanging" or "trailing" labels for the best results.
How long does it take for upside-down flowers to bloom?
Timing depends on the plant, but most upside-down flowers follow the same schedule as traditional gardening. Seedlings may take 6–8 weeks to sprout, and blooms can appear in 8–12 weeks. Keep an eye on light exposure—too little slows growth, while too much can stress delicate roots.
Do upside-down flowers need special watering?
Yes! Since roots dangle, watering is critical. Use a spray bottle or drip system to avoid over-saturating the soil. Check moisture daily—upside-down pots dry out faster. Pro tip: Mist roots lightly 2–3 times a week to mimic humidity.
What if my upside-down flowers wilt or droop?
Wilting often signals overwatering or root stress. Let the soil dry slightly between waterings, and ensure the pot is securely hung (roots shouldn’t drag). If drooping persists, trim damaged leaves and adjust light—bright, indirect light is ideal. Most plants bounce back in a week!
Can I move upside-down flowers indoors during winter?
Many upside-down flowers (like trailing pansies) thrive indoors near sunny windows. Use a grow light if natural light is dim, and reduce watering slightly. Just avoid drafts—consistent temps (60–75°F) keep them happy until spring.
Still curious? Drop your questions below—we’re here to help you grow upside-down blooms like a pro!
Wrapping up and next steps
Growing flowers upside down isn’t just a clever trick—it’s a game-changer for small spaces, urban apartments, and creative gardeners! 🌱 With the right setup, you can enjoy lush blooms without traditional soil or a yard.
Whether you’re a beginner or a seasoned plant parent, this method proves that green thumbs thrive in any space.
Ready to bloom where you stand? Start small—pick one plant or a hanging system—and let your upside-down garden flourish. Next, share your progress or dive into elevating your setup with lighting or nutrient tweaks. Your future balcony (or kitchen!) will thank you!