
Flowers
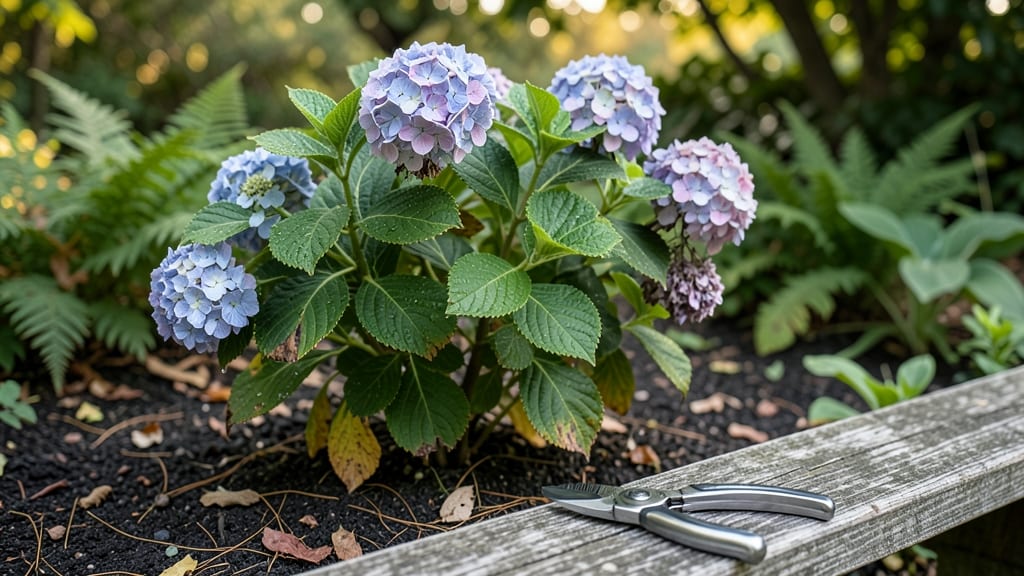
Flower bed clean-up in early spring transforms last year’s chaos into a blank canvas for vibrant blooms. 🌱 I’ve spent years watching neglected beds become overgrown messes—until I learned the 4-step system that makes cleanup feel like a spa day for your garden.
The key? Timing everything right, so you’re not fighting frost or disturbing new growth.
Start with a glove, pruners, and a tarp—that’s it. Remove dead plants by the roots (yes, really), rake out debris, and toss it all in a compost pile. Then fluff the soil lightly with a fork, breaking up compacted spots.
This isn’t about brute force; it’s about giving your bed room to breathe before the growing season kicks in.
By the time you’re done, your flower bed will look like a fresh sheet of paper—ready for mulch, new plants, or even a bold design change. The soil stays healthier, weeds have fewer hiding spots, and your flowers will thank you with longer blooms and fewer pests all season long.
Works for any bed size, from small borders to sprawling landscapes. The only rule? Don’t rush it—spring cleanup is the foundation for summer glory. Let’s get started!
📚 In This Guide
- What you need
- Instructions
- Tips and common mistakes
- Wrapping up and next steps
What you need
- ● Garden gloves (1–2 pairs) – Opt for durable, breathable materials (e.g., nitrile or leather) to protect hands from thorns and debris.
- ● Pruning shears (1–2 pairs) – Bypass pruners (for clean cuts) or anvil pruners (for tougher stems). Choose 5–7" blades for precision.
- ● Garden rake (1) – A bow rake (for leaves/debris) or stiff-bristle rake (for compacted soil). Look for 18–24" head width.
- ● Garden fork or hoe (1) – Helps loosen soil and remove weeds. A broadfork (for aeration) or d-handle hoe (for weeding) works well.
- ● Heavy-duty trash bags (5–10) – 20–30-gallon capacity with sturdy handles for easy disposal of debris.
- ● Wheelbarrow or large bin (1) – For hauling debris. A 1–2 cubic foot wheelbarrow is ideal for small yards.
- ● Water hose with nozzle (1) – A showerhead or adjustable nozzle helps rinse tools and clean up efficiently.
- ● Compost bin or pile – For repurposing organic waste like leaves, small branches, and plant trimmings.
- ● Knee pads – For comfort during extended cleaning sessions.
- ● Garden kneeler – Adds cushioning and mobility.
- ● Soil tester kit – Check pH/nutrient levels before replanting.
- ● Mulch (straw, wood chips, or shredded leaves) – Preserves moisture and suppresses weeds post-cleanup.
- ● Safety glasses – Protects eyes from flying debris or dust.
- ● Portable leaf blower – Speeds up debris removal for larger areas.
Step-by-Step instructions for reviving your flower beds
Here's how to refresh your garden without the overwhelm—just clear, actionable steps.
🌱 Step 1: Remove Debris and Old Growth
Start by clearing away all dead plant material, fallen leaves, and last year's mulch. This prevents disease and pests from overwintering. Use pruning shears for tough stems and a garden rake for loose debris—work in sections if your bed is large.
Watch for hidden perennials that might still be alive beneath the mess. If you're unsure, gently tug on stems—if they pull up easily, they're dead. If resistance meets your fingers, leave it be. This step is all about making space for fresh growth.
✂️ Step 2: Prune Back Perennials and Shrubs
Cut back last year's growth on perennials to about 2-3 inches above the ground. For shrubs, shape them by removing crossing branches and thinning out dense areas. I like to prune in stages—first the dead wood, then the leggy stems, and finally the healthy growth to encourage bushiness.
Look for signs of new growth emerging from the base. If you see fresh green shoots, stop cutting there—you're too close. Pruning too early can remove next year's blooms, so wait until you spot those first signs of life.
💧 Step 3: Refresh the Soil and Add Mulch
Loosen the top 2-3 inches of soil with a garden fork to aerate it. This helps roots breathe and makes room for new growth. Mix in a handful of compost if your soil looks tired—just work it into the top layer, no need to dig deep.
Spread a 2-3 inch layer of fresh mulch over the bed, keeping it 2 inches away from plant stems. Mulch conserves moisture, regulates soil temperature, and keeps weeds down. Use a rake to spread it evenly—you'll see the difference in weed suppression within weeks.
☀️ Step 4: Water and Monitor for New Growth
Give your freshly cleaned bed a deep watering to settle the soil and encourage roots to establish. Water until the top 6 inches of soil feels moist—this might take 10-15 minutes depending on your soil type. Avoid light sprinkles; deep watering prevents shallow roots.
Check back in a week for new shoots. If you see green emerging, your cleanup worked! If not, give it another week—some plants are slow to wake up, especially in cooler springs. This is where patience pays off.
Tips & tricks for perfect flower bed clean-up
Here's what nobody tells you about making your flower beds look effortlessly revived—without the guesswork.
Tool Strategy: Invest in a sturdy pair of pruning shears and a heavy-duty garden rake before you start. I learned this the hard way after struggling with dull tools that made Step 1 feel like work instead of renewal. A good pair of gloves will also save your hands from blisters when dealing with stubborn debris. For larger beds, consider renting a leaf blower for quick cleanup of fallen leaves—it’ll cut your time in half.
Pruning Precision: When cutting back perennials in Step 2, aim for clean cuts just above a leaf node or bud. This encourages new growth from exactly where you want it. If you're unsure where to cut, look for the tiny bump where leaves grow out—this is your target. For shrubs, remove branches that cross or grow inward first, then thin out the rest. This creates airflow and prevents future disease.
Soil Refresh Hack: After loosening the top 2-3 inches of soil in Step 3, sprinkle a thin layer of compost tea (not just compost) over the bed before adding mulch. This gives your plants an immediate nutrient boost while the mulch settles in. If you don't have compost tea, a handful of worm castings mixed into the soil works just as well for microbial activity.
Watering Wisdom: For that 10-15 minute deep watering in Step 4, use a timer on your hose or sprinkler to avoid overwatering. Sandy soil will absorb water faster—check moisture after 10 minutes and add more time if needed. Clay soil may need the full 15 minutes. The goal is to moisten the top 6 inches, not create a muddy mess. A soil probe or screwdriver works great for checking depth without guessing.
Pro Tips for Flower Bed Clean Up
- Here's what nobody tells you about making your flower beds look effortlessly revived—without the guesswork.
- Tool Strategy: Invest in a sturdy pair of pruning shears and a heavy-duty garden rake before you start.
- Pruning Precision: When cutting back perennials in Step 2, aim for clean cuts just above a leaf node or bud.
Frequently asked questions
Got questions about flower bed clean-up?
You’re not alone! Here are answers to the most common concerns to help you tackle your spring revival like a pro.
When is the best time to clean up my flower bed?
The ideal time is early spring (before new growth) or late fall (after frost). Avoid cleaning in peak summer heat or winter, as this can stress plants or disturb dormant wildlife. If your bed is messy in spring, act quickly—waiting too long can lead to pests or disease.
Should I remove all the dead plants and debris?
Yes! Cut back dead or diseased foliage to the ground, but leave some seed heads (if you want wildlife or next year’s blooms). Remove thick layers of mulch or debris to prevent rot. For perennials, trim them back by one-third to encourage fresh growth.
What do I do with all the cuttings and debris?
- Compost it: Most plant debris (no weeds or diseased material) breaks down well in a compost bin.
- Mulch it: Shred larger cuttings and spread them as mulch to retain moisture.
- Dispose of it: Bag diseased plants or weeds and trash them to avoid spreading pests.
How do I clean up without harming beneficial insects?
Leave some leaf litter in shady or wooded areas—it provides shelter for bees, butterflies, and ground-dwelling insects. Avoid disturbing hibernating creatures (like ladybugs) by checking logs or thick mulch before cleaning. Use a stiff brush instead of a hose to avoid displacing soil-dwelling insects.
My flower bed looks messy year-round. What’s a low-maintenance fix?
Try ground covers (like creeping thyme or ajuga) to suppress weeds, or add evergreen shrubs (e.g., boxwood or hemlock) for year-round structure. Mulch heavily (3–4 inches) to smother weeds and retain moisture. Group plants by water needs to simplify care.
What if I find weeds in my flower bed?
Pull weeds before they seed (spring or early summer). For stubborn weeds, use a weed barrier cloth under mulch or try vinegar-based sprays (spot-treat only). Avoid herbicides—they can harm flowers and soil health.
Wrapping up and next steps
A well-maintained flower bed doesn’t just happen—it’s the result of intentional care and a little elbow grease! By following these four simple steps, you’ve taken the first leap toward a vibrant, thriving garden that’ll wow neighbors and bring joy to your outdoor space. 🌸
Ready to see your hard work bloom? Start small: tackle one section at a time, and soon, your flower bed will be the envy of the block. Need inspiration? Check out our seasonal planting guide to keep your garden fresh all year!