
Planting
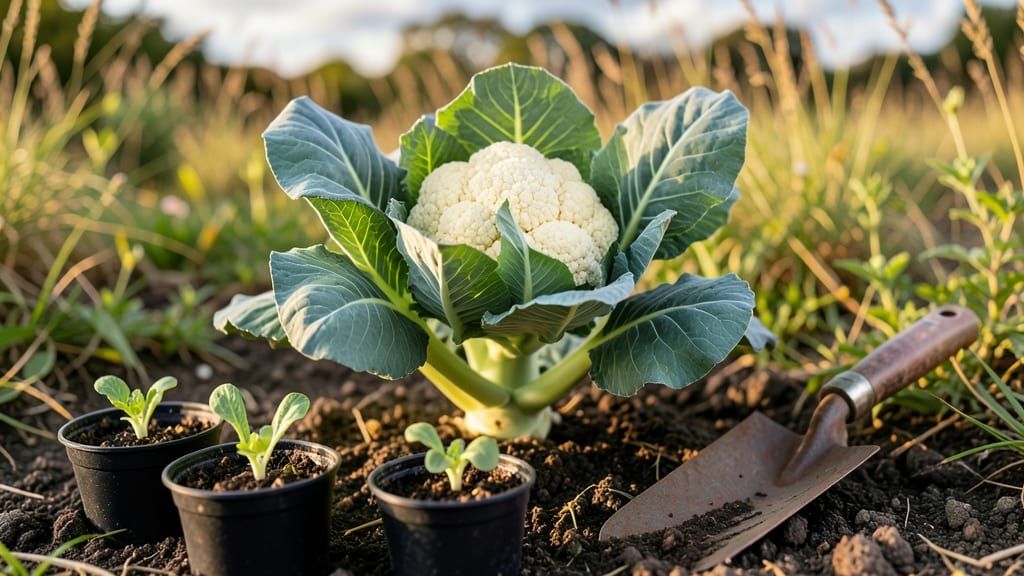
Here are some cauliflower planting tips that’ll turn your garden into a treasure trove of those coveted curds—if you nail the timing, soil, and a little patience with this picky but rewarding plant. 🌱 superstar, even in cooler climates where most veggies struggle.
The secret starts with cool-season soil (60–75°F) and direct sowing or transplants spaced 18–24 inches apart—crowd them, and you’ll fight for heads instead of harvests. Water deeply after planting, then keep the soil moist but never soggy; cauliflower hates soggy feet.
For early starts, use black plastic mulch to warm the soil faster, or try purple or orange varieties like ‘Graffiti’—they’re just as tasty and add color to your plate.
📚 In This Guide
- What you need
- Instructions
- Tips and common mistakes
- Wrapping up and next steps
What you need
- ● Cauliflower seeds or seedlings: Choose cold-hardy varieties like Snowball Y Improved or Purple of Sicily. Start with 3–5 plants for a small harvest or 10+ for a family-sized yield.
- ● Well-draining soil: Aim for a pH of 6.0–6.8. Mix in 2–3 inches of compost or aged manure per square foot of planting area.
- ● Fertilizer: Use a balanced 10-10-10 or organic option (like fish emulsion) at planting and again when heads form.
- ○ Watering can or hose: Cauliflower needs 1–2 inches of water weekly (more in heat). A drip irrigation system (optional but helpful) keeps soil consistently moist.
- ● Garden twine or stakes: For self-blanching varieties, use 12–18-inch stakes to tie leaves together and protect heads from sunburn.
- ● Garden trowel or transplanting spade: For digging holes 12–18 inches apart (rows should be 2–3 feet apart).
- ● Gloves and knee pads: Because gardening is way more comfortable with these!
- ● Pruning shears: To trim yellowing leaves or harvest side shoots.
- ● Row cover or frost cloth: Essential for early spring/fall planting to protect from frost (30–50°F tolerance).
- ● Mulch (straw or wood chips): Keeps soil moist and suppresses weeds.
- ● Epsom salt: A tablespoon per plant boosts magnesium for healthier heads.
- ● Shade cloth (30–50% coverage): Protects heads from direct sun in hot climates.
- ● Seedling heat mat: For indoor starts (if sowing 6–8 weeks before last frost).
Step-by-step guide to planting cauliflower for consistent harvests
Here's how I ensure my cauliflower thrives from seed to table—no more bolting surprises.
🌱 Step 1: Start Seeds Indoors at the Right Time
Plant seeds 8-10 weeks before your last frost date in biodegradable pots (they hate root disturbance). I use a seedling heat mat to keep soil at 70-75°F—this speeds germination to 5-7 days. Fill the pots with sterile seed-starting mix and press seeds ½ inch deep, two per pot since cauliflower germinates unevenly.
Keep the mix damp but never soggy. The moment sprouts appear, move them to a south-facing window or under grow lights for 14-16 hours daily. You'll know they're getting enough light when seedlings stand straight and leaves stay dark green—not pale or stretched. If they lean toward the light, your setup needs adjusting.
🌿 Step 2: Harden Off and Transplant Young Plants
Two weeks before moving outdoors, start hardening off seedlings by placing them outside in partial shade for 1 hour daily, gradually increasing time to full sun exposure over 10-14 days. This toughens stems and prevents transplant shock. Choose a cloudy day for the final move—sunburned leaves mean lost plants.
Transplant when seedlings have 4-5 true leaves and soil temps are above 45°F. Space plants 18-24 inches apart in rows 24-30 inches apart to allow airflow. I dig holes slightly deeper than the root ball and add a handful of compost to each to boost nutrients. Water deeply right after planting to settle soil and remove the pots—cauliflower roots will spread into the soil naturally.
☀️ Step 3: Maintain Ideal Growing Conditions
Cauliflower thrives in cool weather—60-70°F is perfect. If temps climb above 80°F, heads bolt prematurely. I use shade cloth during summer heatwaves and water deeply 1-2 times weekly, aiming for 1 inch of water per week. Let the top 2 inches of soil dry between waterings to prevent rot.
Watch for yellowing lower leaves—this signals nitrogen deficiency. Side-dress with compost tea or a balanced fertilizer (10-10-10) every 3-4 weeks. When heads form, I tie them with garden twine to prevent wind damage. The goal is firm, compact heads—not loose, leafy growth. If heads split or turn yellow, they're ready to harvest.
✂️ Step 4: Harvest and Extend the Season
Cut heads when they're firm and fully formed, leaving 1-2 inches of stem. I harvest in the morning when temps are coolest—this preserves crispness. After cutting, look for side shoots forming at the base. These smaller heads often produce 3-5 weeks later, extending your harvest. Remove any flowering stalks immediately to redirect energy to new growth.
For year-round harvests, I plant succession crops every 2-3 weeks from early spring to mid-summer. In fall, I use row covers to protect plants from frost. With this method, I've harvested cauliflower every 8-10 weeks—no gaps, no wasted effort. The key is consistency in soil prep, watering, and timing.
Tips & tricks for perfect cauliflower planting
Small details make all the difference when growing cauliflower—here's what I've learned after years of trial and error.
Seedling Heat Mat Strategy: The 70-75°F soil temperature from your seedling heat mat isn't just about speeding germination—it's about consistency. I've found that keeping the soil within this range for the full 5-7 days until sprouts appear creates stronger seedlings. The moment you see those first green leaves, transfer them immediately to bright light. I place a small fan nearby to prevent damping off from excess moisture while they're still tiny.
Harden Off Gradually: That 1-hour daily outdoor exposure in partial shade during hardening off is non-negotiable. I've ruined seedlings by moving them too quickly—watch for any wilting or yellowing. On the final day, I test readiness by gently tugging a leaf. If it resists, the plant's tough enough. Pro tip: Harden off in the morning when temps are cooler and the sun isn't as intense.
Transplanting Technique: When you're transplanting those 4-5 true leaf seedlings, dig holes just slightly deeper than the root ball—this encourages new root growth. I make a small mound of soil in the center of each hole and place the seedling on top, then fill around it. This creates better soil contact. After watering deeply, I add a handful of mulch to retain moisture and prevent soil crusting.
Heatwave Rescue: When temperatures climb above 80°F, your cauliflower will bolt. I use lightweight shade cloth (30-40% shade) during peak afternoon sun, removing it in the mornings and evenings. For extreme heat, I water deeply in the early morning to cool the soil, then again in the evening. The key is keeping the soil consistently moist without waterlogging.
Pro Tips for Cauliflower Planting Tips
- Small details make all the difference when growing cauliflower—here's what I've learned after years of trial and error.
- Seedling Heat Mat Strategy: The 70-75°F soil temperature from your seedling heat mat isn't just about speeding germination—it's about consistency.
- Harden Off Gradually: That 1-hour daily outdoor exposure in partial shade during hardening off is non-negotiable.
Frequently asked questions
Got questions about growing your own cauliflower? You're not alone! Here are some of the most common queries—plus straightforward answers to help you cultivate a thriving crop.
When is the best time to plant cauliflower?
Cauliflower thrives in cool weather, so plant it 4-6 weeks before your last frost date in spring (around March–April in most zones) or 60–80 days before your first fall frost (around August–September). Avoid planting in hot summer months—it’ll bolt (go to seed) faster. For year-round harvests, try succession planting in mild climates!
How do I prevent cauliflower from bolting (going to seed) early?
Bolting happens when cauliflower senses heat or stress. To avoid it:
- Choose heat-tolerant varieties like ‘Cheddar’ or ‘Purple of Sicily.’
- Plant in partial shade during hot spells.
- Keep soil consistently moist (but not soggy).
- Avoid over-fertilizing with nitrogen—it speeds up growth and bolting.
Can I grow cauliflower in containers or small spaces?
Cauliflower does well in 5-gallon containers or larger with at least 12–18 inches of depth. Use a lightweight potting mix and place pots in a spot with 6+ hours of sun daily. Just ensure the container has drainage holes to prevent root rot. Dwarf varieties like ‘Snowball Y’ are perfect for small gardens.
What pests or diseases should I watch for, and how do I treat them?
Common issues include:
- Cabbage worms/moths: Handpick pests or use Bt (Bacillus thuringiensis) spray.
- Aphids: Blast off with water or introduce ladybugs.
- Clubroot: Avoid planting in infected soil; use lime to raise pH if needed.
- Powdery mildew: Space plants for airflow and apply neem oil preventatively.
Why is my cauliflower head not forming?
If your cauliflower isn’t forming a tight head, check these fixes:
- Insufficient phosphorus? Add bone meal to the soil.
- Too much nitrogen? Switch to a balanced fertilizer (e.g., 10-10-10).
- Heat stress? Move plants to shadier spots or use shade cloth.
- Overcrowding? Thin seedlings to 18–24 inches apart for better airflow.
Wrapping up and next steps
Growing your own cauliflower is a rewarding journey that combines patience, care, and a little bit of green-thumb magic! 🌱 By choosing the right variety, preparing the soil, and providing consistent care—like proper watering, sunlight, and pest control—you’ll soon enjoy a bountiful harvest.
Whether you’re a seasoned gardener or just starting, these cauliflower planting tips will set you up for success.
Now that you’re armed with the know-how, it’s time to roll up your sleeves and get planting! Start small if you’re new, experiment with different varieties, and don’t forget to savor the delicious results. Happy gardening—your future meals (and bragging rights) will thank you! 🥬✨