
Flowers
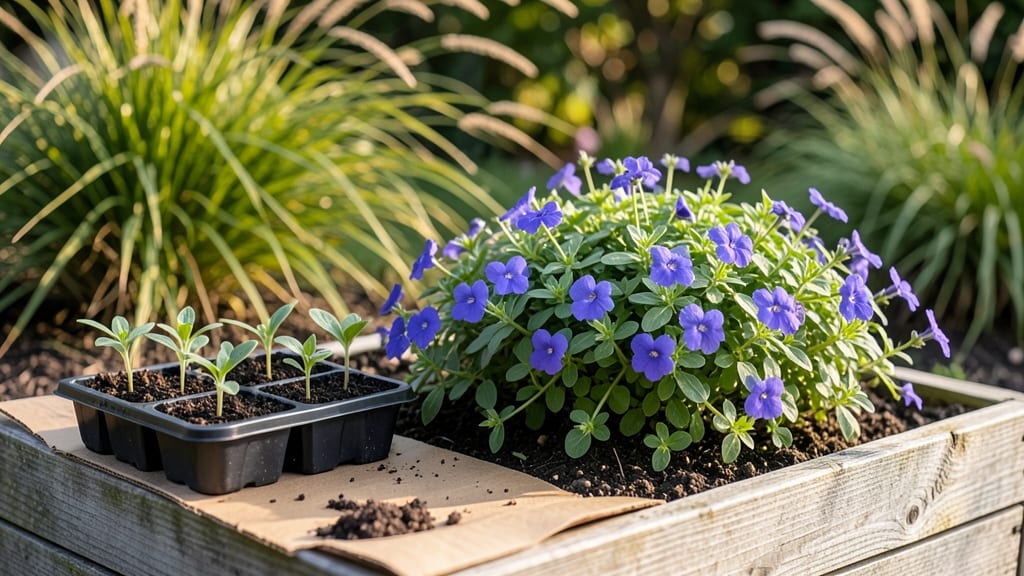
Cardboard in flower beds isn’t just a hack—it’s a game-changer for weed control and soil health. 🌱 I’ve used it in my own garden to slash weeds by 90% without breaking the bank, and the results speak for themselves.
The key lies in how you prep it: removing tape, staples, and glossy ink ensures it breaks down safely while smothering weeds.
Once you’ve flattened the cardboard in your beds, cover it with 2-3 inches of mulch—compost, straw, or wood chips work best. This combo blocks light from weeds while feeding your soil as the cardboard decomposes.
It’s a two-for-one trick that saves time and keeps roots happy, especially in high-traffic areas where weeds love to take over.
You’ll notice fewer weeds popping up within 2-3 weeks, and the soil stays looser and more fertile. The best part? It’s free, reusable, and works in raised beds, pathways, or even under shrubs. Just avoid thick, glossy cardboard—it can leach harmful chemicals into the soil over time.
For long-term beds, refresh the mulch layer every 6-12 months to keep the weed barrier strong. It’s a low-effort way to transform tired soil into a thriving, low-maintenance space. Ready to try it in your garden?
📚 In This Guide
- What you need
- Instructions
- Tips and common mistakes
- Wrapping up and next steps
What you need
- ● Cardboard: 2–3 sheets per flower bed (minimum 22" x 28" per sheet; thicker, corrugated cardboard works best). Recycled, plain, and free of tape/glue is ideal.
- ● Compost or soil: 2–3 inches of nutrient-rich soil or compost to top the cardboard.
- ○ Mulch (optional but recommended): Straw, wood chips, or shredded leaves (1–2 inches thick) to retain moisture and suppress weeds.
- ● Garden gloves: A pair to protect your hands while handling cardboard or soil.
- ● Scissors or box cutter: For cutting cardboard to fit snugly around plants or edges.
- ● Watering can or hose: To keep the cardboard damp before planting.
- ● Landscape fabric (cut to size) – If you want an extra weed-blocking layer under the cardboard.
- ● Plant markers or stakes – To label and support young plants.
- ● Organic fertilizer – A sprinkle on top of the soil for a nutrient boost.
- ● Edging tool – To create clean lines around flower beds.
Step-by-step guide for using cardboard as a weed-blocking barrier
Here's how to create a weed-free foundation that actually supports root health.
🌱 Step 1: Select and Prepare the Cardboard
Choose unbleached, plain cardboard without glossy coatings or tape—these can leach chemicals into your soil. Newspaper or delivery boxes work well, but avoid cardboard with colored ink or plastic liners. Cut sheets to fit your flower bed dimensions, leaving 2-3 inches of overlap between pieces for a seamless barrier.
Break down any cardboard tubes or corrugated sections to create a uniform, flat layer. The goal is ¼ inch thickness—thicker sections won't break down quickly enough, while thinner areas may tear when watered. Real talk: if it feels flimsy, double up in high-traffic areas where weeds love to sprout.
🌿 Step 2: Lay the Cardboard in Flower Beds
Remove all existing weeds and debris from the bed before placing the cardboard. You'll see roots and small weeds—pull them now to prevent them from growing through your new barrier. Position the cardboard directly on the soil surface, overlapping edges by at least 1 inch to eliminate gaps where weeds can push through.
For established beds, tuck the edges slightly into the soil along the perimeter to anchor the cardboard and prevent shifting when you water. If your bed has slopes or uneven areas, fold the cardboard to follow the contours—this keeps it in place and maintains consistent thickness. Here's the thing: don't bury the cardboard. Burying it creates an anaerobic layer that can trap moisture and cause rot.
💧 Step 3: Water Thoroughly to Activate the Barrier
Water the cardboard immediately after installation to help it adhere to the soil and begin breaking down. The moisture triggers the cardboard fibers to soften and settle, creating a tight seal against weeds. Aim for ½ inch of water evenly distributed—this ensures the entire layer is saturated without becoming waterlogged.
You'll notice the edges curl slightly as the cardboard absorbs moisture. This is normal and actually helps the barrier stay in place. After watering, wait 24 hours before adding mulch or plants. This gives the cardboard time to stabilize and prevents it from shifting when you work in the bed. Don't skip this step—rushing leads to gaps where weeds will eventually find their way through.
☀️ Step 4: Add Mulch for Long-Term Weed Control
Spread a 2-3 inch layer of organic mulch (like straw or shredded leaves) over the cardboard to block light completely and prevent weed seeds from germinating. The mulch also helps retain soil moisture and improves the bed's overall health. Choose a mulch that complements your garden's aesthetic—pine straw for a natural look or cocoa hulls for a rich, dark finish.
Press the mulch lightly into the cardboard's edges to create a seamless surface. You'll see the mulch settle slightly over time, so plan to refresh it annually in the spring. This layer works in tandem with the cardboard: while the cardboard blocks established weeds, the mulch prevents new ones from taking hold. Real talk: if you notice mulch pulling away from the edges, tuck it back in—even small gaps let weeds sneak through.
✂️ Step 5: Maintain and Monitor the Barrier
Check the cardboard barrier every 2-3 weeks during the growing season to ensure it remains intact. Look for tears, shifts, or areas where mulch has pulled away. If you spot gaps, overlap additional cardboard pieces and secure them with landscape pins if needed. This proactive approach keeps weeds at bay and maintains the bed's neat appearance.
As the cardboard breaks down over 6-12 months, it enriches the soil with organic matter, improving its structure and fertility. You'll notice the soil becoming darker and looser as the fibers decompose. Here's where it gets fun: once the cardboard fully integrates, you can remove it and plant directly into the enriched soil—no need to dig or disturb the roots of your existing plants.
Tips & tricks for perfect cardboard weed barriers
Here's what nobody tells you about making this method work flawlessly.
Material Selection Tip: Look for corrugated cardboard—it's sturdier than flat sheets and breaks down more predictably. I've found that delivery boxes with minimal tape work best because they're already cut to size. If you're using corrugated cardboard, flatten it completely before installation to prevent uneven settling. The goal is that ¼ inch thickness throughout, so don't skip this flattening step—it's what keeps your barrier effective for the full 6-12 months.
Pre-Installation Prep: Before laying down your cardboard, give it a quick soak in water for 5-10 minutes if you're working in dry conditions. This pre-wetting helps the fibers soften immediately, creating a tighter seal against weeds. I learned this the hard way after installing a barrier during a heatwave—it took weeks to properly adhere. The 24-hour stabilization period becomes much more reliable when you start with pre-moistened cardboard.
Edge Management Strategy: The most common failure point is at the edges where mulch pulls away. My game-changer? Use small landscape pins or even bent wire to secure the cardboard corners before adding mulch. This prevents shifting when you water or when roots expand. For sloped areas, fold the cardboard to follow the contour—this creates a natural anchor that stays put even after heavy rains.
Mulch Layering Technique: When adding that 2-3 inch layer of mulch, press it firmly along the edges to create a physical barrier that prevents weeds from pushing through gaps. I like to use a flat board or the back of a rake to press the mulch into the cardboard's edges—this creates a seamless surface that looks professional and works effectively. The key is maintaining that continuous barrier without any breaks where weeds could establish themselves.
Pro Tips for Cardboard In Flower Beds
- Here's what nobody tells you about making this method work flawlessly.
- Material Selection Tip: Look for corrugated cardboard—it's sturdier than flat sheets and breaks down more predictably.
- Pre-Installation Prep: Before laying down your cardboard, give it a quick soak in water for 5-10 minutes if you're working in dry conditions.
Frequently asked questions
Got questions about using cardboard in your flower beds?
Here are some of the most common ones—plus clear, practical answers to help you get the best results!
1. How long does cardboard last as a weed-blocking barrier?
Cardboard typically breaks down in 6 months to 2 years, depending on thickness and climate. In hot, moist conditions, it decomposes faster. For longer-lasting protection, layer 2-3 sheets or pair it with mulch. Replace it if it starts to tear or mold excessively.
2. Should I remove all labels and tape from the cardboard first?
Absolutely!
Ink, tape, and staples can leach chemicals into the soil, harming plants. Use plain, unprinted cardboard whenever possible. If you must use printed cardboard, flip it label-side down and cover it with mulch or compost to minimize contact with roots.
3. Can I plant directly into cardboard, or do I need to prepare it first?
Yes, but prep it first! Wet the cardboard thoroughly to prevent it from wicking moisture away from roots. Then, poke holes for plant roots and cover with 2-3 inches of compost or mulch to improve soil contact. Avoid planting directly on untreated cardboard—it can block water and nutrients.
4. What if weeds still grow through the cardboard?
Weeds may sprout if the cardboard isn’t fully covered or if seeds were already in the soil. Troubleshoot by:
- Adding a thicker layer of mulch (straw or wood chips work well).
- Using landscape fabric under the cardboard for extra defense.
- Hand-pulling weeds early to prevent seed spread.
5. Are there eco-friendly alternatives to cardboard for flower beds?
If cardboard isn’t available, try these sustainable options:
- Newspaper or junk mail (ink-free if possible).
- Burlap or hemp fabric (biodegradable and breathable).
- Compost or grass clippings (for short-term weed control).
- Living mulches (like clover or creeping thyme) to crowd out weeds naturally.
Wrapping up and next steps
Transforming your flower beds with cardboard isn’t just eco-friendly—it’s a game-changer for weed control and root health! 🌱 By blocking weeds early, you’ll spend less time pulling them and more time admiring your thriving blooms.
Ready to give it a try? Start small with one bed, gather your supplies, and watch your garden flourish with minimal effort. Happy gardening!
- Next step: Pick a sunny spot in your yard and lay down that cardboard—your future garden will thank you!