
Flowers
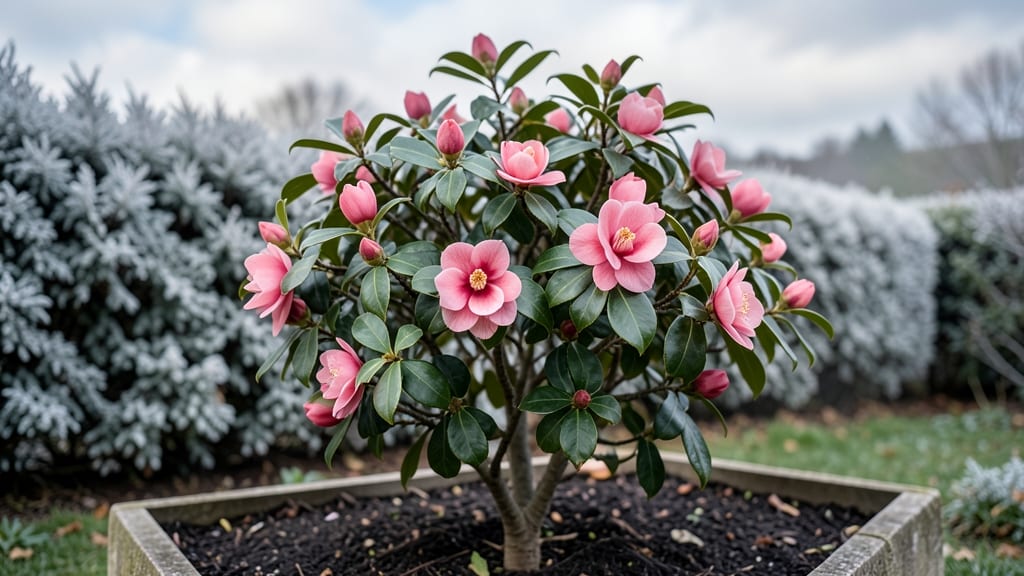
Even in the Pacific Northwest’s dreary winters, where rain turns yards into muddy wastelands, these evergreens stand out like jewels against gray skies, offering their camellia winter flowers from November through March. ✨ March. My first camellia bush taught me that winter gardens aren’t just possible—they can be stunning.
The secret lies in their timing and care. Unlike spring bloomers, camellias need mild winter days (USDA zones 7-9) to trigger buds, but they hate late frosts. Prune after blooming to avoid cutting off next year’s flowers, and protect young plants with burlap wraps if temps drop below 20°F.
The payoff? Months of deep pink, red, or white blooms when everything else is brown.
You’ll end up with a garden that feels alive even in January—no forced bulbs or plastic decorations needed. The fragrance alone (especially in Camellia sasanqua varieties) turns winter walks into sensory treats. Plus, they’re low-maintenance once established, thriving in partial shade where other plants struggle.
Works perfectly for coastal gardens, city courtyards, or even large containers. Here’s how to keep yours blooming reliably through the coldest months—without sacrificing next year’s flowers in the process.
📚 In This Guide
- What you need
- Instructions
- Tips and common mistakes
- Wrapping up and next steps
What you need
- ● Camellia plants: Choose Camellia sasanqua (for winter blooms) or Camellia japonica (spring blooms). Buy 1–3 mature plants (3–5 ft tall) from a local nursery or online.
- ● Well-draining soil: Mix 60% native soil with 40% organic matter (compost or peat moss). Test soil pH (ideal: 5.5–6.5).
- ● Mulch: 2–3 inches of pine bark or cedar chips to retain moisture and protect roots.
- ● Fertilizer: Acid-loving plant fertilizer (e.g., 10-10-10 or Miracid) applied in early spring and fall.
- ● Watering can or hose: With a fine mist nozzle for gentle hydration.
- ● Pruning shears: Sharp, bypass-style shears (sterilized with rubbing alcohol).
- ● Gloves: Heavy-duty gardening gloves to protect from thorns.
- ● Transplanting tools: Garden fork, trowel, and wheelbarrow (for moving soil).
- ● Stakes & ties: If planting in windy areas (use bamboo stakes and soft jute twine).
- ● Slow-release fertilizer spikes: For convenience (e.g., Osmocote).
- ● Pest control: Neem oil spray (for aphids or scale insects) and hose attachment for rinsing.
- ● Decorative elements: Mulch rings, garden flags, or acid-loving plant companions (e.g., rhododendrons, azaleas).
Step-by-step guide to coaxing stunning Camellia winter blooms
Here's how to transform your Pacific Northwest garden into a winter wonderland of camellia color.
🌱 Step 1: Select and Prepare the Right Varieties
Camellias thrive in the PNW's mild winters, but not all varieties bloom reliably this late. Focus on Camellia sasanqua (hardy to 10°F) and Camellia japonica (hardy to 5°F) varieties like 'Yuletide' or 'Winter's Star'—these are bred specifically for winter flowering. I always choose established plants over seeds for winter blooms, as they've already developed strong root systems to support flower production.
When selecting plants, look for ones with thick, leathery leaves and multiple buds along the stems. These are your visual cues for a plant ready to perform in winter. Avoid plants with yellowing leaves or sparse budding—they won't have the energy reserves needed for late-season blooms.
☀️ Step 2: Position for Optimal Light and Shelter
Camellias need morning sun and afternoon shade to prevent leaf scorch while still getting enough light to produce winter flowers. In the PNW, that means planting them where they receive 4-6 hours of direct sun daily, ideally against a north-facing wall or under the dappled shade of large trees. I've found that planting near evergreens provides extra wind protection without blocking too much light.
Here's the thing—camellias hate wind. Strong winter winds can break tender stems and damage buds. If your garden is exposed, create a windbreak using bamboo fencing or evergreen shrubs planted on the north and west sides. The goal is to reduce wind speed by at least 50% while maintaining good air circulation to prevent fungal diseases.
💧 Step 3: Master the Watering Schedule for Winter Blooms
Winter watering is where most gardeners go wrong. Camellias need consistent moisture but not soggy roots. Water deeply every 7-10 days when the soil feels dry 2 inches below the surface. I use a moisture meter to check—this prevents overwatering while ensuring roots stay hydrated enough to support flower production.
Real talk: camellias are thirsty plants, especially when they're pushing out winter blooms. The key is to water in the late afternoon so moisture has time to penetrate before evening. Avoid wetting the leaves when watering—this helps prevent fungal diseases like petal blight, which can ruin your winter display before it even starts.
✂️ Step 4: Prune Strategically to Encourage Winter Flowers
Pruning is crucial for winter blooms, but timing matters. After the first hard frost but before new growth starts in early spring, remove dead or crossing branches and shape the plant to maintain an open center. I always use clean, sharp pruners and make cuts just above a leaf node or outward-facing bud to encourage new growth.
Here's where it gets fun—watch for flower buds forming in late summer. These look like small, green bumps along the stems. Never prune these off! The buds need to mature over winter to produce those stunning winter blooms. If you accidentally remove a bud cluster, don't worry—camellias are forgiving and will produce new ones.
🪴 Step 5: Protect and Maintain Through Winter
Once buds form, protect them from freezing temperatures and heavy rain. I've had success using frost cloth on especially cold nights (below 20°F), draped loosely over the plant. The fabric allows light and air to pass through while providing insulation. Remove it during the day to prevent overheating.
Apply a 2-3 inch layer of mulch around the base of the plant (but not touching the trunk) to insulate roots. I use pine bark mulch because it breaks down slowly and adds organic matter to the soil. This helps maintain even soil temperatures and protects against sudden frost heaves that can damage roots.
Tips & tricks for perfect Camellia winter blooms
Common pitfalls—and how to sidestep every one when coaxing winter camellia flowers.
Variety Selection: The hardiness ratings of 10°F for Camellia sasanqua and 5°F for Camellia japonica are non-negotiable for PNW winters. I've learned the hard way that cheaper nursery varieties often lack the cold tolerance to survive our winters. Look for named cultivars like 'Yuletide'—these are specifically bred to thrive in our climate. The thick, leathery leaves and multiple buds you should see are your quality indicators, not just marketing hype.
Light Balance: That 4-6 hours of morning sun is crucial—it's the sweet spot for winter blooms. I've had plants in full sun wither during winter because afternoon sun becomes too intense. The afternoon shade requirement isn't about being lazy; it's about preventing leaf scorch that can weaken the plant before it even blooms. If your garden only gets harsh afternoon sun, consider planting against a north-facing wall or using sheer fabric shade cloth during peak winter sun hours.
Watering Wisdom: The 7-10 day watering schedule might seem counterintuitive in winter, but camellias actually need consistent moisture to push out winter blooms. I use a moisture meter to check 2 inches below the surface—this prevents both overwatering (which causes root rot) and underwatering (which stresses the plant). Late afternoon watering gives roots time to absorb moisture before evening temperatures drop, and avoiding leaf wetting is your first line of defense against petal blight.
Pruning Precision: Timing your prune after the first hard frost but before spring growth is everything. I've accidentally pruned too early and lost potential flower buds that hadn't fully formed yet. When you see those green bumps in late summer, resist the urge to prune—those are your future blooms! Even if you accidentally remove a bud cluster, camellias are resilient and will produce new ones, but it's better to be patient and let nature take its course.
Pro Tips for Camellia Winter Flowers
- Common pitfalls—and how to sidestep every one when coaxing winter camellia flowers.
- Variety Selection: The hardiness ratings of 10°F for Camellia sasanqua and 5°F for Camellia japonica are non-negotiable for PNW winters.
- Light Balance: That 4-6 hours of morning sun is crucial—it's the sweet spot for winter blooms.
Frequently asked questions
Got questions about keeping your camellias blooming through winter? Here are answers to the most common ones—so you can enjoy their stunning winter flowers with ease!
Do camellias really bloom in winter?
Camellias are famous for their late-winter to early spring flowers (December–March in the Pacific Northwest). Some varieties even bloom into April. Their thick, glossy petals and vibrant colors are a winter bright spot when other plants rest. Just plant them in partial shade for best results!
How do I protect camellias from frost?
Camellias are hardy to USDA Zones 7–9, but young plants or late blooms may need a little help. Mulch the base with 3–4 inches of wood chips and water deeply before hard freezes. For potted camellias, move them to a sheltered spot (like a garage or under eaves) or wrap them in burlap. Avoid plastic—it traps moisture and causes rot.
Can I grow camellias in containers?
Yes! Many camellias thrive in 15–20 gallon containers with well-draining soil. Use a mix of peat moss, pine bark, and perlite to mimic their acidic, moist native soil. Choose dwarf varieties like ‘Yuletide’ or ‘Donation’ for smaller spaces. Just remember: larger pots = more stability in windy PNW winters.
Why aren’t my camellias blooming?
Camellias need 3–4 years to mature before heavy blooming. If established plants skip flowers, check these fixes:
- Light: Too much sun? Move to morning sun + afternoon shade.
- Soil: Test pH (ideal: 5.0–6.5); amend with sulfur if needed.
- Fertilizer: Feed with acid-loving plant fertilizer in early spring.
- Pruning: Trim after blooming to encourage new growth.
What’s a good alternative if camellias won’t grow in my yard?
If your soil is too alkaline or your microclimate is too harsh, try these winter-blooming PNW-friendly plants:
- Hellebores (‘Lenten rose’): Shade-loving, blooms Jan–March.
- Mahonia: Yellow flowers + holly-like leaves; thrives in partial shade.
- Winter daphnes: Fragrant white/pink blooms in late winter.
- Pieris japonica (‘Andromeda’): Evergreen with spring flowers.
Wrapping up and next steps
Embrace the magic of camellias—your Pacific Northwest garden’s winter wonderland awaits! These late-blooming stars bring year-round elegance, from bold reds to delicate whites, proving winter doesn’t have to be dull. With the right care (and a little patience), you’ll enjoy their stunning blooms for seasons to come.
Ready to transform your space? Start small: plant one camellia this fall, or explore local nurseries for the perfect variety. Your winter garden’s secret is just a bloom away! 🌸✨