
Flowers
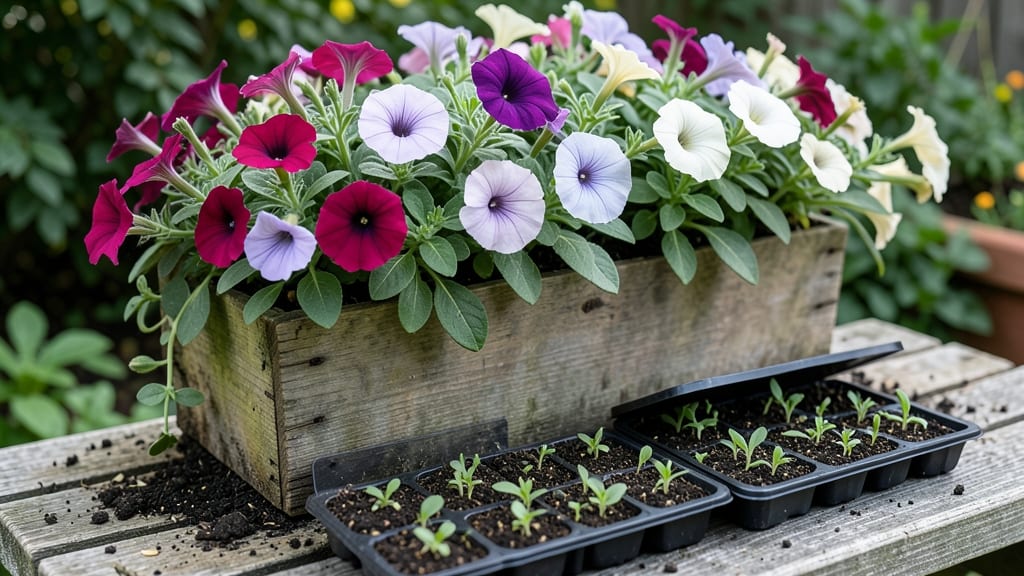
Building flower boxes turns blank walls into lush, fragrant displays that even the smallest patio can handle. 🌸 I’ve built mine from scrap lumber and thrift-store finds, and they’ve become the showstopper of my urban courtyard—no yard required.
The key isn’t fancy materials but smart design: drainage holes, sturdy construction, and plants that thrive in tight spaces.
You’ll need basic tools, untreated wood (cedar lasts longest), paint or stain, and a drill for drainage. My first box cost under $30 and took less than two hours to assemble.
The real magic happens in the planting: choose trailing plants like petunias or ferns for cascading beauty, and mix in compact perennials for year-round interest.
What you end up with is a vertical garden that blooms all season, attracts pollinators, and softens harsh architecture. The trick to longevity? Line the bottom with landscape fabric to prevent soil spills, and water from the top to keep roots evenly moist.
Even in hot afternoons, these boxes stay vibrant.
Adapt them to balconies, windowsills, or trellises—just adjust the depth for larger plants. My neighbor turned an old ladder into a hanging planter, and I’ve seen them mounted on fences or even repurposed gutters. The possibilities are endless, and the payoff is instant curb appeal.
📚 In This Guide
- What you need
- Instructions
- Tips and common mistakes
- Wrapping up and next steps
What you need
- ● Flower box container (wooden, plastic, or metal): Dimensions: 12–18 inches deep (deeper for root-heavy plants), 6–12 inches wide, and any length (standard: 12–24 inches). Options: Pre-made boxes (e.g., cedar, redwood, or composite) or DIY builds (see tools below).
- ● Potting soil: Quantity: 1–2 cubic feet per box (adjust based on size). Type: Well-draining mix (e.g., 60% potting soil + 30% perlite/vermiculite + 10% compost).
- ● Drainage layer: Materials: Pebbles, gravel, or broken pottery (1–2 inches thick).
- ● Plants: Choose compact, trailing, or cascading varieties (e.g., petunias, ferns, ivy, or succulents). Quantity: 3–5 plants per 12-inch box (spaced 4–6 inches apart).
- ● Measuring tape and pencil (for marking cuts).
- ● Saw (hand saw or miter saw for clean cuts).
- ● Drill (with 1/4-inch bit for drainage holes).
- ● Screws/nails (galvanized or stainless steel, 1.5–2 inches long).
- ● Sandpaper (120–150 grit for smoothing edges).
- ○ Wood glue (optional, for extra reinforcement).
- ○ Paint/stain (weather-resistant, optional for aesthetics).
- ● Hanging brackets or wall mounts (if attaching to walls/rails).
- ● Self-watering system (e.g., wicks or reservoir trays for low-maintenance care).
- ● Mulch (e.g., bark chips to retain moisture).
- ● Decorative trim (e.g., copper flashing or lattice for a polished look).
Step-by-Step instructions for building flower boxes
Here's how to create sturdy, stylish flower boxes that transform any wall into a blooming paradise.
🪴 Step 1: Gather and Prepare Materials
Start with a 4-foot-long wooden flower box (pre-cut to avoid measuring) and the 2 gallons of lightweight potting mix you've chosen. I like to prep the wood first by sanding any rough edges—splinters are the last thing you want near delicate flowers. Use 100-grit sandpaper and smooth all interior corners where roots will grow.
Next, line the bottom with landscape fabric to prevent soil from washing out through drainage holes. Cut a piece slightly larger than the box's interior, fold edges up the sides, and secure with staple gun and 1-inch staples. This keeps your mix in place while allowing excess water to drain freely. Here's the thing—don't skip this step. Without it, your soil will compact and suffocate roots within weeks.
🌱 Step 2: Layer Soil and Add Drainage
Fill the bottom 2 inches of the box with small river rocks (about 1 gallon). These create essential drainage while keeping roots from sitting in soggy conditions. Tap the box gently on the table to settle the rocks evenly—you want them packed but not jammed. I like to add a thin layer of perlite (about ½ cup) mixed into the first 1 inch of potting mix. This prevents compaction and helps air reach shallow roots.
Now add your 2 gallons of potting mix, spreading it evenly. Press down lightly with your hands—just enough to remove air pockets, but don't pack it tight. You'll see the mix settle naturally as you plant. Leave about 1 inch of space at the top for watering and future mulch. Pro tip: Mix in 1 tablespoon of slow-release fertilizer now. Your flowers will thank you all season.
☀️ Step 3: Plant and Arrange Flowers Strategically
Start with 3-4 tall plants (like snapdragons or delphiniums) at the back of the box. These create a natural backdrop and prevent smaller flowers from getting lost. Gently remove each plant from its nursery pot and loosen the roots if they're circling. Place them in the soil, spacing them 4-6 inches apart—crowding leads to weak stems and poor airflow.
Fill the middle with 4-5 medium-height flowers (like petunias or salvia) spaced 3-4 inches apart. These will spill over the edges beautifully. For the front, choose 5-6 trailing plants (like lobelia or sweet alyssum) spaced 2-3 inches apart. Water everything deeply right after planting—this settles the soil and removes air pockets around roots. Real talk: If you plant too tightly, you'll spend all summer deadheading instead of enjoying your garden.
💧 Step 4: Water, Mulch, and Position Perfectly
Water the box thoroughly until water runs out the drainage holes. This ensures the entire root zone is hydrated. Let it drain completely, then add a ½-inch layer of mulch (like shredded bark) on top. Mulch keeps moisture in, suppresses weeds, and protects roots from temperature swings. I like to water again after mulching to help settle everything.
Position your flower box where it gets at least 6 hours of sunlight daily. South or west-facing walls work best for most annuals. Mount it securely using L-brackets and outdoor screws—you don't want it swaying in wind or falling during storms. Here's where it gets fun: Arrange boxes at different heights for visual interest. A trio of boxes at varying levels creates a stunning vertical garden effect.
Tips & tricks for perfect vertical flower boxes
Common pitfalls—and how to sidestep every one when building your own flower boxes.
Material Prep: Don't rush the sanding in Step 1. I learned this the hard way after my first box left splinters in my hands—and worse, in my plants. Use a 100-grit sandpaper and focus on the interior corners where roots will grow. A quick pass with a damp cloth afterward removes dust that could irritate plant roots. Trust me on this: the extra 10 minutes now saves you from dead plants later.
Drainage Layer: When adding the 2 inches of river rocks in Step 2, don't just dump them in. Tap the box gently on the table to settle them evenly—this prevents gaps where soil could slip through. I like to add a ½ cup of perlite mixed into the first inch of soil too; it's like giving your roots a breath of fresh air. This simple step prevents that dreaded soggy-bottom syndrome that kills plants.
Plant Spacing: The spacing in Step 3 isn't just arbitrary—it's about airflow and sunlight. For the 3-4 tall plants at the back, imagine they're soldiers standing at attention. Give them that 4-6 inch space so their leaves don't rub against each other when the wind blows. Crowding leads to fungal diseases and weak stems that snap under their own weight. Real talk: I've seen beautiful boxes ruined by overcrowding.
Sunlight Strategy: That 6 hours of sunlight in Step 4 is non-negotiable for most annuals. If your wall gets less, choose shade-tolerant plants like impatiens or ferns. For maximum impact, position your boxes so the tallest plants face south—they'll cast less shade on the shorter ones behind them. Pro tip: Use a small mirror or reflective surface nearby to bounce extra light onto the box during cloudy days.
Pro Tips for Building A Flower Box
- Common pitfalls—and how to sidestep every one when building your own flower boxes.
- Material Prep: Don't rush the sanding in Step 1.
- Drainage Layer: When adding the 2 inches of river rocks in Step 2, don't just dump them in.
Frequently asked questions
Got questions about building your own flower boxes? You’re not alone! Here are some of the most common queries—plus straightforward answers to help you get started with confidence.
What’s the best time of year to build and plant a flower box?
The ideal time depends on your climate! In mild zones, spring or fall is perfect—soil is workable, and plants thrive. In colder areas, wait until after the last frost (usually late spring). For warm climates, late winter or early spring works best. Just avoid extreme heat or freezing temps while planting!
Can I use cheap or repurposed materials instead of buying new ones?
Flower boxes are budget-friendly by nature. Use wooden crates, old gutters, or even recycled plastic containers lined with landscape fabric. Just ensure they’re sturdy, have drainage holes, and aren’t treated with toxic chemicals. A little creativity goes a long way—think pallets, wine barrels, or even hanging baskets!
How do I keep my flower box from drying out or getting waterlogged?
Drainage is key! Pre-drill holes in the bottom if your box doesn’t have them, and add a 1-inch layer of gravel or broken pottery at the base. For water retention, mix peat moss or coconut coir into your soil. Self-watering systems (like a drip line or wicking fabric) can also save you time. Monitor moisture—most flower boxes need watering every 2–3 days in hot weather.
What are the best low-maintenance flowers for beginners?
Start with hardy, drought-tolerant plants like pansies, petunias, or geraniums—they bloom all season with minimal fuss. Succulents (like sedum) or herbs (thyme, oregano) are also great for beginners. Avoid fussy annuals like impatiens unless you’re willing to babysit them. Pro tip: Mix perennials with annuals for long-lasting color!
How do I prevent pests like aphids or slugs from ruining my flower box?
Pests love tender new growth! Neem oil or insecticidal soap tackle aphids, while diatomaceous earth deters slugs. Encourage beneficial insects (like ladybugs) by planting marigolds or basil nearby. For slugs, add a copper barrier around the edges or use beer traps. Keep your box well-aerated—crowded plants attract pests!
Can I reuse the same flower box year after year?
Yes! With a little care, your flower box can last 5–10 years (or longer if made from durable materials like cedar or metal). Clean it thoroughly in fall—remove old soil, scrub with soapy water, and disinfect with a 10% bleach solution to kill pests/diseases. Store it in a dry place over winter, and refresh the soil and plants each spring. Rotate plants yearly to prevent soil depletion!
Wrapping up and next steps
Building your own flower box is a rewarding way to bring nature into small spaces—whether you’re a beginner or a seasoned gardener! 🌸 With the right materials, a little creativity, and patience, you’ll transform an ordinary corner into a vibrant, blooming oasis.
The key is to start small, choose plants that thrive together, and enjoy the process.
Now that you’re inspired, why not take the next step? Pick your favorite flowers, gather your tools, and let your green thumb shine. Happy planting! 🌱