
Flowers
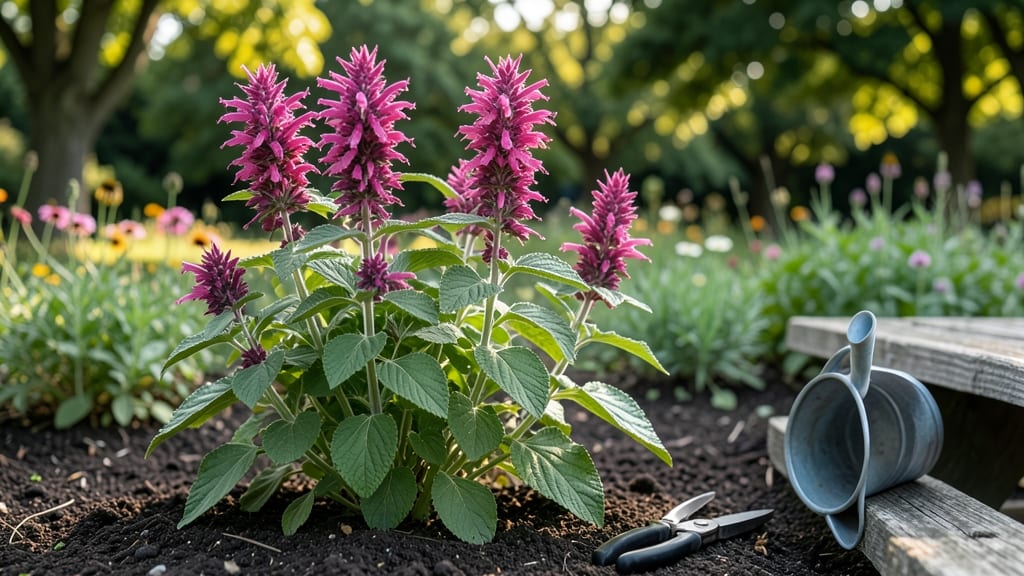
Caring for bee balm flowers in the Pacific Northwest means embracing their hardy nature while working with the region's damp, cool climate. 🌿 The trick is pruning at the right time—after the first frost—to protect these frost-resistant plants from winter dieback while encouraging the boldest blooms next spring.
My first year growing bee balm, I nearly cut everything back too early, only to watch new growth emerge too late for summer color. That mistake taught me the importance of timing and patience.
Bee balm thrives with 6-8 hours of sunlight daily, though it tolerates partial shade in hotter afternoons. The soil should drain well but stay consistently moist—think of a damp sponge, not a swamp.
Mulching with 2-3 inches of organic matter helps retain moisture and insulate roots during our chilly winters. Most gardeners underestimate how tough bee balm is, assuming it needs coddling, but once you get the basics right, it practically grows itself.
When pruning, aim for one-third of the plant's height after blooms fade or by late fall. This keeps the plant compact and prevents flopping stems. The result? A bushy, vibrant plant that rebounds with fresh growth in spring, often blooming even earlier than the year before.
The key is to never prune into new growth—always cut back to a leaf node or bud to encourage branching.
For Pacific Northwest gardeners, this means late fall or early spring pruning is ideal. The plants handle our damp winters beautifully, and with proper pruning, you'll enjoy months of hummingbird activity and fragrant blooms.
Once you master the timing, bee balm becomes one of the most low-maintenance yet rewarding perennials in your garden.
📚 In This Guide
- What you need
- Instructions
- Tips and common mistakes
- Wrapping up and next steps
What you need
- ● Bee balm plants: 3–5 Monarda varieties (e.g., 'Jacob Cline,' 'Cambridge Scarlet,' or 'Grandiflora'). Choose frost-resistant cultivars suited for USDA Zones 3–8.
- ● Well-draining soil: 1–2 cubic yards of loamy, slightly acidic soil (pH 6.0–7.0). Mix in compost (1–2 bags) for nutrients.
- ● Sunlight access: Full sun to partial shade (4–6 hours of sunlight daily)—ideal for PNW’s mixed light conditions.
- ● Watering tools: Hose with adjustable nozzle (for deep watering)
- ○ Watering can (optional, for precision)
- ● Pruning tools: Bypass pruners (sharp, sterilized)
- ● Hand pruners (for smaller stems)
- ● Garden shears (for bulk pruning)
- ● Mulch: 2–3 inches of organic mulch (e.g., shredded bark or straw) to insulate roots from frost.
- ● Fertilizer: Balanced 10-10-10 or fish emulsion (apply in early spring).
- ● Pest control: Neem oil spray (organic) for aphids or spider mites.
- ● Support stakes: 3–4 bamboo stakes (6–12 inches tall) for tall varieties (e.g., 'Grandiflora').
- ● Frost cloth: Lightweight frost protection fabric for late-season frost warnings.
- ● Gloves: Heavy-duty gardening gloves (to protect from thorns on some varieties).
How to prune bee balm for a Pacific Northwest climate
Here’s how I keep my bee balm thriving through PNW winters and summers—no guesswork.
✂️ Step 1: Cut Back After First Frost
Once the first hard frost hits (usually late October in the PNW), your bee balm will look crispy and done for the season. That’s actually good news—it’s time to prune. Use clean, sharp pruners and cut back the entire plant to 2-3 inches above the ground. This prevents disease buildup in dead stems and encourages fresh growth in spring.
If you’re in a milder microclimate (like near Puget Sound), wait until mid-November when daytime temps stay below 40°F. The goal is to remove all foliage before winter rains set in. I like to bundle the cuttings and compost them—they’re still full of nutrients.
Here’s the thing—if you leave old stems standing, they’ll collect moisture and rot. You’ll know you’ve pruned correctly when the plant looks like a stubby stump, ready to rebound in spring. Don’t worry if it looks brutal; bee balm is tougher than it appears.
🌱 Step 2: Early Spring Renewal Cut
As soon as the ground thaws and new shoots appear (usually late March to early April in the PNW), grab your pruners again. This time, trim back any dead or weak stems to just above a healthy bud. You’ll see these buds as little swellings along the stems—cut ¼ inch above them to encourage branching.
I avoid fertilizing right after this cut because fresh growth is fragile. Instead, I wait until mid-April when the plant has 4-6 inches of new growth. That’s when I’ll add a balanced, slow-release fertilizer (like 10-10-10) to fuel the season ahead.
Watch for new leaves unfurling—those are your signal that the plant is waking up. If you see moldy stems or black spots, snip those off immediately and dispose of them in the trash (not compost). Bee balm can get powdery mildew in damp PNW springs, so air circulation matters.
☀️ Step 3: Mid-Season Deadheading for Longer Blooms
Once your bee balm bursts into flower (typically June to August in the PNW), deadhead spent blooms every 2-3 weeks. Pinch off the faded flower heads with your fingers or pruners—no need for fancy tools. This redirects the plant’s energy into producing more blooms instead of setting seed.
I like to do this on a dry morning after the dew has evaporated. Wet stems are harder to grip, and you’ll risk spreading fungal spores if the plant is damp. Cut back to the first set of healthy leaves below the bloom—this encourages bushier growth and delays the plant’s natural decline in late summer.
Real talk: If you skip deadheading, your bee balm will still bloom, but the flowers will be fewer and the stems leggier. The plant will eventually go to seed on its own, but you’ll miss out on that second flush of color that PNW summers deserve.
⏰ Step 4: Late Summer Prep for Winter
By mid-August, your bee balm will start slowing down as daylight shortens. This is your last chance to give it a little TLC before winter. Trim back any leggy or overgrown stems by ⅓ to improve airflow and reduce disease risk. Cut just above a leaf node to encourage new growth.
Now’s also the time to divide crowded clumps if they’ve outgrown their space. Dig up the plant, separate the roots into 3-4 inch sections (each with 2-3 stems), and replant them immediately. Bee balm spreads aggressively, so dividing keeps it from taking over your garden.
Finally, add a 2-inch layer of mulch (like shredded bark) around the base. This insulates the roots during PNW winters when temps can dip into the 20s°F. Just keep the mulch 2 inches away from the crown to prevent rot. You’ll know you’ve done it right when the soil looks protected and the plant looks ready to hunker down.
Tips & tricks for perfect bee balm flower care in the Pacific Northwest
These little details make all the difference when keeping your bee balm thriving through our unpredictable PNW climate.
Tool Prep Matters: Always sterilize your pruners with rubbing alcohol before each pruning session, especially after Step 1 when you're cutting back frost-damaged stems. I keep a small bottle in my gardening caddy—it takes 10 seconds to wipe them down and prevents fungal spread between cuts. Clean tools also make the job easier; dull blades crush stems instead of cutting cleanly, which stresses the plant.
Microclimate Timing: The instructions mention waiting until mid-November for milder areas, but I've learned to check your local weather forecast too. If we get an unexpected warm spell in late October, delay pruning until after the next frost. You can tell it's safe when morning temps consistently stay below 40°F for 3-4 days. This prevents shocking the plant with premature dormancy.
Spring Growth Cues: In Step 2, those 4-6 inches of new growth by mid-April are your green light to fertilize—but don't rush it. I test by gently tugging on a stem. If it resists slightly (like fresh celery), it's ready. If it bends easily, wait another week. This simple tug test tells you more than measuring growth ever could.
Deadheading Discipline: The every-2-3-week schedule in Step 3 works perfectly, but I've found a trick to make it easier: set a reminder for every other weekend in June-August. This keeps you consistent without overdoing it. Also, use your fingers instead of pruners—pinching off spent blooms prevents accidental damage to healthy stems, and it's faster when you're doing dozens of flowers.
Pro Tips for Bee Balm Flower Care
- These little details make all the difference when keeping your bee balm thriving through our unpredictable PNW climate.
- Tool Prep Matters: Always sterilize your pruners with rubbing alcohol before each pruning session, especially after Step 1 when you're cutting back frost-damaged stems.
- Microclimate Timing: The instructions mention waiting until mid-November for milder areas, but I've learned to check your local weather forecast too.
Frequently asked questions
Got questions about keeping your bee balm flowers thriving in the Pacific Northwest? You’re not alone! Here are some of the most common concerns—and their simple solutions.
How often should I water bee balm in PNW’s rainy climate?
While PNW’s damp weather helps, bee balm still needs well-draining soil. Water deeply 1-2 times per week (more in summer heat) but avoid soggy roots—mulch helps retain moisture without overwatering. Pro tip: Check soil 1-2 inches down; if dry, it’s time to water!
When is the best time to prune bee balm to prevent frost damage?
Prune after flowering (late summer/early fall) to remove spent blooms and shape the plant. For frost resistance, cut back by ⅓ in late autumn (after first frost) to protect stems. Never prune in spring—new growth needs energy to harden off!
Why aren’t bees visiting my bee balm flowers?
Bees love bee balm—but if they’re absent, check these fixes:
- Timing: Blooms peak in June-August; plant varieties like ‘Marshmallow’ for extended nectar.
- Pesticides: Avoid chemicals; opt for neem oil or soapy water sprays if pests appear.
- Location: Place in sunny spots (6+ hours/day) and near water sources.
Can I grow bee balm in containers? What’s the best soil mix?
Use a 10-12” pot with drainage holes and a moisture-retentive mix:
- 60% pearlite or perlite (for drainage)
- 30% potting soil
- 10% compost (for nutrients)
My bee balm leaves are turning yellow—what’s wrong?
Yellowing leaves usually mean:
- Overwatering: Let soil dry slightly between waterings.
- Nutrient deficiency: Feed with balanced fertilizer (10-10-10) in spring.
- Fungal issues: Improve airflow; remove affected leaves and treat with copper fungicide if needed.
Wrapping up and next steps
Caring for bee balm flowers in the Pacific Northwest is a rewarding journey—especially when you embrace their frost-resistant nature and strategic pruning habits! 🌿 With the right tools, timing, and techniques, you’ll enjoy vibrant blooms year after year while supporting local pollinators.
Now that you’re armed with expert tips, why not take the next step?
🌱 Ready to Transform Your Garden?
Start by marking your calendar for next year’s pruning dates or experiment with deadheading spent blooms to extend the flowering season. Share your progress with fellow gardeners—your bee balm’s beauty will inspire others to join the green revolution! Happy gardening! 🌸