Orchid Care
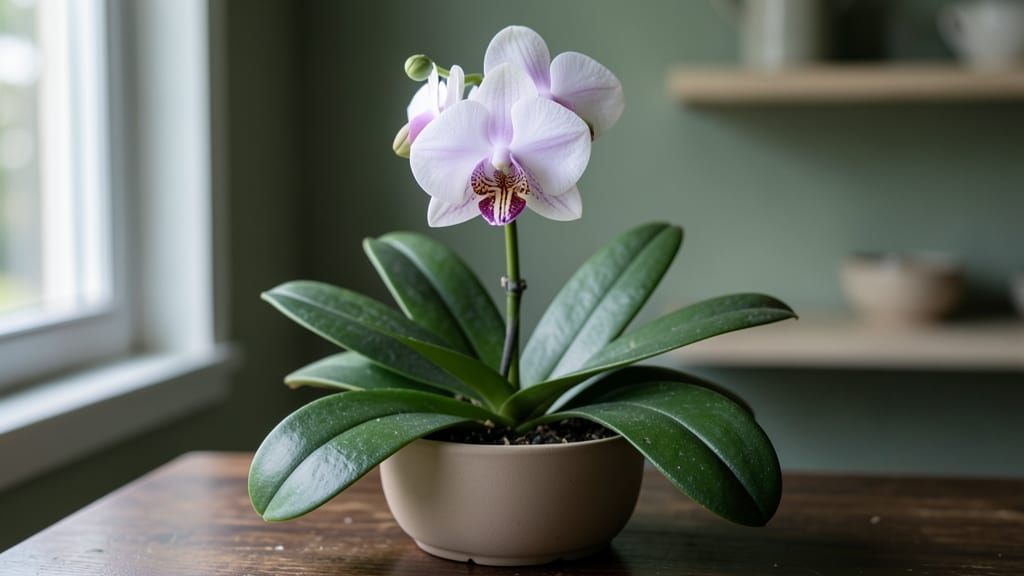
That single orchid flower spike holds the key to months of blooms—if you know how to care for it. 🌸 I’ve watched spikes wither after just a few flowers because of one simple mistake: cutting too soon or too late.
The secret lies in timing, lighting, and a little strategic pruning that keeps your orchid producing new spikes year after year.
You’ll need sharp scissors (sterilized with rubbing alcohol), a bright spot with indirect light, and patience—this isn’t a quick fix, but the results are worth it. Most people skip the post-bloom care, which is where the magic happens.
After the last flower fades, don’t toss the spike! With the right approach, it’ll regrow into a stronger, more productive one next season.
What you’ll end up with is an orchid that blooms for 8-12 weeks each cycle, with thicker, more vibrant spikes than you’ve ever seen. The fragrance? Unmatched. The attention from neighbors?
Priceless. And the best part? You’ll spot new growth within 4-6 weeks of proper care—proof that even delicate orchids thrive with the right techniques.
Works for Phalaenopsis, Cattleya, and Dendrobium orchids alike, whether you’re growing them on a sunny windowsill or under grow lights. Here’s how to make every spike count—no more wasted blooms, just lush, repeat performances.
📚 In This Guide
- What you need
- Instructions
- Tips and common mistakes
- Wrapping up and next steps
What you need
- ● Clean, sharp pruning shears – sterilized (rubbing alcohol wipe) to prevent disease. Size: Small to medium (2-4 inches).
- ● Rubbing alcohol (70% or higher) – Quantity: 1 small bottle (for sterilizing tools).
- ○ Cinnamon powder or antifungal dust – Quantity: 1 small jar (to prevent infection). Optional but highly recommended!
- ● Disposable gloves – Quantity: 1 pair (for hygiene).
- ● Newspaper or paper towels – Quantity: 2-3 sheets (for cleanup).
- ● Small spray bottle with water – Quantity: 1 (for post-pruning hydration).
- ● Healthy orchid plant – Ensure no signs of pests, rot, or wilting before pruning.
- ● Freshly watered orchid – Water 24 hours before pruning to reduce stress.
- ● Bright, indirect light – Choose a well-lit workspace (no direct sun!).
- ● Patience & confidence – Pruning spikes takes practice, so take your time!
Step-by-Step guide to pruning orchid flower spikes for prolonged blooms
Here's how to coax your orchid into reblooming like a pro—no guesswork, just proven techniques.
✂️ Step 1: Identify the Right Time to Prune
Wait until the flower spike turns completely brown and papery—this signals the plant has finished blooming. If you prune too early, you risk cutting off potential buds that might still form. I always check for this by gently tugging on the spike; if it pulls away easily, it's ready.
Never prune a green or partially brown spike. The plant needs time to redirect energy after flowering. For Phalaenopsis orchids, this usually happens 4-6 weeks after the last bloom fades. Keep an eye on your plant's growth cycle—some varieties bloom year-round while others need a rest period.
🌱 Step 2: Choose Your Pruning Method
For reblooming, cut the spike 1 inch above a visible node (the little bump where leaves or buds might form). Use clean, sharp scissors or pruning shears to make a clean cut—ragged edges invite rot. I like to make the cut at a slight angle to prevent water from pooling.
If your orchid produces a new spike from the base (called a keiki), you can leave the old spike intact or remove it at the base. For non-reblooming spikes, cut all the way to the base. The key is to leave enough energy in the plant for new growth—never remove more than necessary.
💧 Step 3: Stimulate New Growth After Pruning
After pruning, give your orchid 2-3 weeks of recovery before fertilizing again. I use a balanced 20-20-20 fertilizer diluted to half strength during this time. The plant needs time to heal and redirect nutrients to either new roots or a fresh spike.
Place your orchid in bright, indirect light (east or west window) and maintain 60-75°F temperatures. Avoid cold drafts or sudden temperature swings—these stress the plant and delay reblooming. You'll know you're on the right track when new leaves start forming at the base.
☀️ Step 4: Encourage Reblooming with Proper Care
For maximum reblooming potential, provide 12-14 hours of light daily using a grow light if natural light is insufficient. I position my grow light 6-12 inches above the plant and adjust the height as the leaves grow. Too little light results in weak, sparse blooms.
Water your orchid once a week with room-temperature water, allowing the roots to dry slightly between waterings. Overwatering smothers roots and prevents new spikes from forming. Watch for new growth at the base—this is your sign that the plant is ready to produce another flower spike.
⏰ Step 5: Monitor for New Spikes and Adjust Care
New flower spikes typically emerge 8-12 weeks after pruning. They'll start as small, green buds at the base of the plant. When you see these, increase fertilizer to full strength once a week to support blooming. I switch to a high-phosphorus fertilizer (like 10-30-20) to encourage flowering.
If your orchid doesn't produce new spikes within 4 months, it may need a longer rest period. Reduce watering slightly and keep it in cooler conditions (55-65°F nights) for 4-6 weeks to simulate winter dormancy. This often triggers reblooming in the following season.
Tips & tricks for perfect orchid flower spike care
Here's what nobody tells you about keeping your orchids blooming longer—these tricks make all the difference.
Timing is Everything: In Step 1, when waiting for that 4-6 week window after blooming, mark your calendar or set a reminder. I've seen orchids produce new spikes as early as 3 weeks or as late as 8 weeks—this variation depends on your plant's maturity and growing conditions. The key is patience; don't rush the process. If you're unsure whether a spike is ready, do the tug test: gently pull on it. If it comes away easily without resistance, it's time to prune.
Precision Cutting Matters: When following Step 2 to cut 1 inch above a visible node, use a magnifying glass if needed—those nodes can be tiny! I've made the mistake of cutting too close to the node, which can prevent new growth. The slight angle cut you make isn't just for aesthetics; it helps water run off cleanly, preventing rot at the cut site. For stubborn spikes that won't budge, wrap them with floral tape after cutting to stabilize the plant.
Lighting Strategy: The 12-14 hours of light mentioned in Step 4 is crucial, but quality matters just as much as quantity. Position your grow light so it covers the entire plant evenly—orchids need light on all sides to develop properly. I notice the biggest difference when I adjust the light height as the leaves grow; starting with 6-12 inches above is perfect, but you'll need to raise it as the plant grows taller. Too little light causes weak, leggy growth, while too much can scorch the leaves.
Fertilizer Timing: After pruning, the 2-3 week recovery period before fertilizing is non-negotiable. I've learned this the hard way after burning tender new growth with too-strong fertilizer too soon. Once you resume fertilizing, stick to the 20-20-20 diluted to half strength for those first few weeks. When new spikes appear, switch to high-phosphorus (10-30-20)—this phosphorus boost is what triggers flowering. I apply it every week until buds form, then reduce to every other week during blooming.
Pro Tips for Orchid Flower Spike
- Here's what nobody tells you about keeping your orchids blooming longer—these tricks make all the difference.
- Timing is Everything: In Step 1, when waiting for that 4-6 week window after blooming, mark your calendar or set a re...
- Precision Cutting Matters: When following Step 2 to cut 1 inch above a visible node, use a magnifying glass if needed...
Frequently asked questions
Got questions about pruning orchid flower spikes? You’re not alone!
Here are answers to the most common concerns—whether you're a newbie or just looking to refine your technique.
When should I cut back an orchid flower spike after blooming?
Timing is key! Wait until the spike turns yellow or brown and feels dry to the touch (about 2–4 weeks after blooming). If it’s still green, it may produce new blooms or baby orchids (keikis). Use clean, sharp scissors to trim just above a node (the tiny bump where leaves grow).
Can I prune an orchid spike while it’s still flowering?
No—never cut a spike while flowers are open! This stresses the plant and can kill future blooms. Only prune dead spikes (no buds or flowers) or after blooms fully fade. Patience pays off—healthy spikes reward you with stunning reblooms!
What if my orchid spike doesn’t bloom again after pruning?
Don’t panic! Orchids need time (and sometimes a little coaxing). Check these fixes:
- Light: Move to bright, indirect light (east/west windowsill).
- Water: Soak roots weekly, then drain excess—no soggy pots!
- Fertilizer: Use a balanced orchid mix (20-20-20) every 2–4 weeks in spring/summer.
Should I remove a spike that’s all leaves with no flowers?
Not yet! A leafless spike might still be alive—it’s just dormant. Trim it only if it’s completely brown, mushy, or infested with pests. Some orchids (like Phalaenopsis) can rebloom from old spikes if given proper care. Give it 1–2 months before deciding.
How do I sterilize my pruning tools to avoid orchid diseases?
Clean tools prevent fungal/bacterial infections! After each use, wipe blades with rubbing alcohol (70%+) or soak in a 10% bleach solution for 10 minutes, then rinse and dry. Store in a dry place—never share scissors between plants!
Pro Tip:
Label your pruned spikes! Use a small tag with the date and orchid type. This helps track reblooming cycles and spot patterns (e.g., "always blooms in spring").
Wrapping up and next steps
Mastering the art of pruning your orchid’s flower spike is like unlocking a secret to endless blooms—it’s all about timing, technique, and a little patience! 🌸 Whether you’re trimming spent spikes or encouraging reblooms, these steps will keep your orchids thriving.
Now that you’re armed with the know-how, grab those sterilized shears and give your orchid the TLC it deserves.
Ready to put your new skills to the test? Start with one spike at a time—observe, experiment, and enjoy the process. Your orchid will reward you with vibrant, long-lasting blooms that’ll make every effort worthwhile!