Flowers
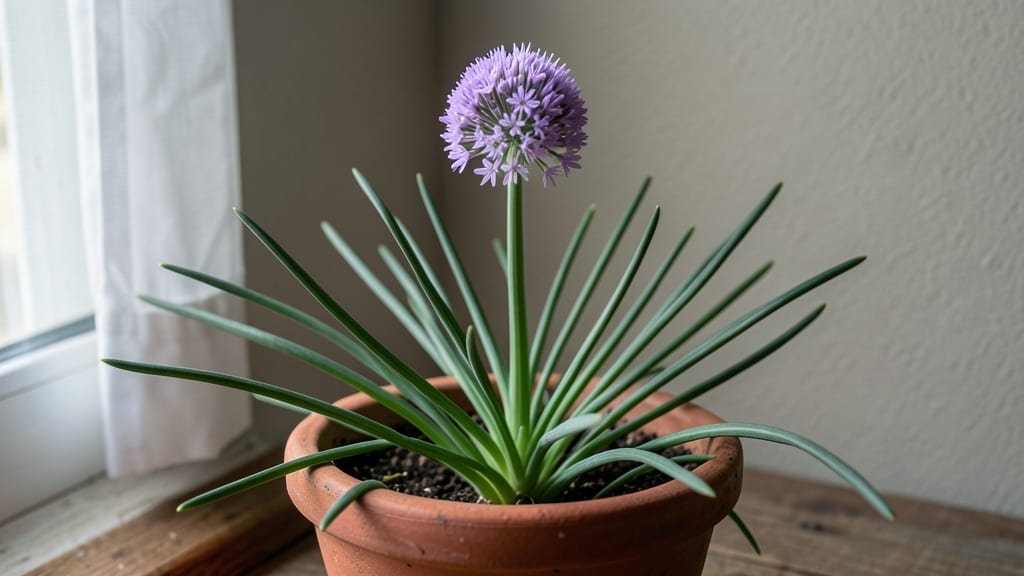
The first time I saw chives with purple flowers bordering a neighbor’s herb spiral, I knew they’d steal the spotlight—and my heart. Their lavender-pink flowers add color while their snipped leaves brighten everything from potatoes to salads.
What makes them perfect for containers is their compact size and adaptability. They thrive in pots as small as 6 inches wide, making them ideal for windowsills, patio edges, or mixed containers with other herbs.
Plus, they self-seed gently, so you’ll get more plants without extra effort—just snip the spent blooms to encourage fresh growth.
Imagine a container overflowing with purple chives spilling over the rim, their flowers attracting pollinators while their leaves stay fresh for months. They pair beautifully with silver foliage like dusty miller or the deep green of thyme, creating a striking contrast.
The best part? You’ll harvest both beauty and flavor all season long.
Whether you’re designing a themed garden or simply want to add color to your windowsill, purple chives bring it all together. They’re the secret weapon for edible landscaping that doesn’t compromise on style. Let’s get planting!
📚 In This Guide
- What you need
- Instructions
- Tips and common mistakes
- Wrapping up and next steps
What you need
- ● Chive seeds or seedlings: Choose Allium schoenoprasum (common chives) or Allium tuberosum (garlic chives) for purple flowers. Opt for organic, non-GMO seeds if possible.
- ● Quantity: 10–20 seeds (or 3–5 seedlings) per 6-inch container.
- ● Containers: Minimum 6-inch diameter pots (deeper is better for root growth).
- ● Drainage holes are a must—no exceptions!
- ● Material: Terracotta, plastic, or fabric grow bags (terracotta helps regulate moisture).
- ● Potting soil: Well-draining, nutrient-rich mix (e.g., 60% potting soil + 30% perlite + 10% compost).
- ● Avoid garden soil—it compacts and lacks aeration.
- ● Basic gardening tools: Trowel or small hand shovel
- ● Measuring cup or spoon (for soil amendments)
- ● Spray bottle (for gentle watering)
- ○ Optional but helpful: Fertilizer: Balanced, water-soluble fertilizer (e.g., 10-10-10) or compost tea for organic growth.
- ● Mulch: Straw or shredded leaves to retain moisture and suppress weeds.
- ● Sunlight tracker: Ensure your containers get 5–6 hours of direct sunlight daily.
- ● Climate check: Chives thrive in USDA Zones 3–9. If you’re in a hotter zone, provide afternoon shade.
- ● Seed starting: Sow seeds ¼-inch deep and keep soil moist (not soggy) until germination (7–14 days).
- ● Container size: For bigger harvests, use a 12-inch pot and plant 5–6 seedlings.
How to grow purple flowering chives in containers
Here’s how I keep these striking chives thriving in pots—edible, ornamental, and easy to maintain.
Select the Right Container and Soil Mix
Choose a container with drainage holes at least 6 inches deep and 8 inches wide—chives need room to spread. I use unglazed terra cotta because it breathes and prevents root rot. Fill the pot with a lightweight potting mix (avoid garden soil—it compacts and suffocates roots). Mix in 1 part perlite to improve drainage and aeration.
Moisten the mix until it’s damp but not soggy—you should be able to squeeze a handful and feel slight resistance. Overwatering now will lead to yellowing leaves later. Place the container in a spot with partial sun (4-6 hours daily) while you prepare the plant.
Plant Chive Sets or Divide Existing Clumps
Chives spread via underground rhizomes, so I start with 4-inch divisions from an established plant or pre-packaged chive sets. Gently loosen the roots if they’re tightly bound. Plant each division 2 inches apart in the prepared soil, pressing lightly to secure them without compacting.
Keep the soil surface 1 inch below the rim—this prevents water from spilling over when you water. If using sets, place them 1 inch deep so the base of the stalk sits just below the soil line. Water gently after planting to settle the soil around the roots.
Water and Fertilize for Strong Growth
Water once a week during the first month, allowing the top inch of soil to dry out between waterings. Purple chives are drought-tolerant once established, but young plants need consistent moisture. Use a slow-release organic fertilizer (like 10-10-10) at half strength when you see new growth appear—usually within 2-3 weeks of planting.
Here’s the thing—chives thrive in well-draining but consistently moist soil. If leaves yellow, you’re overwatering. If they crisp at the edges, the soil is too dry. Adjust your schedule until you find the sweet spot: damp but never waterlogged.
Prune for Flowers and Edible Leaves
When the purple flower stalks reach 6-8 inches tall, snip them just above a set of leaves to encourage more blooms and prevent the plant from becoming leggy. You’ll get multiple flushes of flowers throughout the growing season if you prune consistently. Harvest the flowers for garnishes or let them go to seed for next year’s plants.
For edible leaves, cut outer stems to 2 inches above the base when they reach 6 inches tall. This stimulates bushier growth and prevents the plant from becoming woody. Avoid cutting more than one-third of the plant at once—chives recover quickly but won’t bounce back from harsh pruning.
Overwinter and Maintain Year-Round
In zones 5-9, chives are perennial and will return every year. In colder climates, move pots to a garage or sheltered porch before the first frost. Reduce watering to every 2-3 weeks once growth slows in fall. In spring, resume watering when you see new shoots emerge—usually by late March or early April.
Divide the plant every 2-3 years to rejuvenate growth. Simply dig up the clump, separate the rhizomes, and replant in fresh soil. This keeps your chives vigorous and prevents overcrowding. With minimal care, your purple chives will reward you with edible greens and stunning blooms for years.
Tips & tricks for growing purple flowering chives in containers
These practical insights will help you cultivate vibrant, edible chives that thrive year after year in your containers.
Container Selection: While terra cotta is ideal, you can also use fiberglass or plastic pots as long as they have proper drainage. Avoid metal containers—they can heat up too much and damage roots. If using a decorative pot without drainage, place it inside a saucer filled with pebbles to catch excess water. The 6-inch depth is critical for root development, but you can go wider if you want multiple plants in one container.
Soil Preparation: The perlite-to-potting mix ratio of 1:4 is perfect for aeration, but if you don't have perlite, substitute with vermiculite or even coarse sand. I've also found that adding a handful of compost to the mix gives an extra nutrient boost without compromising drainage. When testing soil moisture, press your finger about 1 inch deep—if it feels dry, it's time to water.
Planting Strategy: For maximum yield, arrange your 4-inch divisions in a circular pattern in the container. This creates a natural growth habit that prevents overcrowding. If you're using sets, plant them slightly deeper than the instructions suggest—1.5 inches deep—for slightly stronger root establishment. The 2-inch spacing between plants is ideal, but you can reduce this to 1.5 inches if you're planting in a very wide container.
Pruning Technique: When harvesting leaves, use clean, sharp scissors to avoid damaging the plant. Cut at a 45-degree angle just above a leaf node to encourage new growth from that point. For flowers, wait until they're fully open before harvesting—this ensures you get the most vibrant purple color. The 6-8 inch height guideline is perfect, but don't hesitate to harvest slightly shorter if you're eager for edible greens.
Pro Tips for Chives With Purple Flowers
- These practical insights will help you cultivate vibrant, edible chives that thrive year after year in your containers.
- Container Selection: While terra cotta is ideal, you can also use fiberglass or plastic pots as long as they have pro...
- Soil Preparation: The perlite-to-potting mix ratio of 1:4 is perfect for aeration, but if you don't have perlite, sub...
Frequently asked questions
Can I eat the purple flowers from chives?
The purple flowers of chives are completely edible and add a mild onion flavor with a pop of color to salads, garnishes, or cocktails. Just harvest them before they fully open for the best flavor and presentation.
How long does it take for chives to produce purple flowers?
Purple flowers typically appear in their first or second year of growth, usually between late spring and early summer. With proper care—like regular watering and sunlight—they’ll reward you with blooms reliably. Pro tip: Deadhead spent flowers to encourage more growth!
Are chives with purple flowers hard to grow in containers?
Not at all! These hardy herbs thrive in containers as long as you provide:
- Well-draining soil (mix in compost for nutrients)
- At least 6 hours of sunlight daily
- A pot 6+ inches deep (they have shallow roots)
What can I do if my chives aren’t flowering?
If your chives are lush but not blooming, try these fixes:
- More sunlight: Move to a sunnier spot (they need 6+ hours/day).
- Balanced fertilizer: Use a mild, organic fertilizer in early spring.
- Trim regularly: Cut back foliage to encourage new growth and flowering.
What’s a good substitute if I can’t grow chives?
If chives aren’t an option, try these flavorful and ornamental alternatives:
- Garlic chives (milder, with white/purple flowers)
- Green onions (similar mild onion taste)
- Leeks (for a stronger, sweeter kick)
Wrapping up and next steps
Growing chives with purple flowers isn’t just about adding a pop of color to your space—it’s a rewarding way to enjoy fresh, flavorful herbs while embracing low-maintenance gardening.
Whether you’re a beginner or a seasoned gardener, these hardy plants prove that beauty and utility can thrive together, even in small containers. 🌿
Now that you’re armed with tips and answers, why not take the next step? Start your own mini chive garden this weekend—your taste buds (and your balcony!) will thank you. Happy planting! 🌱